How To Create an AI Voice Assistant with Raspberry Pi

“Hey Boris, what’s the weather like?”
“Right now it is clear skies and 26 degrees. Humidity is 71%”
He’s a useful chap, Boris. Except he isn’t really a chap: Boris is a voice assistant running on a Raspberry Pi. I call him Boris, or Big Offline Responsive Intelligent(ish) System, because it uses the latest AI techniques to listen to my voice, respond and control things in my office, all without connecting to the major AI platforms.
Boris is built on a Raspberry Pi. And although Boris listens and responds, it doesn’t share my data with the giant AI companies that crave it. Boris is quiet when I don’t need him, more helpful than my dog, and stays out of the way when I’m trying to work.
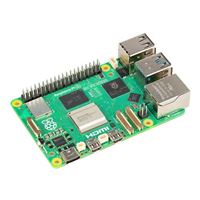
I built Boris from a Raspberry Pi 5 8GB with a 128GB Micro SD card and an old USB speakerphone I had lying around (an Anker PowerConf S330), but the system is flexible enough to work with most USB audio devices, webcams and the many inexpensive displays that are available for the Pi.

Boris is built using Open Voice OS (OVOS), a system that combines open-source technology and cutting-edge AI to create a voice-controlled system configured to your requirements that integrates with your smart home and existing technology. Here’s how I built Boris, and how you can, too. This is a fairly advanced tutorial, so you should know something about setting up a Pi system already.
Read more:
What You Need To Know to Get Started With Raspberry Pi
How to Build a Local AI Voice Assistant
Firstly, install the Lite version of Raspian onto a micro SD card. The lite version strips out a lot of things we don’t need, leaving just the basic functionality. Once installed, add the details of the Wi-Fi network it’ll connect to, set the device name (I chose Boris, of course) and turn SSH on for remote access to the Pi. If you aren’t sure how to do this, Open Voice OS offers an excellent step-by-step guide.
From there, put the micro SD card into the Raspberry Pi and boot it up. After a couple of minutes, you should be able to connect to the device with an SSH client (I use Termius on my Mac) and log in.
Next, run a few commands to update the software on the Pi:
sudo apt update && Sudo apt upgrade -y
Then, install Curl, an app that pulls files and the like from the internet.
sudo apt install -y git curl
Next is the command to install OVOS, which grabs the install script (using Curl) and runs it. This is all on one line.
sh -c "curl -s https://raw.githubusercontent.com/OpenVoiceOS/ovos-installer/main/installer.sh -o installer.sh && chmod +x installer.sh && sudo ./installer.sh && rm installer.sh"
In the installer, I answered a few questions to configure the system, using the default settings for all except the installation method (where I selected the virtualenv option instead of Containers because it is easier to customize), and opted to install the extra skills.
After about 15 minutes of scrolling messages (and a couple of pauses where I thought it had crashed, but patience is a virtue, remember), the installer was done. However, there may be one extra step, depending on the microphone: Due to a bug in the Pi 5 audio system, USB microphones like mine won’t work on default settings. So, I had to apply one more tweak, using the app wpctl to find my microphone and set it as the default:
wpctl status
That command will call up a list of devices; you want to find the number next to the name of your microphone. In my case, it was 67.
wpctl set-default 67
After rebooting, my speaker cheerfully said, “I’m ready!”
To test it, I asked an easy, fundamental question: “Hey, Mycroft (the AI’s default name), what time is it?” When I said the first two words, the speaker chimed to let me know it was listening; that’s called the watchword, the equivalent of saying “Hey Siri” to your iPhone. It then told me the time. Great! So we have the basics in there. Now it is time to modify it to become Boris.
Modifying an AI Voice Assistant
nano ~/.config/mycroft/mycroft.conf
I then changed the “voice” line to read:
"voice": "alba-medium"
Much better for my tastes; a soft Scottish accent with just a hint of annoyance in it. The in-depth details of how to do this and the available voices are here.
Next, I changed the wake word so that the system responds to the name Boris. This involved some file editing, as detailed here: I just replaced Ziggy with Boris.
OVOS can also be enhanced through skills that add new features or interface with other devices and services. There is a long list of options here. Some of these are very useful, such as Wolfie, which connects the voice assistant to Wolfram Alpha and can answer pretty much any science question. The Spotify skill lets it play audio from your Spotify account. Others are a bit more fun, like Monster Scanner, which checks for monsters under your bed.
I used one of these to add some local AI smarts to Boris: fallback ChatGPT. If the question you asked isn’t one that OVOS understands, it uses AI to answer it. Despite the name, it works with most AI programs, including ones that run locally on the Pi itself. So, I installed Ollama and grabbed the Phi3 LLM, an LLM that has been tweaked to be a helpful assistant that doesn’t need a lot of memory.
curl -fsSL https://ollama.com/install.sh | sh
ollama run phi3
Next, I tested it by typing in a simple question.
Why is the sky blue?
/exit
Now that the LLM is installed and running, I can connect OVOS to it.
pip install skill-ovos-fallback-chatgpt
Following the instructions in the documentation, I reconfigured my Pi to use the local version of Ollama by editing the config file for the plugin:
Nano ~/.config/mycroft/skills/skill-ovos-fallback-chatgpt.openvoiceos/settings.json
The edited file should look like something this::
{
"persona": "You are a helpful voice assistant.",
"__mycroft_skill_firstrun": false,
"enable_memory": true,
"memory_size": 10,
"name": "my brain",
"confirmation": false,
"api_url": "http://localhost:11434/v1",
"key": "sk-xxx",
"model": "phi3"
}
You can read more about these settings in the documentation for Fallback ChatGPT, but the gist is that it points towards the local AI, gives it the same personality, and tells it to remember our conversation.
When I ask Boris a question that the OVOS software itself doesn’t understand, it asks the Phi3 LLM. The My Brain line makes it reply, “I was not able to get an answer from my brain” if there is a problem, which I find endlessly amusing.
Now Boris is fairly intelligent and can answer a lot of questions. I also installed the Wolfie plugin, so if I have a more difficult question, I can get more help by using Wolfram Alpha by posting the question along the lines of “Hey Boris, ask the wolf to find the first prime number larger than nine hundred and ninety nine”.
That’s a pretty good starting point: Boris is smart enough to answer simple questions and can tap into a local AI for more complex questions. That takes a long time, because even a lightweight LLM like Phi3 runs slowly on a Raspberry Pi.
But we’re just getting started. Keep an eye on Micro Center news -- In the next article, I’ll show you how to customize AI like Boris to make it run faster and give better answers, all without compromising your data.
Ready to start setting up your own voice assistant? Stop by your local Micro Center and speak to our associates. Our knowledgeable DIY team will be happy to help set you up with everything you need to make your project dreams a reality.
Read more: AI and Maker Tools and Tips
- What You Need To Know to Get Started With Raspberry Pi
- How To Turn Your Raspberry Pi 4 into a Retro Gaming Console
- Getting started with LM Studio: A Beginner's Guide
- Meet Claude, the Best AI You've Never Heard of
- How to Get NVIDIA Chat with RTX: Local AI for Everyone
Richard Baguley is a seasoned technology journalist and editor passionate about unraveling the complexities of the digital world. With over three decades of experience, he has established himself as a leading authority on consumer electronics, emerging technologies, and the intersection of tech and society. Richard has contributed to numerous prestigious publications, including PCMag, TechRadar, Wired, and CNET.