What You Need To Know to Get Started With Raspberry Pi

What is the Raspberry Pi?
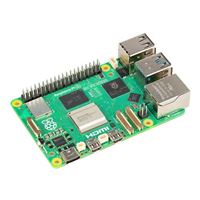
The Raspberry Pi is a single-board computer (SBC), which means it has everything your laptop or desktop PC has, but on a single board the size of a credit card. It has memory, a processor, inputs, and outputs, all in a single package. It costs a lot less than your laptop, though: you can buy a Raspberry Pi 5 for $70-$80 or a Raspberry Pi Pico 2 for about $5.
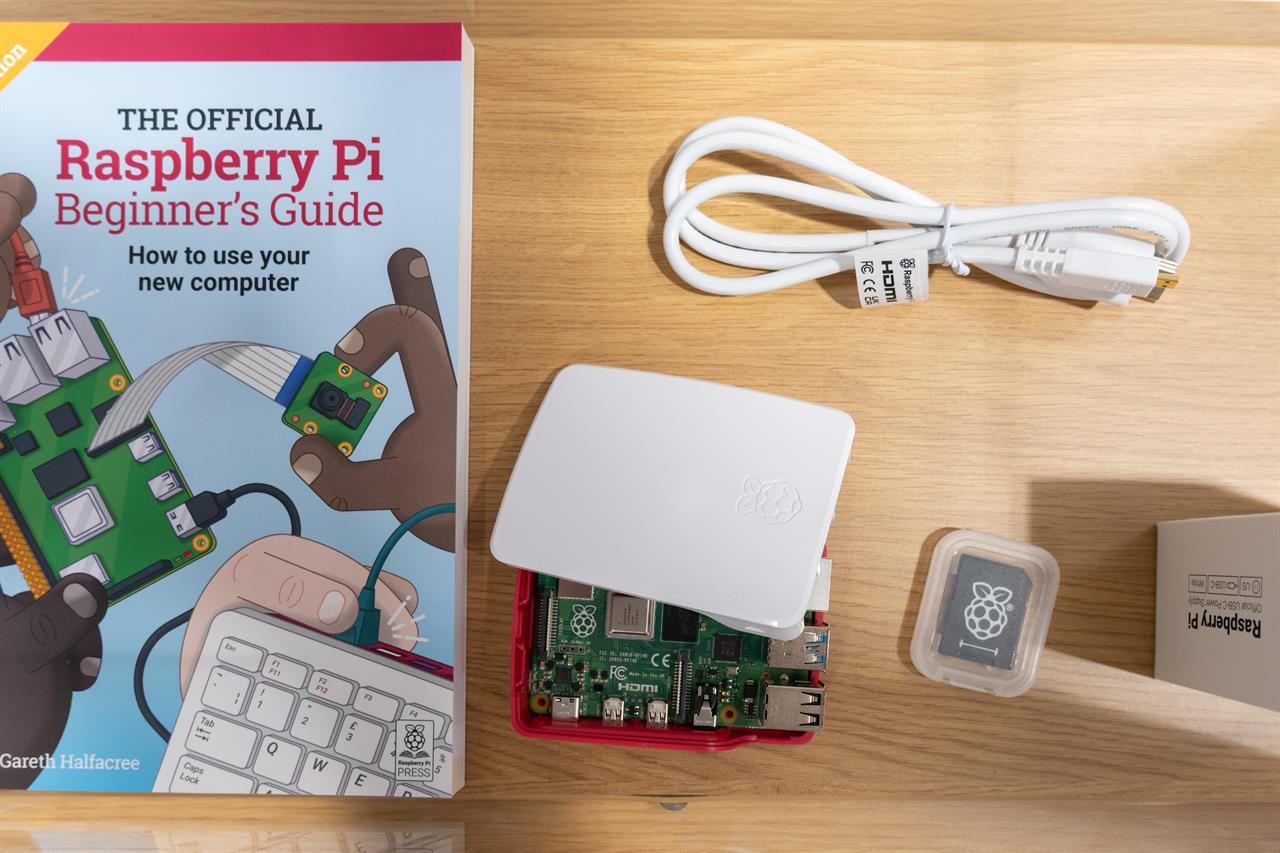 Photo: Jacob Bobo
 The original Pi was launched in 2012 as a way for people to get hands-on experience with computers, understand how they work, and how they can interact with other devices. While your laptop is a sealed box you can’t poke around in, experimentation is encouraged on the Pi, where all the internal signals are available for users to connect. And if you make a mistake? Don’t sweat it. Not only are Pi’s remarkably hard to break, but they’re far cheaper to replace than a laptop.
The latest version is the Raspberry Pi 5, which comes in 4GB or 8GB memory, supports WiFi and Bluetooth, and includes four USB ports and Gigabit ethernet. That provides enough processing power to do anything from running an AI voice assistant to playing games or controlling a robot. This combination of decent processing power and easy interfaces with devices like speakers, servos, motors and sensors make it a great intro to programming and robotics.
What Do I Need To Get Started With the Pi?
You may already have most of the things you need available if you have a computer or modern phone. To get going with a Pi, you’ll need:
-
A Raspberry Pi. Several versions of the Pi are available, but the Pi 5 with 8GB of RAM is the best for beginners, as it has enough memory and features to allow you to do more complex tasks, while the cheaper Pi Pico 2 requires a bit more to get up and running.
-
A Micro SD memory card. The Pi uses micro SD memory cards to store its operating system and other data. You’ll need one that has at least 8GB of space.
-
A Power Supply. For the most recent Pi boards, you’ll need a USB-C power supply that can deliver at least 25 Watts of power. Most modern smartphones will need more than that, so the power supply that comes with them should work just fine.
-
Keyboard & Mouse. The Raspberry Pi company offers its USB keyboard and mouse, but any standard USB keyboard and mouse will work. You can use Bluetooth keyboards and mice, but they are more complicated to set up.
-
A Display. The Pi 5 has two micro HDMI ports that can be connected to any modern TV and most computer displays. Because the Pi uses the smaller micro HDMI socket, you will need a micro HDMI to HDMI adapter to use with the HDMI cables your TV or monitor came with, or a micro HDMI to HDMI cable.

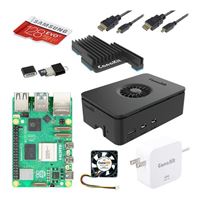
The easiest way to get most of these is to buy a Raspberry Pi starter kit, like this one from Canakit. This includes the Pi, a memory card reader (so you can copy data to it from your laptop), an excellent power supply, a micro HDMI cable, a case to put the Pi into, and a fan to cool it. Plug in a mouse, keyboard, and a screen and you are good to go. The $99 Raspberry Pi 400 is another great starter option: it has a Raspberry Pi 4 built into a keyboard and touchpad, so you don’t need to worry about finding these separately. That uses the Raspberry Pi 4, which is a slightly older model, but it can run most of the software that a Pi 5 can. Alternatively, this $139 Pi 4 kit includes everything except the display. That’s a great option if you don’t have the mouse and keyboard.
How Did You Get Started With the Pi?
The Raspberry Pi runs an operating system called Raspbian. To start with this, download the Raspberry Pi Imager on your PC or Mac and follow the instructions to write Raspbian to your micro SD card. Then plug the card into the Raspberry Pi, connect the power supply, and it will boot into Raspbian. This will show you how to connect to your Wi-Fi and set the device up, then drop you into the Rasbian desktop. Once this is done, you are off and running! The creators of the Raspberry Pi have created a detailed-how to guide here.
A great way to show the potential of the Pi is to run a retro games emulator, which turns the Pi into an old gaming console using software called Retropie. With only a few commands, you can turn your Pi into an incredible emulation station.
How Do You Expand A Raspberry Pi?
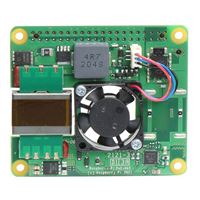
The Raspberry Pi can be expanded by adding hats, which are add-on boards that add features ranging from tiny touch screens to AI processing chips. The Pi has a set of pins called the general purpose Input/Output (GPIO) connector that offers access to most of the internal signals on the board, which makes adding features, like hats, easy. In addition, there are four USB ports, a digital camera port, and a display output port. You can also power the Pi over a long ethernet cable with the Power over Ethernet (PoE) hat, which combines ethernet data and power. I use one of these to run an airplane detector in my back yard, which receives power and connects to the Internet over a 75-foot ethernet cable, far away from all the noisy radio devices in my house.
What Else Can I Do With a Raspberry Pi?
The possibilities are, as they say, endless. We’ve featured guides on building a humidity monitor, running RetroPie, and using the official Raspberry Pi camera to make a simple webcam that you can watch from anywhere. Others have used the Pi to build a stray cat monitor to see who is stealing their cat's food, a simple obstacle-avoiding robot, a robotic cat and convert an RC truck into a robotic vehicle. The Raspberry Pi has evolved into an incredible platform for education, robotics, or those who are just curious about using computers to control things.
If you’re ready to get started with Raspberry Pi, head over to your local Micro Center. Our knowledgeable staff can help you pick out a Pi that’ll work for whatever project you need. And, when you’re ready, be sure to check out the Maker Projects section of Micro Center News for new projects, ideas, and tips to make the most of your Raspberry Pi.
Read more:
- Choosing the Best Supports for your 3D Print
- Supercharge Your Stanley with These 3D Printed Accessories
- See the Top-Rated 3D Printers at Micro Center
- Find 3D printer filament at Micro Center
Richard Baguley is a seasoned technology journalist and editor passionate about unraveling the complexities of the digital world. With over three decades of experience, he has established himself as a leading authority on consumer electronics, emerging technologies, and the intersection of tech and society. Richard has contributed to numerous prestigious publications, including PCMag, TechRadar, Wired, and CNET.