Build an Open-Source Raspberry Pi Security Camera

 All photos: Richard Baguley
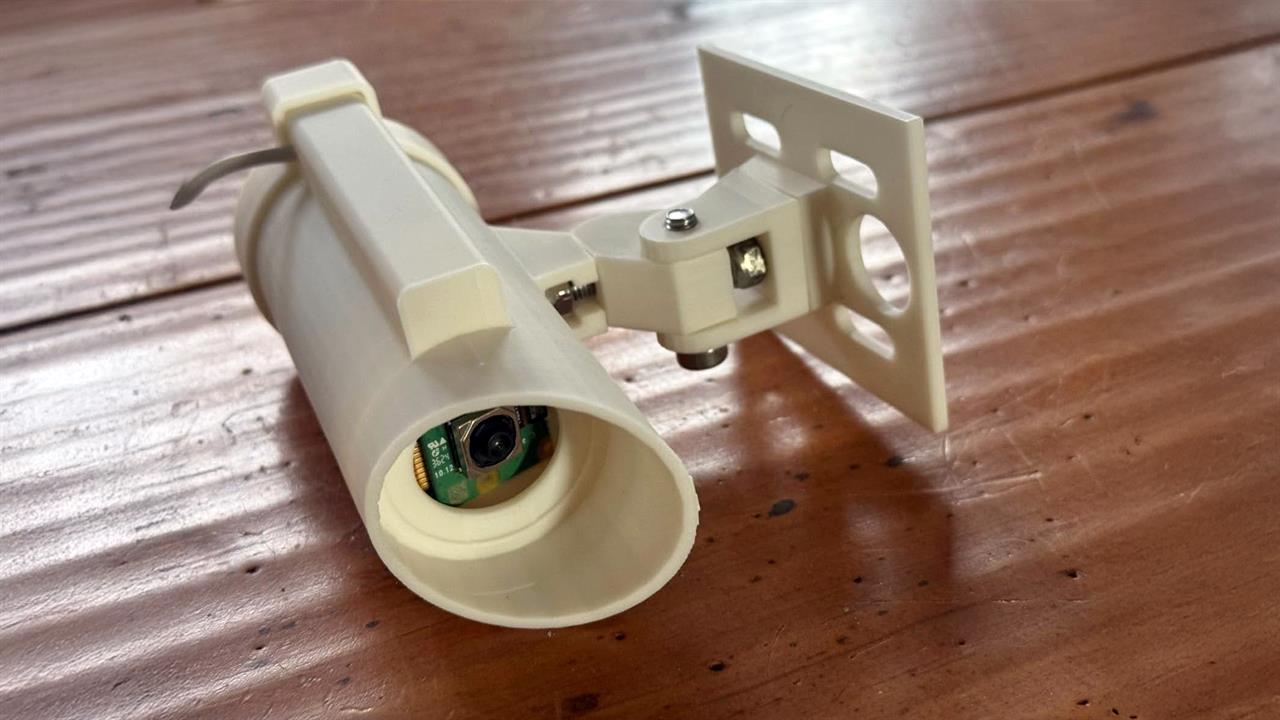
There are a lot of things that I want to keep an eye on in my house, and that has gotten a bit easier since I built this security camera from a 3D printed case, a Pi Zero W, a Pi camera and a few other bits. This camera can be viewed from any web browser, and it can also feed video into my Unifi security camera setup.The total cost? Under $50, or even less if you have some of the parts in your junk drawer already.
My Shopping list:
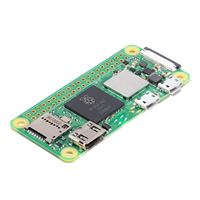
The camera is built around a Raspberry Pi Zero W 2, an inexpensive computer on a single board that runs a version of Linux, but comes with a decent amount of processing power, memory, and Wi-Fi. Ironically, that only costs a little more than the usb cable that feeds it power.
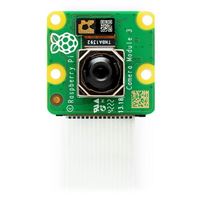
The Pi Camera 3, a surprisingly high quality camera that costs under $25, supplies the video. You can use other cameras if you want: there are versions of this that have long zoom lenses, that can see in the dark, or have very wide angle lenses on them, so you can adapt the camera for different uses and needs.
I 3D printed the case for the camera using this model. This neat design prints in six parts for the camera itself and three parts for the mount. I printed it in PLA because I am using this indoors, but if I wanted it to be water and weather-proof, I would have used PTEG, a tough and weather-resistant material, or coated the PLA print in an epoxy resin. I was able to print the parts of the case in a couple of print passes.

Next, I assembled the case and fitted the Pi Zero W and the camera module into the case. The case itself snaps together, but the adjustable stand needs a few nuts and bolts to tighten the mount. I also used a right-angle mini USB adapter to connect the Pi Zero W, and a long USB cable with an old phone power adapter to feed juice to the Pi. Any old USB phone power supply will work: the Pi Zero W 2 and the camera only take a few watts of power.

If I was using the camera outside or in a wet or dusty location, I would have attached a small piece of watch glass to the front of the case over the camera to protect the lens. You should use watch glass because it allows IR light to pass through (so you can use an IR light) and doesn’t get fogged up with condensation. You can either buy a new piece of watch glass for a few dollars, or scavenge one from an old watch. That and a few dabs of silicone sealant around the cover on the back and the cable would keep the water out pretty effectively.
Now for the software. I used the lite version of Raspbian because the slower Pi Zero W 2 runs faster without the desktop stuff, and we aren’t going to be needing it anyway. So, I selected Raspbian lite in the Raspberry Pi Imager and added the details of my WiFi network, enabled SSH, and set the network name so I could find it on my network. I called it Picam.local because, well, it is a Pi camera.
I put the micro SD card into the Pi Zero 2 W and let it boot up. Once it was booted, I logged in over SSH and updated the OS using the following commands:
Sudo apt update
Sudo apt upgrade
The next step is to install the software that converts the Pi into a Webcam: motioneye. This involved a bit of fiddling, but you can cut and paste the commands into the SSH client. I followed the general installation instructions, rather than the Raspbian specific ones, as the general ones are more recent. It takes a long time, though: the last step of installing motioneye itself took nearly an hour on the slow Pi Zero W 2 because it has to download and install all of the other programs that motioneye needs.
One thing to note here: motioneye is written using the programming language Python, and recent versions of Python force programs to run in a venv: virtual environments where the programs can’t damage other programs. However, that’s less important on a device that is only going to perform one task: the Pi will be running as a streaming video camera only. So, the instructions show you how to override the venv default, which is fine for this use case. It’s not a great idea for anything that is doing more than one thing at a time, though.
After the install process was complete, I rebooted the Pi, went to my laptop and opened the web interface at http://picam.local:8765/. I logged in as admin with the default blank password (change that!) and clicked on add a new camera, but got no video: after some investigation I found that a change in one of the programs that runs behind the scenes means the Pi camera won’t work with the default settings, but running through this slightly altered install process fixes the problem. You can even download the process as a script and run it all at once.
Reload the camera web page, and...we have video!

After letting the camera run for a while to make sure it is working, I tweaked the settings, increasing the resolution and altering the frame rate to get better quality video. Be cautious, though: the higher the resolution and frame rate, the more bandwidth the connection will need, the less video it can store, and the hotter the Raspberry Pi might get.
MotionEye offers a ton of advanced features, including motion detection, email notification, and scheduling. I didn’t use these, though: I just want it to run as a streaming camera that integrates with my security system. I did this by installing Onvif-zeep, which turns the camera into an ONVIF streaming camera, which I could then connect to my security system.
The end result? I’ve built a capable, high-quality security camera out of cheap parts that is as good as most of the ones you can buy. Now I can use it to keep an eye on the things that matter to me.

Read more: Raspberry Pi projects:
- What You Need To Know to Get Started With Raspberry Pi
- How To Turn Your Raspberry Pi 4 into a Retro Gaming Console
- How To Create an AI Voice Assistant with Raspberry Pi
- How to Tame Your Raspberry Pi's Local AI