Where's My Bus? Build A Simple Raspberry Pi Display To Keep an Eye on Transit Schedules

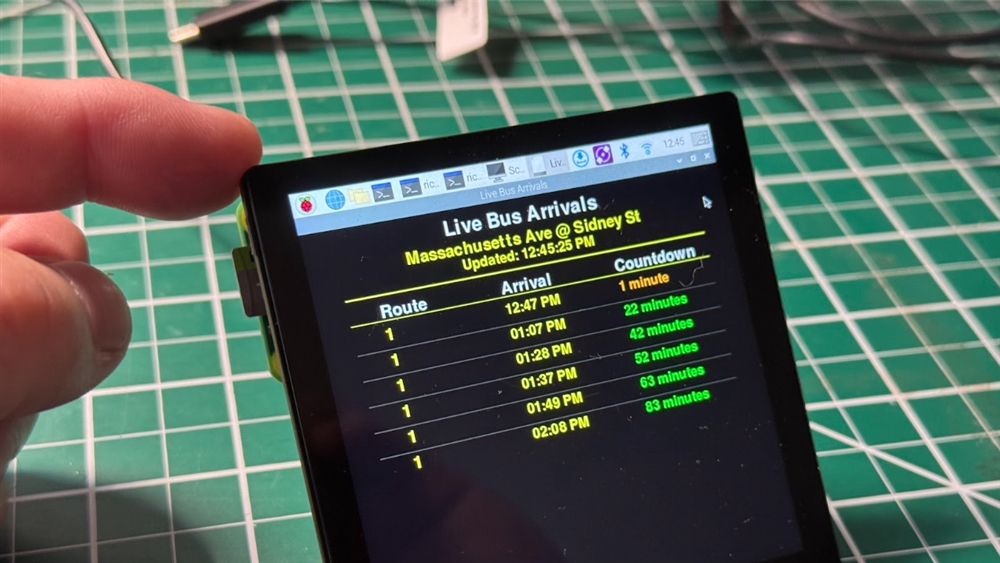
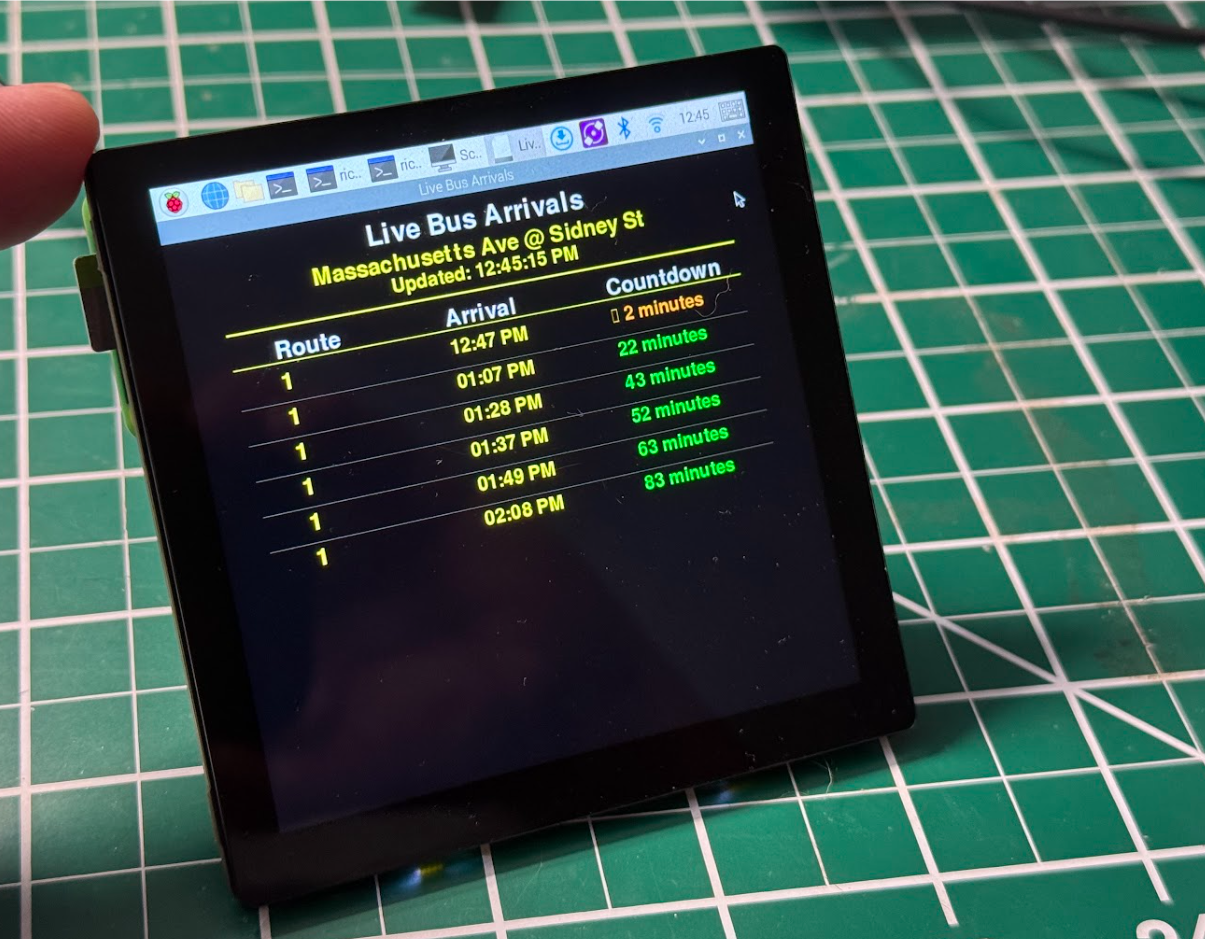
I’m pretty lucky. I live near Boston where the local public transit system, the MBTA, is pretty good. With the weather around here, though, things can get unpredictable. I hate waiting at the bus stop, especially during a surprise rain storm, so I built a Raspberry Pi-powered display that shows me which bus is next at my nearest bus stop and when it will arrive. It sits on my desk so I can quickly glance at the schedule and set out just in time to catch it. Here’s how I did it, and how you can build your own.
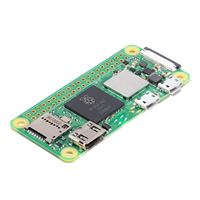
 Photo: Richard Baguley
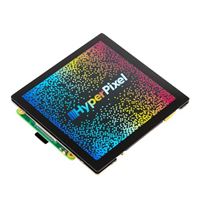
I built this using a Raspberry Pi Zero 2 W and a PiMoroni HyperPixe l Square, an adorable 4-inch square LED display that’s perfect for a small but info-dense display. It would be easy to adapt this project for a low-key eInk display or a bright scrolling LED display like the ones on bus stops if you want to try something different.
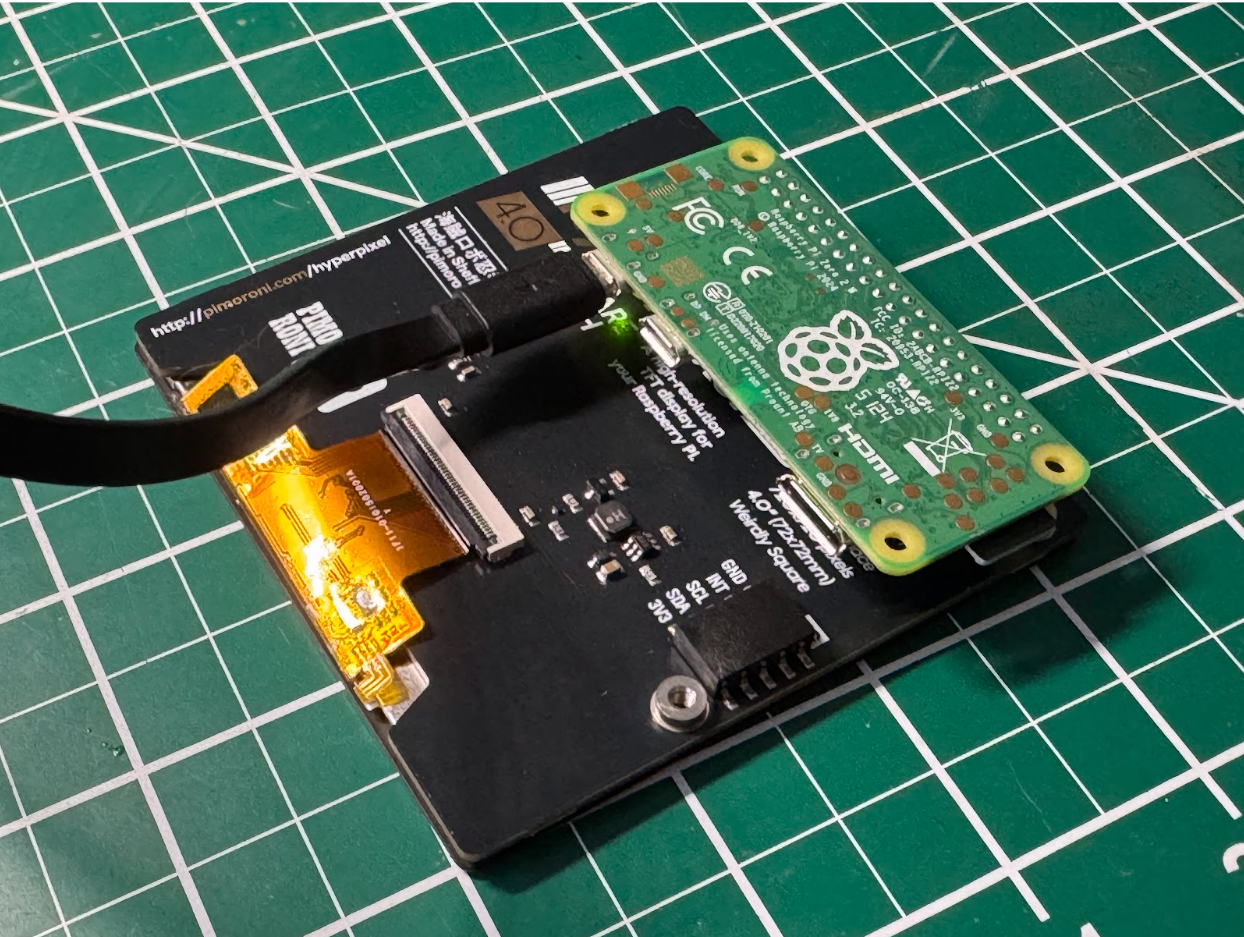 Photo: Richard Baguley
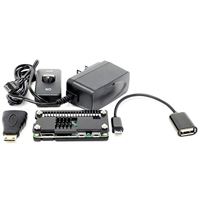
 Once that was ready, I put the SD card into the Pi and connected it to power. A couple minutes later and the Raspian desktop popped up on the screen.
Next, I updated the Pi OS and installed a couple of programs that we need, which was an absolute breeze; with a keyboard connected to the device (you’ll need the OTG cable to connect a USB keyboard) and logged in, I issued three commands in a terminal:
sudo apt update
sudo apt upgrade -y
sudo apt install virtualenv git -y
That will probably take several minutes, as there are often several updates, and the virtualenv program requires a few other installs to properly function.
Now, let’s dig into the software side of this project. With some assistance from various sample code snippets (and a dash of AI), I wrote a Python script that retrieves the desired data from the transit provider's system using their Application Programming Interface (API), a standard method for accessing their data via web requests. My program makes the API call, parses the resulting data and displays it in a nice bus-like display created using the PyGame library.
To get my app from GitHub, run this command:
git clone https://github.com/richardtheb/mybus.git
That grabs the app and sticks it into the directory called mybus. This can be called up with:
cd mybus
Next, we will create a Python virtual environment, a type of sandbox that isolates the program.
python3 -m venv myvenv
source myvenv/bin/activate
Again, this may take a few minutes, as it needs to create several files and directories. You can tell this worked if the prompt changes to include (myvenv) at the start. We are now in a virtual environment where we can make changes that won’t affect the rest of the system. So, let’s install the other bits that the app will need:
pip install -r requirements.txt
As with all our programming, this might take a while as PyGame is quite large; it’s a library for writing games, so I am barely scratching the surface of what it can do by using it to create a simple display.
Now, we will need three things to make the app work:
- An API key from the transit provider. To obtain this, you will need to sign up with the agency and agree to a few terms and conditions. For me, that was at https://www.mbta.com/developers/v3-api. To obtain the key, I created an account with my email and requested a key, which their system immediately sent me. The MBTA API I used is free, but providers use it to track who is using their data. Don’t worry about the program overwhelming their server; the free basic key is good for 1,000 queries per second, but my program only grabs an update once a minute.
- The API base URL. The URL where the agency lets users access their data. For me, this was https://api-v3.mbta.com. I found this information in the MBTA API documentation, so you may need to review the documentation further to see the details for your provider. The MTA in New York, for instance, has a developer portal here.
- The predictions endpoint. This is the remaining part of the URL that links to the API call to retrieve the bus predictions for my stop. For me, this was /predictions?filter[stop]={stop_id}&sort=arrival_time. Again, you may need to dig into the paperwork to find the details.
Once I had all of these details, I edited the config file to add them:
nano Provider-Config.json
With the details inserted, I pressed Ctrl-X and hit y to save the file.
Next, it was time to start the program. Run:
python3 MyBus.py
When it starts, the program sets everything up, sends the API requests, parses the result and shows the next few buses headed my way. It will refresh the data once a minute and will keep running until you hit Ctrl-C.
And voila! You have the starting point for a fantastic project. There was a lot I didn’t get around to, such as adding support for emojis to indicate the type of transit (bus, ferry, etc.) used on the route. At the moment, the info is rather basic, but there are many more things that could be easily added, such as:
- A more user-friendly interface that converts text data into something more visually appealing.
- Including the data that some transport agencies provide on how full each of the buses is.
- Including information on how full the bike racks are at each stop.
- Use the GTFS data from the agency to produce a map that shows the location of all of the buses on the route.
Read more: Raspberry Pi projects:
- What You Need To Know to Get Started With Raspberry Pi
- How To Turn Your Raspberry Pi 4 into a Retro Gaming Console
- How To Create an AI Voice Assistant with Raspberry Pi
- How to Tame Your Raspberry Pi's Local AI
Richard Baguley is a seasoned technology journalist and editor passionate about unraveling the complexities of the digital world. With over three decades of experience, he has established himself as a leading authority on consumer electronics, emerging technologies, and the intersection of tech and society. Richard has contributed to numerous prestigious publications, including PCMag, TechRadar, Wired, and CNET.