How to set up Traffic Limits for Upload Speeds on a Tenda Router
Description: This document details the specifics of how to setup Traffic Limits for upload speeds on a Tenda Router. It is recommended that this document be printed, as the computer and network will be reset during the process.
Ensure that all the cables are plugged in to the correct ports as per the included documentation. Remember that the cable from your Modem plugs in to the WAN port on the back of the Tenda router.
- Using a computer that is plugged directly into the Tenda router via one of the yellow ports, open up an Internet window and locate the address bar and erase everything from the field.

- In the same location, type in 192.168.0.1 and press enter.
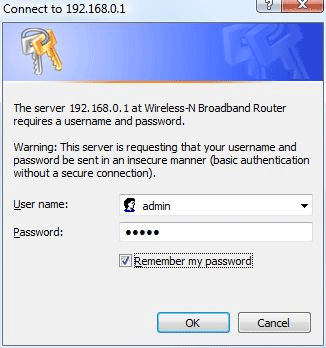
- When prompted for a username and password enter admin for both and click OK.

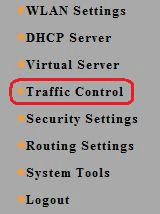
- On the left, click on Traffic Control.

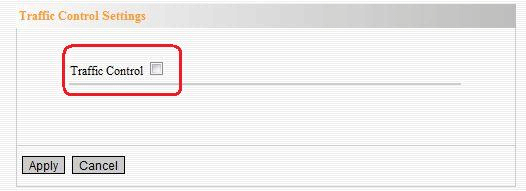
- To the right of Traffic Control, click on the check box.

- Fill in the range of IP addresses to be limited.

- Select Up from the dropdown menu.

- Select the bandwidth range to limit.

- Select Add at the bottom of the page.

- Notice that the newly added limit is shown at the bottom of the page.

- Click Apply at the bottom left of the page.

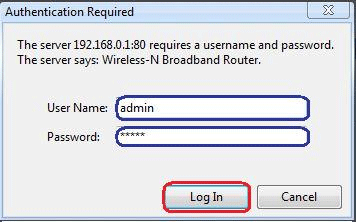
- When the router asks for your credentials again enter the username and password.

Technical Support Community
Free technical support is available for your desktops, laptops, printers, software usage and more, via our new community forum, where our tech support staff, or the Micro Center Community will be happy to answer your questions online.
Forums
Ask questions and get answers from our technical support team or our community.
PC Builds
Help in Choosing Parts
Troubleshooting

