Building the Ultimate Family Gaming PC


Photo: Dan Ackerman
As a parent and a gamer, it was inevitable that my son would eventually get curious about how gaming PCs worked and want to build his own. But choosing the right time to take on a task like that is critical. Too soon and the patience and fine detail work required might be above his head. Too late and you've missed the wonder and excitement of learning about things like heat sinks and liquid cooling. So when my 12-year-old started peppering me with questions like: "What's better, an NVIDIA 4070 Ti Super or a 4080?" That's when I knew the time was right to start our first father/son PC build.
I started with a collection of excellent components from MSI, including a case, motherboard, fans, liquid cooling, SSD and a new RTX 4070 Ti Super GPU. To keep it reasonable since I had a pretty high-end graphics card, I added a fairly affordable Intel Core i7-13700K CPU and 32GB of Corsair DDR5.
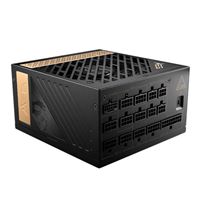
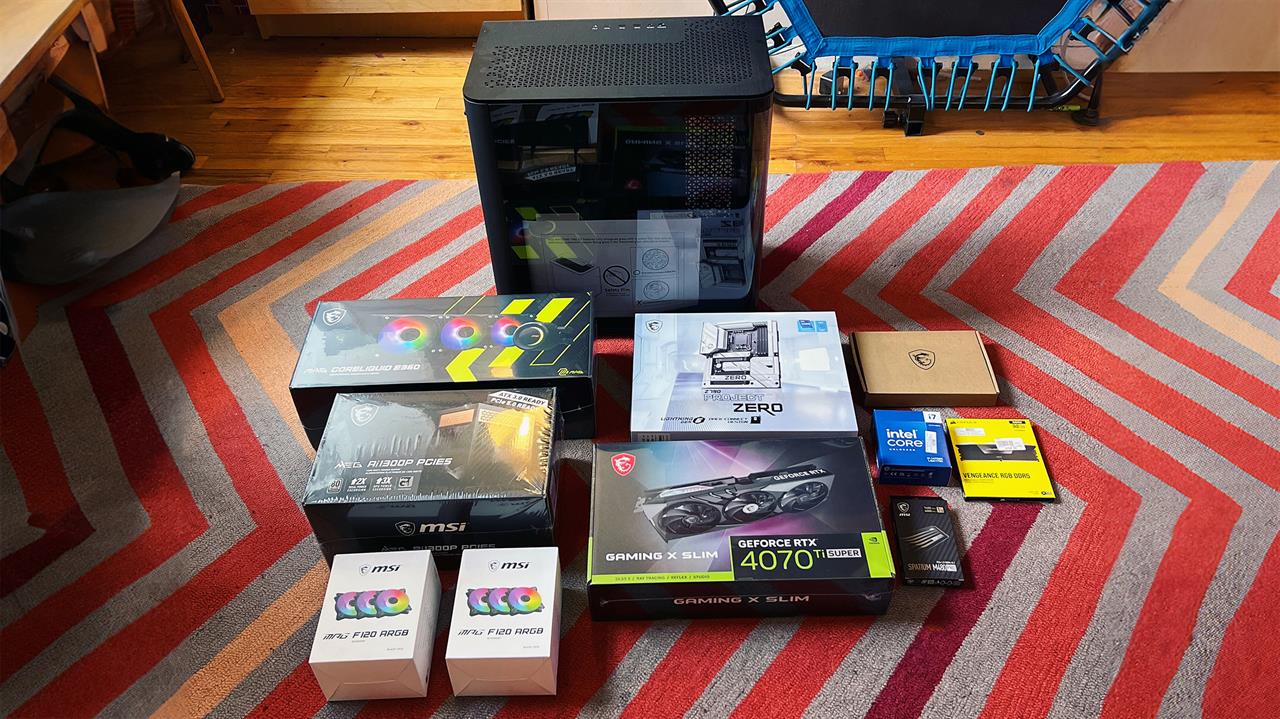 Photo: Dan Ackerman -- The parts for our MSI-powered build.
 There's a parts list to the side here, with a few substitutions where the exact parts I used aren't widely available yet. We started with the MSI MEG Maestro 700L PZ case and MSI Z790 Project Zero motherboard, which cleverly route most of the cables to a chamber behind the motherboard. It's a tight fit and you need some cable organization origami skills, but the look is clean and uncluttered. For a similar price, you can also try a more traditional case/mobo combo with the MSI Z790 MPG Edge motherboard and the MSI MEG Prospect 700R case, which has a similar large tempered glass side panel.
Dash and I slotted in the RAM and CPU, then mounted the motherboard in the case. Having not built a gaming desktop from scratch in some time, this was a learning experience for me as well as my son, and we spent some time researching fan placement and direction, using two sets of case fans and an MSI MAG CoreLiquid cooler, with included its own set of three case fans. The only thing we really had to watch out for was daisy-chaining all the power connections for the fans into the motherboard and separately daisy-chaining the lighting controls to the appropriate port on the motherboard. Dash handled the fan connections as well as all the tiny screws required to fix everything into place.
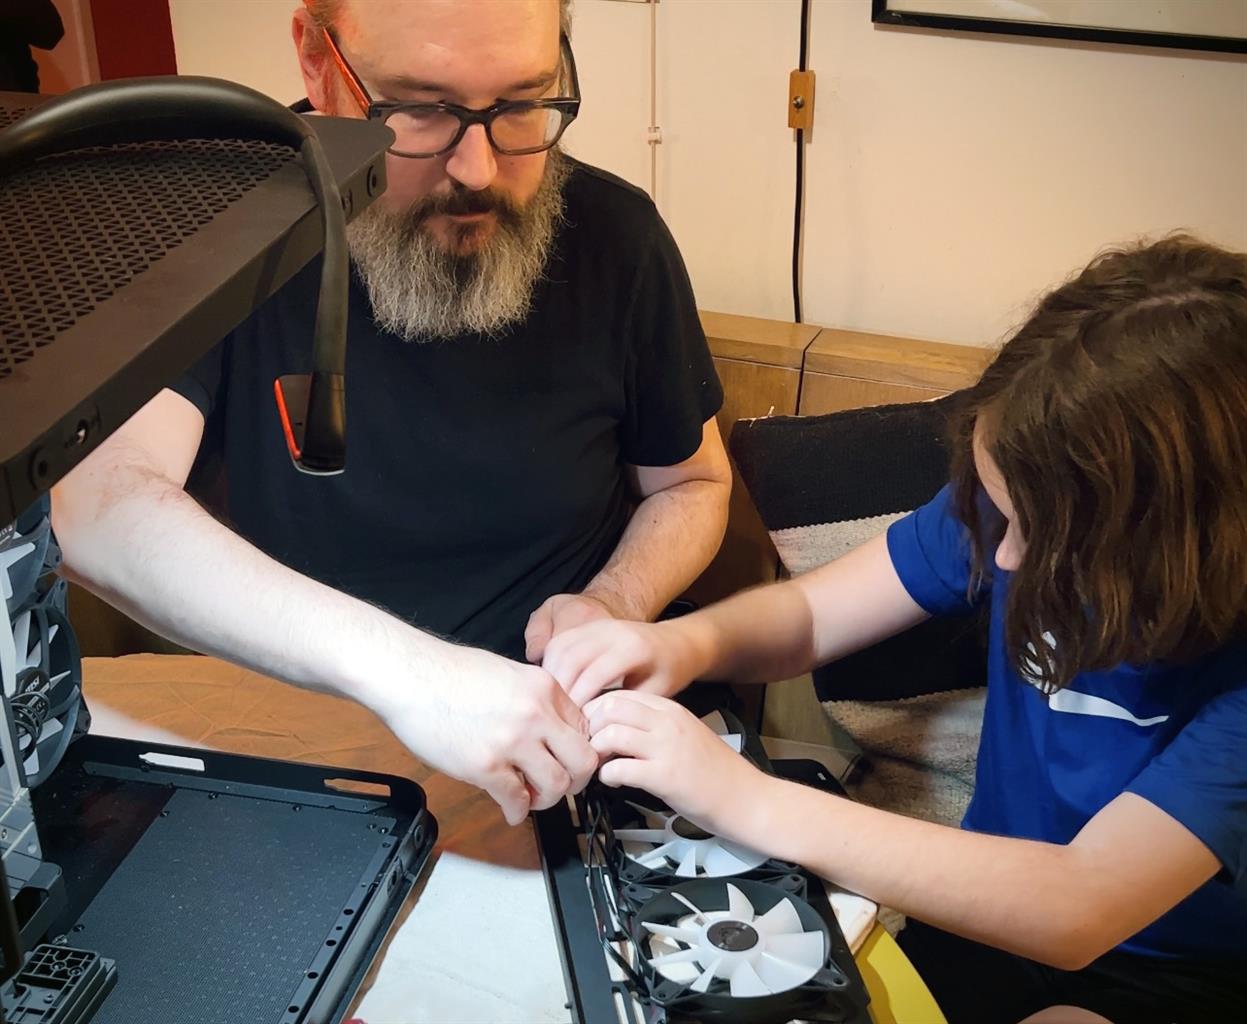 Photo: Dan Ackerman -- Routing fan cables.
 Speaking of power, since this build has a high-end RTX 4070 Ti Super GPU we used a MSI MEG Ai1300P power supply, which slotted right behind the Project Zero motherboard. You'd usually want at least 850W for this build, but the 1,300W MEG Ai1300P gives us plenty of room to grow in the future, and it also includes a big collection of cables, letting you just pick and choose what you need.
The star of the show was clearly the MSI GeForce RTX 4070 Ti Super 16G Gaming X Slim GPU, which is, as the name implies, fairly slim and fits into the case easily. I mounted it vertically, using the included PCIe extension cable, and had plenty of room thanks to the slim Torx 5.0 fans and copper baseplate and heat pipes.
With everything hooked up and plugged in, it was time to click the power button and see what happens. The system booted right up, and went into the BIOS settings. Rebooting with Windows 11 on an external SSD, the system went into the Windows setup process.
Here's where 20 years of testing and reviewing computers came in handy, as we had a couple of issues to troubleshoot. If you run into similar issues, this might help.
Initially, the system wasn't recognizing the networking hardware, so I had to bypass the required network connection to finish the Windows 11 installation. That works as follows:
First, use another computer to download the required network drivers on an external drive. On the "Let's connect you to a network" screen, press Shift+F10 to launch the CMD prompt. Type: OOBE\BYPASSNRO and then when the system restarts, during the setup you'll have an "I don't have Internet" option. Complete the setup, after which you'll be able to update Windows to install the required network drivers.
The second bit of troubleshooting I had to do was to flash the BIOS in order to get it to output properly via the GPU video port. I unplugged the power supply from the GPU, connected my video output to the motherboard HDMI port, and used the instructions on this page to download the new BIOS to my handy external drive, then rebooted and hit "DEL" to get back to the BIOS screen. From there, I followed the instructions to update the BIOS, and once I rebooted, the GPU output worked correctly.
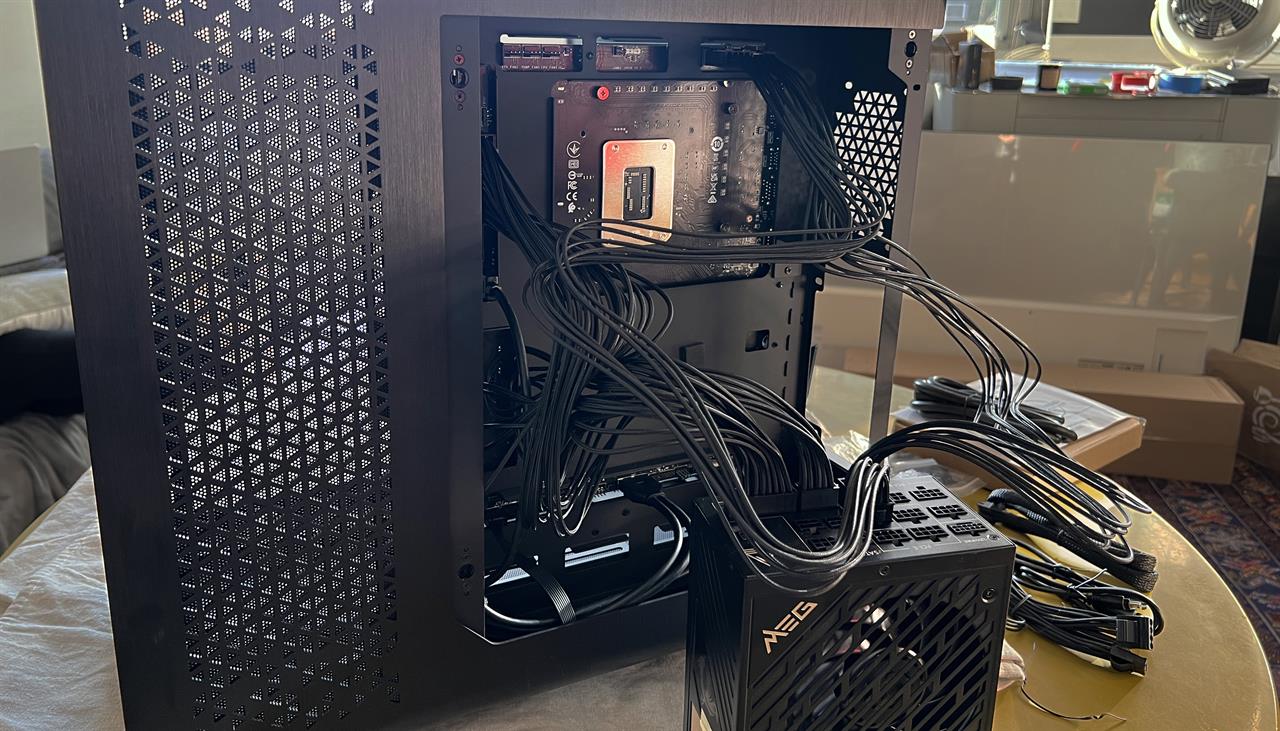
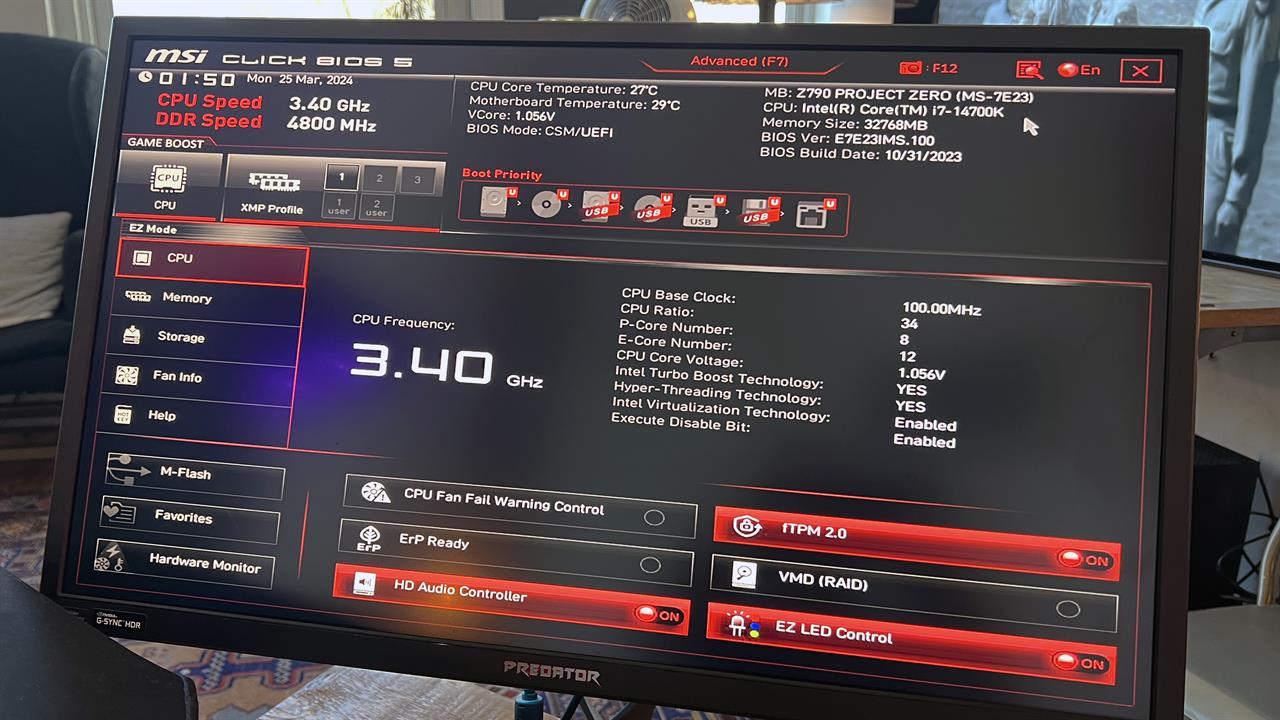 Photo: Dan Ackerman -- Setting up the system BIOS before installing the OS.
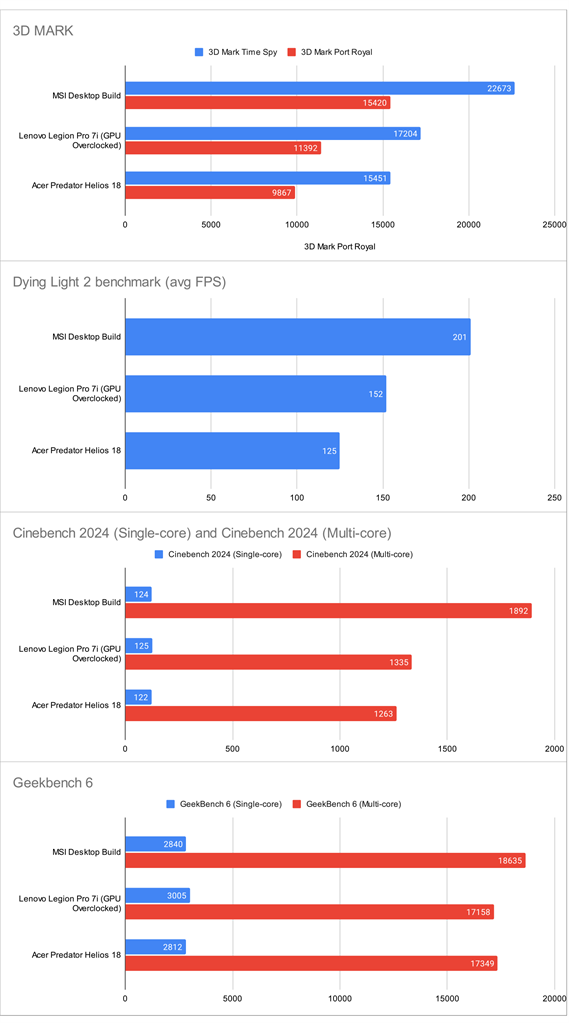
 The most fun you can have with a gaming desktop is playing games on it. But a close second is benchmarking it, which is one of my favorite things to do with a new PC. Compared to some of the most high-powered gaming laptops you can buy, this MSI/Intel/NVIDIA build was a monster.
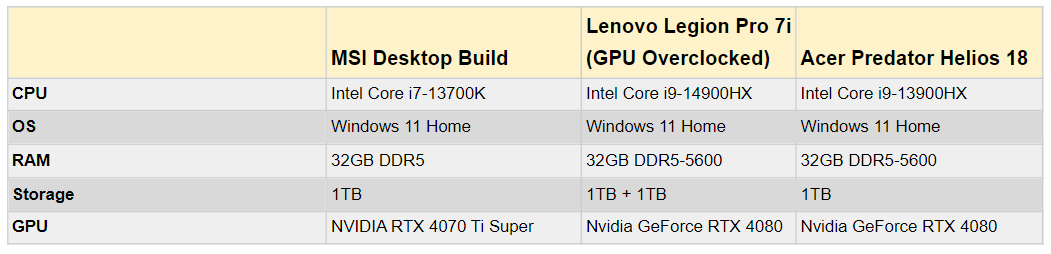
You can see in the charts below how it compares to some of my favorite gaming laptops, including the Lenovo Legion Pro 7i and the Razer Blade 16. For a total cost of around $2,500, this father/son MSI gaming desktop is an amazing value that's highly upgradable, looks awesome, and can play even PC-killing games like Dragon's Dogma 2 at the highest detail settings. I'll give the last word to Dash, who said, "It was easier than I thought to build, and there were a lot more fans and lights than I expected."
- See top new laptops at Micro Center
- See top new desktops at Micro Center
- See top new GPUs at Micro Center
- See top new CPUs at Micro Center
- Start building a new PC with Micro Center's PC builder
Micro Center Editor-in-Chief Dan Ackerman is a veteran tech reporter and has served as Editor-in-Chief of Gizmodo and Editorial Director at CNET. He's been testing and reviewing laptops and other consumer tech for almost 20 years and is the author of The Tetris Effect, a Cold War history of the world's most influential video game. Contact Dan at dackerman@microcenter.com.