How to Build Your Own Custom Mechanical Keyboard

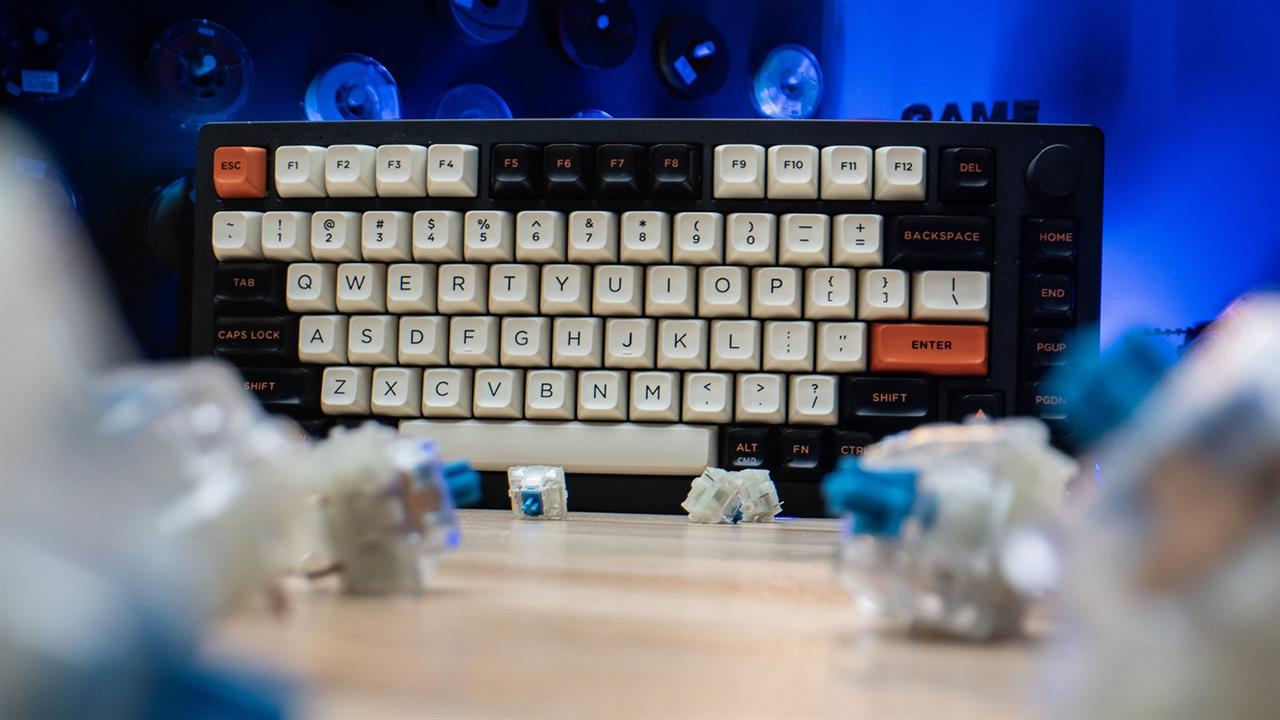
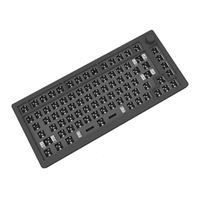
We suggest starting with a barebones keyboard chassis, like the Inland Gaming MK Pro 75% keyboard. The 75% means it leaves out the separate numberpad. I personally like this design -- it's cleaner and takes up a smaller desk footprint, while still giving you full-size keys, and this aluminum model has a weighty, sturdy feel.
After choosing the base, the next step is picking out the switches and the keycaps, both of which are going to have a huge impact on the final product. Gamers often favor mechanical keyboards for their durable, responsive switches that offer superior feedback, but building your own mechanical keyboard is not just about the tactile and auditory feedback; it's also about personalization and aesthetics.
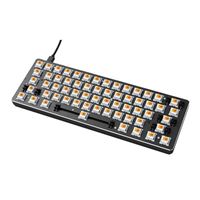
Switches are critical for defining the typing feel. You have color-coded options from brands like Cherry MX and others such as Reds (linear), Blacks (linear with higher actuation force), Browns (tactile without loud clicks), and Blues (clicky). There are also additional switch types like "silent tactiles" and "speed switches" that cater to different preferences.
For beginners, it might be beneficial to start with a switch that offers feedback without being too loud, like the MX Black switches used in our video, providing a balance between responsiveness and required force. A set of switches can run between $20-$40.
See mechanical keyboard switches at Micro Center
Choosing keycaps
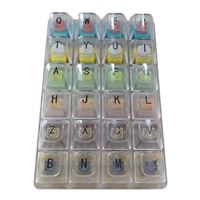
Choosing different keycaps is where creativity meets functionality. With a wide range of colors, materials, and shapes available, keycaps allow you to customize the look and design of your keyboard to match your personal style or gaming setup. This customization extends beyond aesthetics; different keycap profiles can alter the typing feel and sound, further tailoring your keyboard to your preferences.
Whether aiming for a keyboard that stands out with vibrant colors or one that integrates seamlessly with your gaming environment, the choice of keycaps plays a crucial role in achieving a truly personalized look and feel. A set of keycaps can cost anywhere from $10-$50, depending on the color, design and material.
See keycap sets at Micro Center
Assembly Process
Putting together a hot-swappable keyboard is fairly straightforward:
- Installing Switches: Align the switches with the slots on the keyboard base and press them in. Hot-swappable bases allow for easy switch replacements without soldering, offering flexibility to experiment with different switch types.
- Adding Keycaps: Choose a keycap set that matches your aesthetic preference. Keycaps are pressed onto the switches, and they usually click into place without much effort. To remove or replace a keycap, use a keycap puller wire tool, like this one.
Customization and Final Touches
This isn't necessarily the end of your keyboard journey. The hot-swappable nature of barebones keyboards like the Inland Gaming MK 75% allows you to change switches or keycaps anytime, so your keyboard can evolve with your preferences. Whether you prefer a clicky, tactile, or linear feel, bright colors or muted ones, you can always adjust your keyboard accordingly.
Read more:
- See mechanical keyboard switches at Micro Center
- See keycap sets at Micro Center
- See barebones keyboard bases at Micro Center
Micro Center Editor-in-Chief Dan Ackerman is a veteran tech reporter and has served as Editor-in-Chief of Gizmodo and Editorial Director at CNET. He's been testing and reviewing laptops and other consumer tech for almost 20 years and is the author of The Tetris Effect, a Cold War history of the world's most influential video game. Contact Dan at dackerman@microcenter.com.