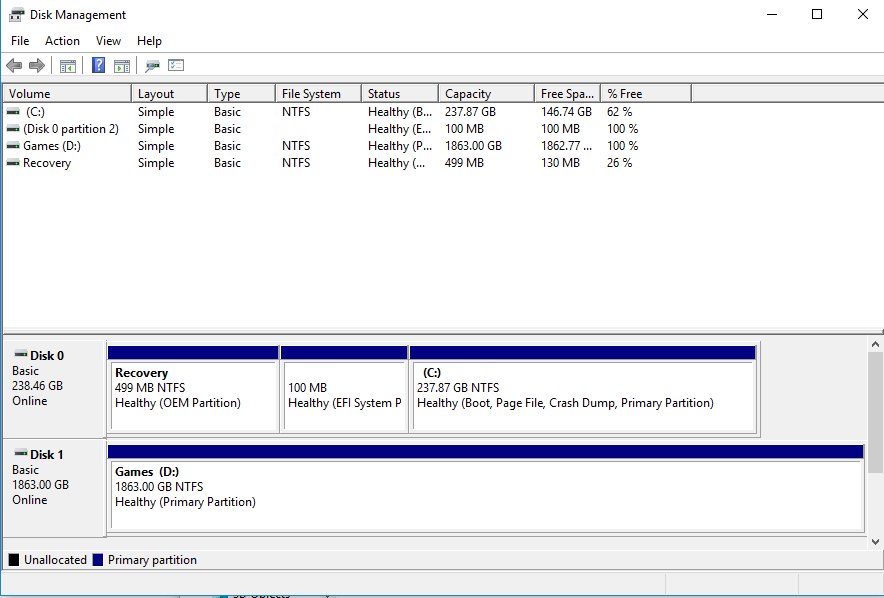
How to Initialize and Format a Newly Installed Secondary Drive in Windows 10

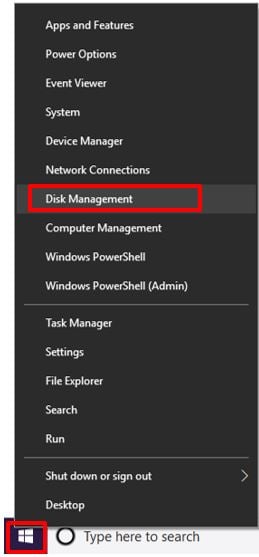
1. Right-click the Windows icon and select Disk Management.
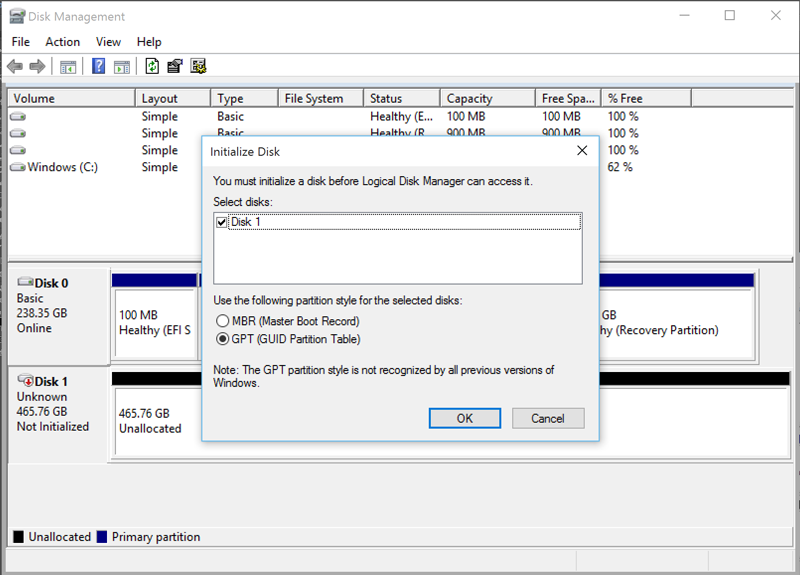
2. Right-click the “Unknown Disk” and select Initialize Disk.

3. Select the partition style. GPT is preferred for newer drives or drives larger than 2TB in size. Click Ok.
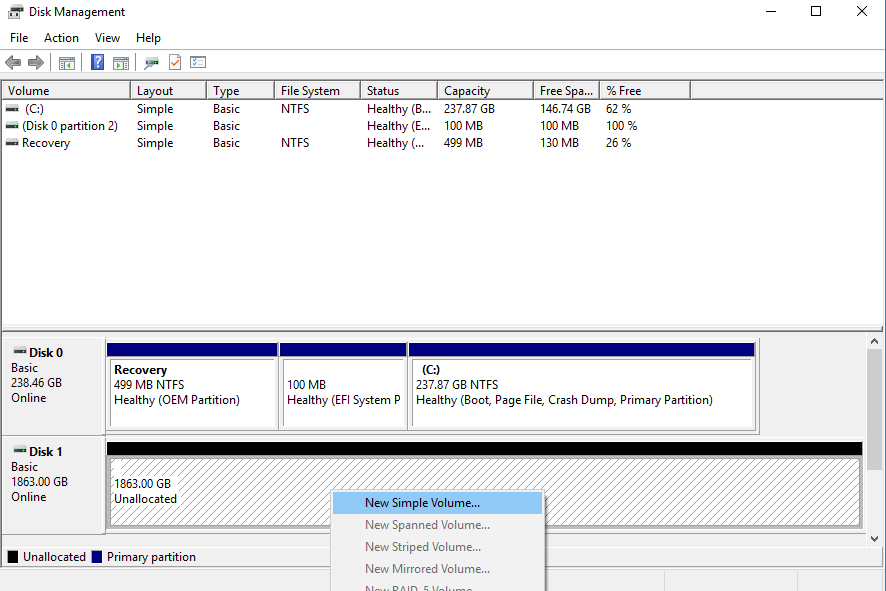
4. Right-click the Unallocated Space and select the New Simple Volume option.
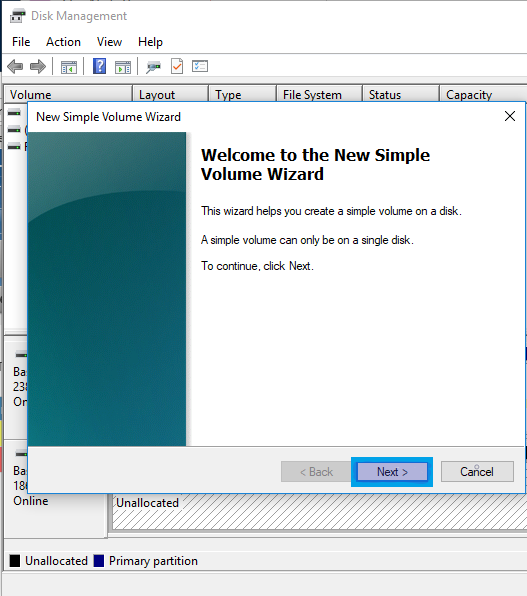
5. Click the Next button.
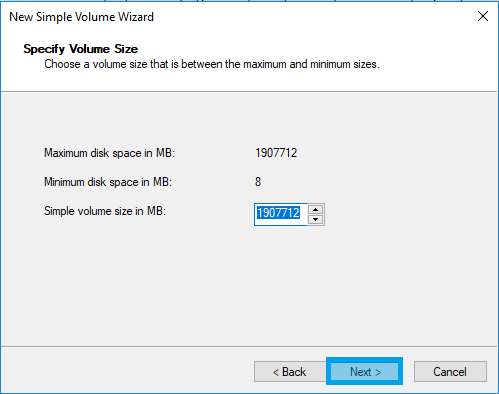
6. You will be asked to Specify Volume Size. The default value is the maximum size and will format the entire disk as 1 partition. If you want to create multiple smaller partitions, change the Simple volume size in MB value. Then select Next.
7. Use the Assign the following drive letter drop-down menu to select a letter for the new hard drive or leave the default letter assigned by Windows and click Next.

8. Use the File system drop-down menu and select NTFS.

9. Use the Allocation unit size drop-down menu and select the Default option.

10. In the Volume label field, type a descriptive name for the drive.

11. Check the Perform a quick format option.

12. Unless necessary, clear the Enable file and folder compression option.
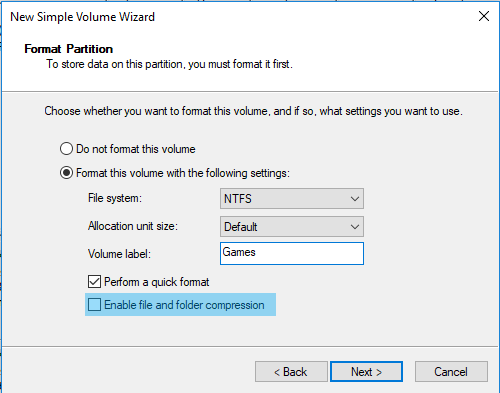
13. Click the Next button and then Finish.

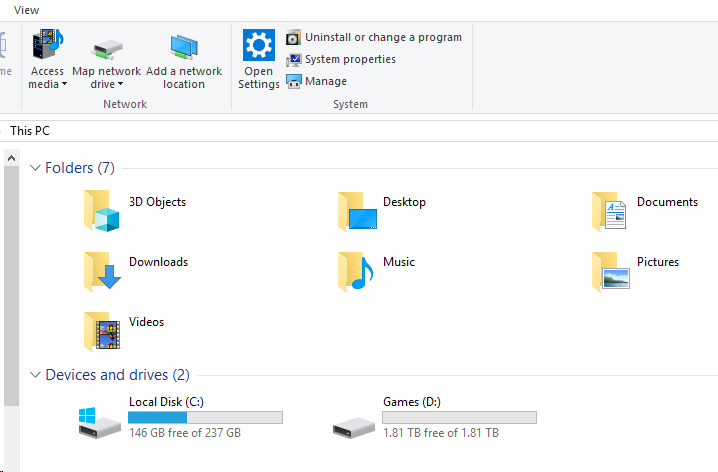
14. Your disk is now ready to use