How to Set Up Your First Home Server
DIY home servers are great ways to keep your network secure while making your whole life easier and more efficient than ever before, whether they're for streaming, AI, or gaming!How-To

We’ll be working with ISO files, system BIOS, and router settings for this project.
From building your own video streaming service with Plex or Jellyfin to creating your own AI chatbot with Ollama and Open WebUI, a server can be an incredible addition to your home, but what exactly is a server? While there are certainly purpose built machines for enterprise use, a server is simply a computer that has a job, which means almost any computer you have can be a server, even that old PC in the basement that isn’t Windows 11 compatible!
However, even knowing all the benefits a server has to offer, setting up a server can seem like a daunting task. Whether it's for DIY cloud storage, media streaming, or home automation, a home server can help make your life easier and more efficient. And, setting one up can be simpler than you'd expect.
Picking out hardware
Before we dig into the meat and potatoes of setting up a home server, there are a few considerations to make ahead of timThe most important thing is choosing the right hardware. For servers, that means considering storage, power, networking, and physical space. It also means deciding whether to build or buy.
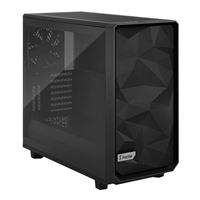
Take the Fractal Design Meshify 2, for example. This massive PC case can support up to 11 3.5-inch drives - perfect for a hefty home media server or backup. That's good if you want a massive amount of storage in your DIY server.
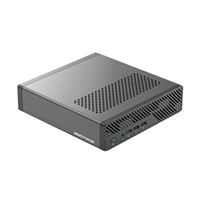
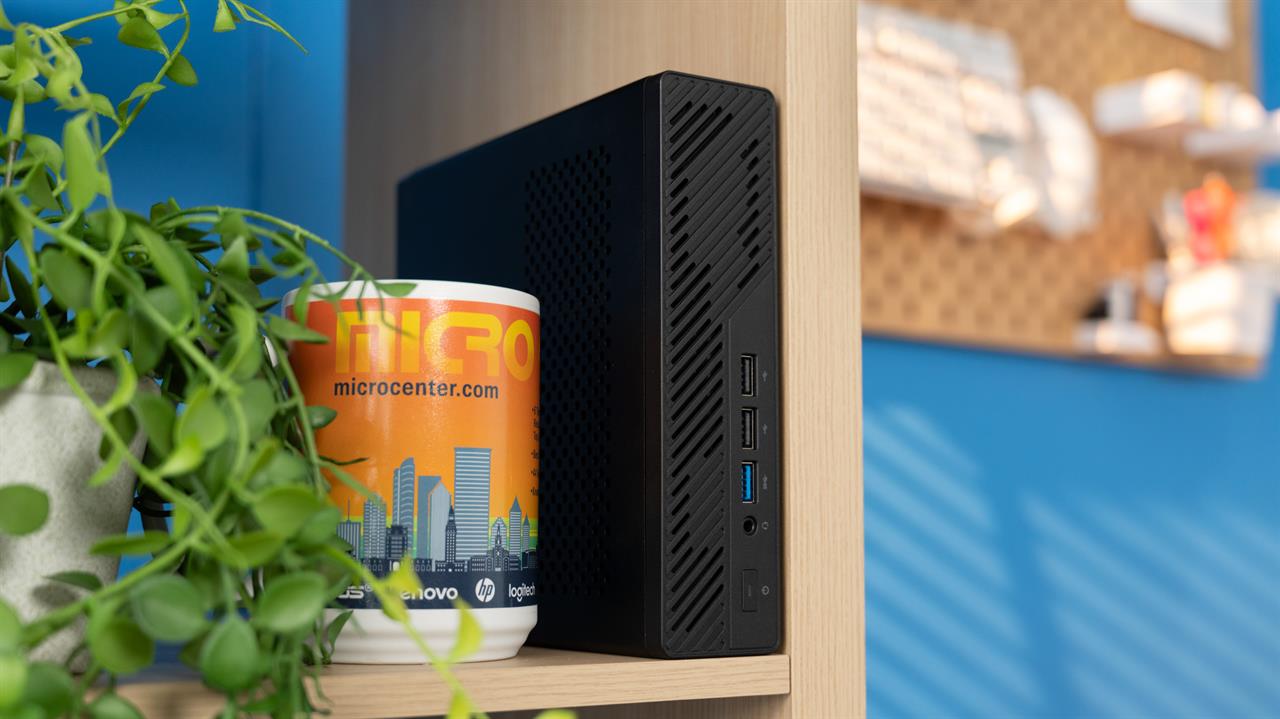
For our build, however, we’ll be going a bit smaller, using the Minis Forum MS-01, a tiny pre-built PC that packs a big punch. This small form factor (SFF) desktop is perfect for our project thanks to the plethora of networking options it has, along with an Intel Core i9 13900H, which is a 14 Core, 20 Thread CPU that’s perfect for self-hosting all the services and virtual machines, or VMs, we'll need.
We’ll go over considerations for building your own server in a future article, but your local Micro Center is full of associates who are more than happy to help you pick out everything you need to build your own!
Choosing the software
Once the hardware has been picked out, the next major decision is what operating system (or OS) to install. There are many different options to choose from, all with differing purposes. From storage-focused OSs like TrueNAS Scale or Unraid to classic Linux distributions like Ubuntu or Debian, there’s no starving for choice here.
While Windows 11 could theoretically work for a server, we’ll be going a bit above what Windows is natively capable of.. A lot of programs we’ll be using for this build make use of docker containers (more on these in the future), a feature Windows does not natively support -- though there are workarounds with programs like Docker Desktop and WSL, if you’re set on Windows.
If this is your first foray into home servers and not just a refresher, there’s a good chance you’ll end up doing a lot of exploring and experimentation and probably breaking some things along the way. Which is why you need a hypervisor! Hypervisors are a specialized type of OS that acts as a "host" and will allow you to have "guest" operating systems installed through virtualization. For this server, we will be using ProxMox VE as our host OS and Ubuntu Server as our first guest.
A quick note on virtualization and why it’s important: Virtualization allows you to test out different operating systems easily and efficiently by slicing up your server's resources like RAM and CPU cores. It also keeps virtual machines separate from the root of the server, so if something breaks it won’t take down the whole machine.
Creating the server
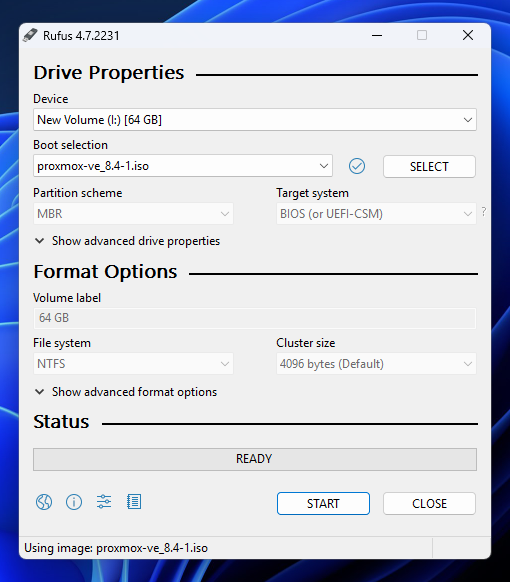
Now that we’ve got our hardware and software picked out, it's time to go out and grab the ProxMox VE ISO file from their site and create a bootable drive. For this explainer, I'll be using a program called Rufus but. there are a ton of different programs that can accomplish this, so use whichever you’re most comfortable with.
Once Rufus is downloaded and running, make sure that the correct drive --the one you want to make bootable -- is the one selected in the "Device" portion. Rufus won’t show your main OS drive as an option, but other services might, meaning if you pick the wrong one, you could reformat your whole PC, so be careful. Now click on the "SELECT" button and select the ProxMox ISO. You should see this warning.
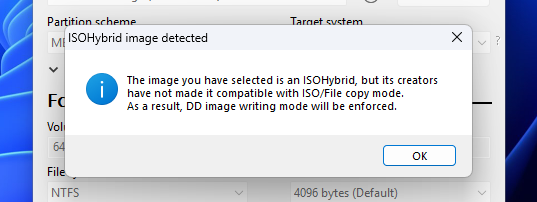
Don't Panic! As the Hitchhiker's Guide reminds us, as long as you have a towel, everything will be fine. Joking aside, there’s nothing to worry about. Simply click "OK" and the dialogue box should change to the one below. From there, just click “START.”
Now that you have your bootable USB drive in-hand, plug it in to the MS-01 or whichever PC you’ll be using as a server and boot the machine (with a keyboard and monitor attached). From there, act like a professional computer tech and start mashing the delete and escape keys to enter the BIOS/UEFI. Once in BIOS,click on "Setup."
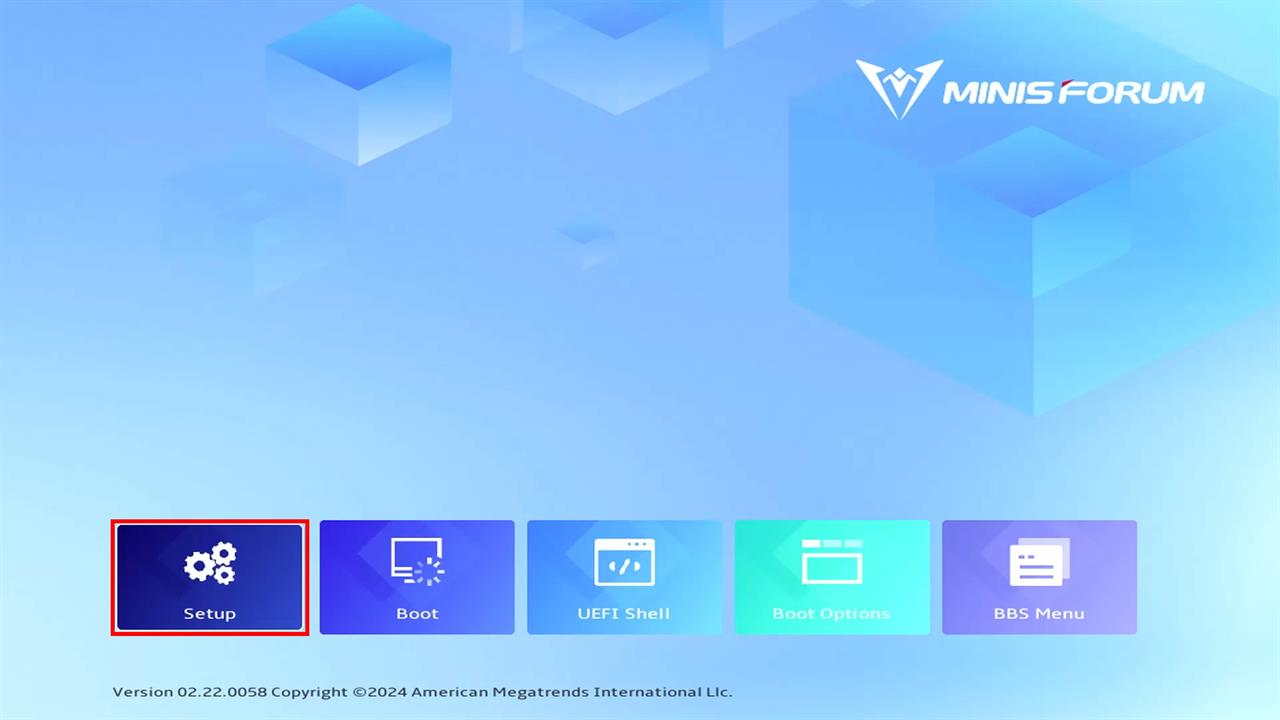 Photo: Minisforum
Then, under "Boot", make sure that "Boot Option #1" is set to a UEFI USB Device.
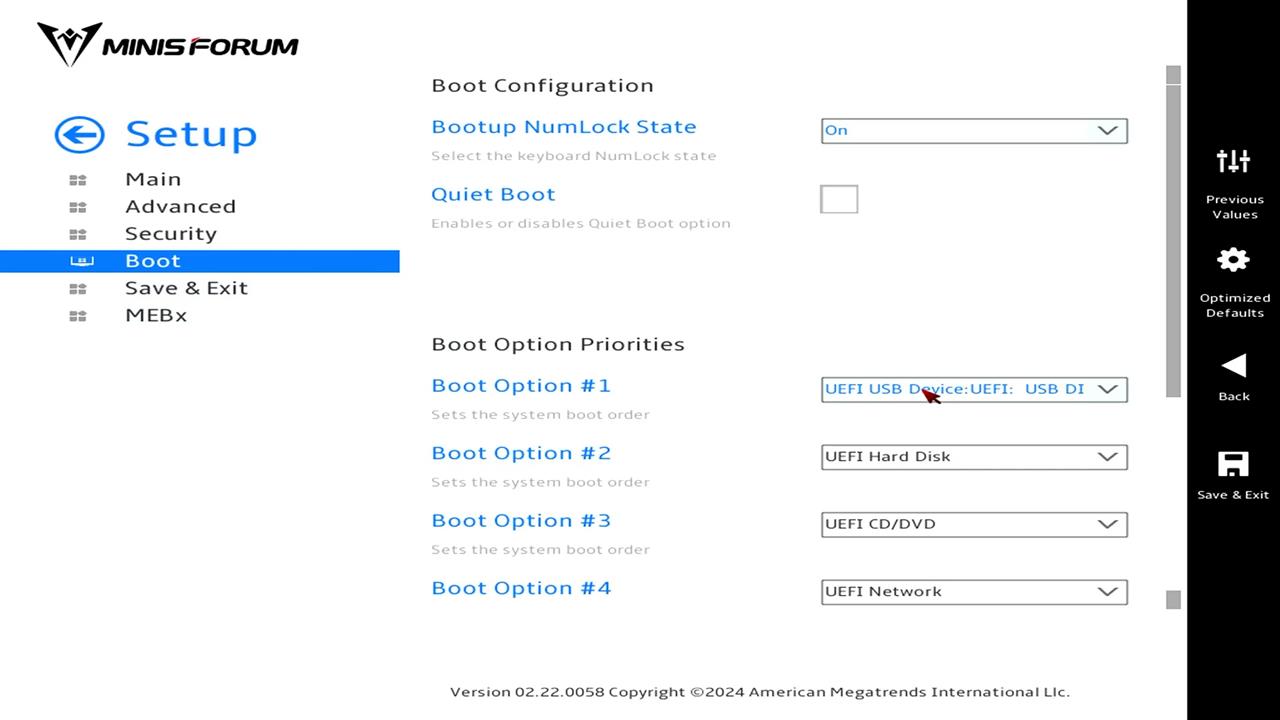 Photo: Minisforum
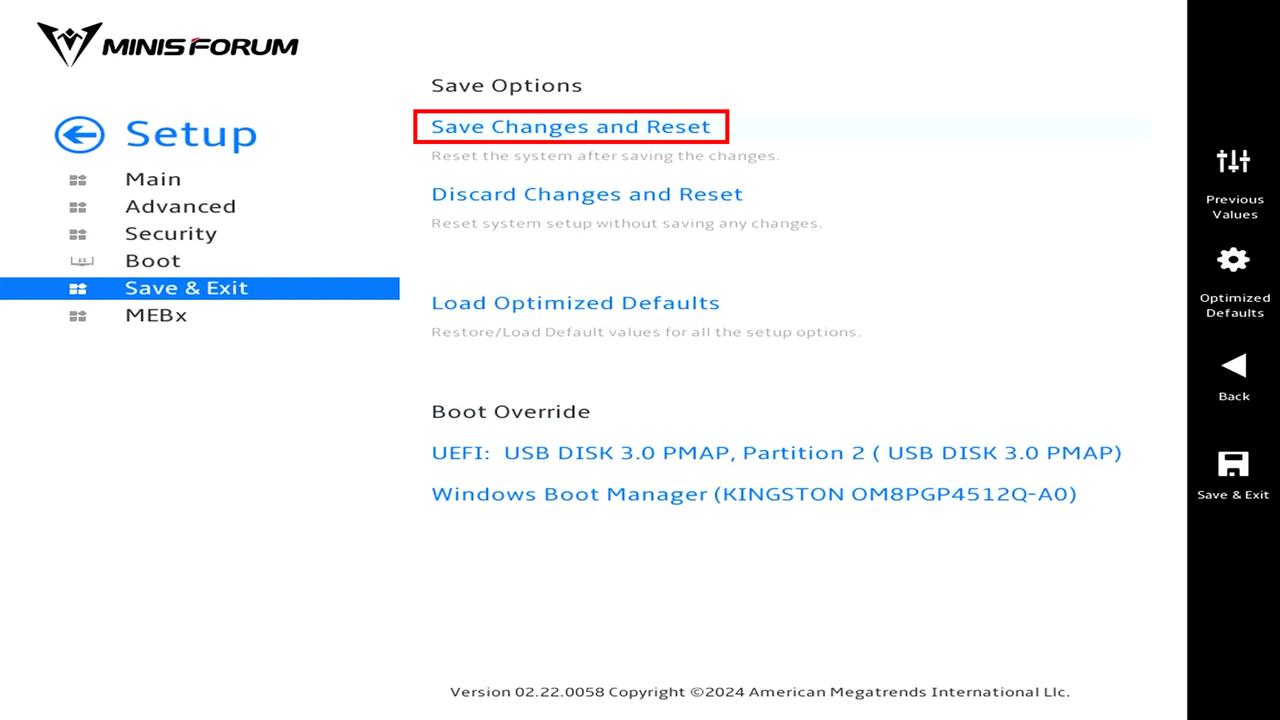
 Click on "Save & Exit" then "Save Changes and Reset." The system should reboot into the ProxMox VE installer.
Once the ProxMox VE Installer has started, it's a fairly straight-forward step by step process of choosing your disk, country, password, and associated email (for notification purposes). Once all boxes have been filled in, the installer will grab some info about the network it's attached to and let you know the IP address DHCP has given your server.
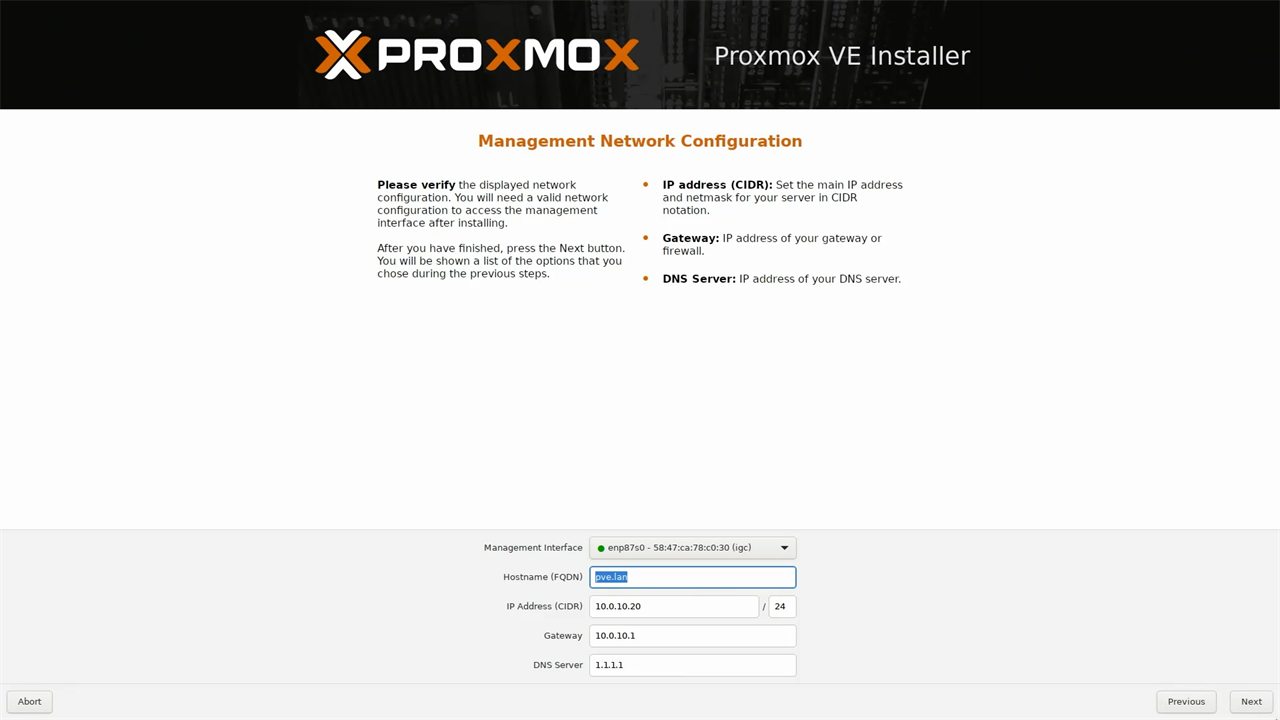 Photo: ProxMox
 Verify all information is accurate, then click “Next” and the actual installation will begin.
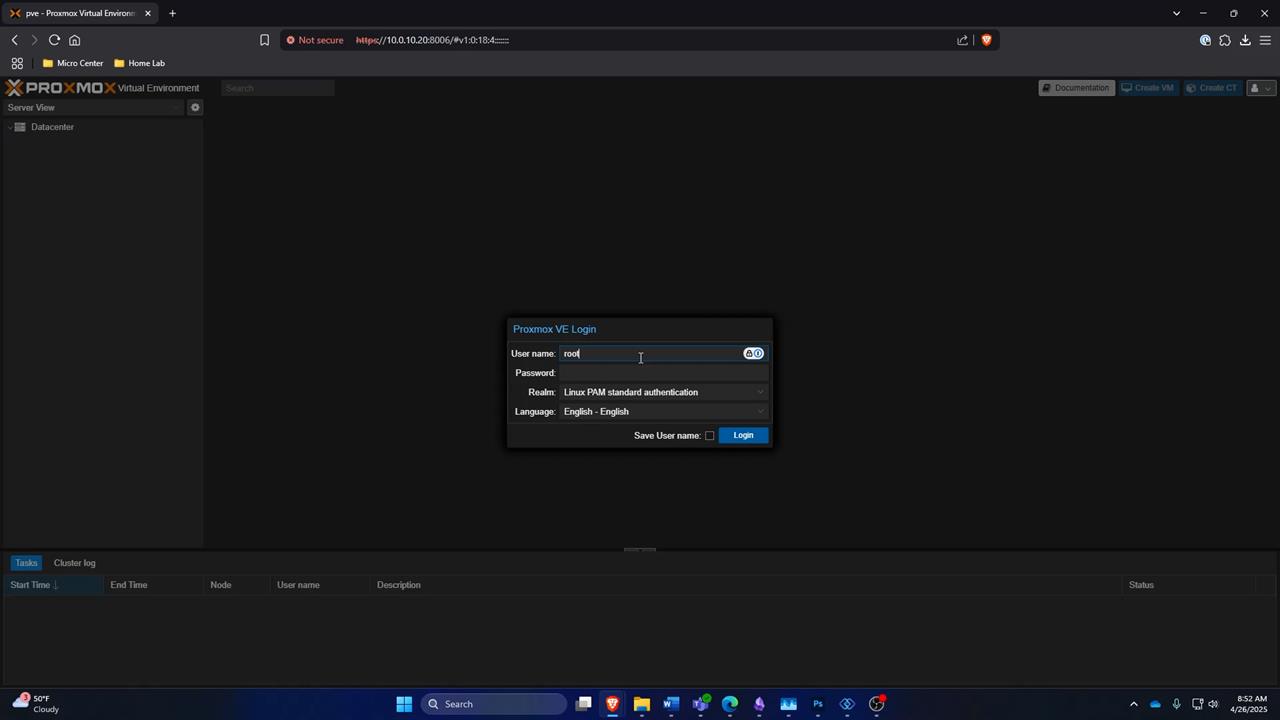
Once you have ProxMox fully installed, I recommend logging into your router's admin portal to create a DHCP Reservation (without getting too in the weeds, the DHCP Reservation assigns a static, unchanging VPN) with the IP address ProxMox was assigned in the last step. Once the DHCP Reservation has been created, open a web browser and type in "https://PROXMOX-IP:8006" replacing "PROXMOX-IP" with the IP address of your fresh new ProxMox install.
Note: ignoring privacy warnings can be dangerous to your computer and should be done with discretion. As our server is only on our local network, the risk is far smaller than opening unsecured external web pages.

Once Ubuntu Server has downloaded, open the ProxMox dashboard. On the left sidebar, click on the option labeled PVE to open another sub-menu. Locate and click on “local (pve)” to open another dialogue box. Select “ISO Images” from this new box and upload the downloaded Ubuntu Server ISO you just downloaded.
Once the ISO has been fully uploaded, close the task viewer dialog that appears and, in the top right hand corner, click the button that says "Create VM."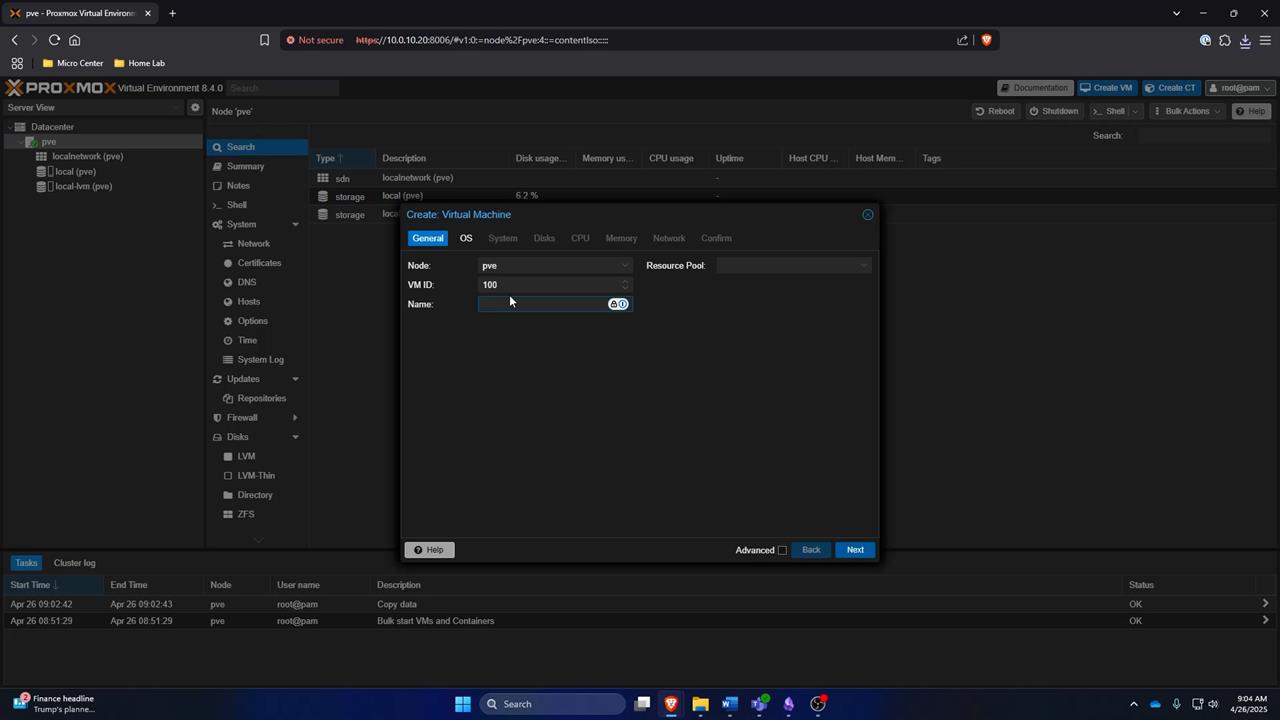 Photo: ProxMox
We’ll be going through the set-up tabs one by one, starting with the OS tab where you just need to select the Ubuntu ISO image from the drop down. We’ll ignore the System tab for the moment, but in the Disks tab we’ll need to assign a disk size to the VM. For now, go with 100 GiB; this is more than you’ll need, today, but that space will come in handy as we add more VMs in the future.
The CPU tab is for telling ProxMox how many CPU cores this VM should have. Remember that these aren't always physical cores, so if your CPU is hyper-threaded, each thread counts as a core.
For our example we're going to assign six cores to the VM. This will give our VM enough oomph to run without issue, but leaves enough on the table for other programs. Memory needs to be assigned in multiples of 1,024. So in our example, we are going with 8,192, or approximately 8GB of RAM. For this initial set up, we won’t be doing anything with the Network tab, so go ahead and confirm your choices.
Once theVM is created, it will appear in the "pve" folder on the left side of the screen. Click it and then “Console” in the sub-menu that appears. 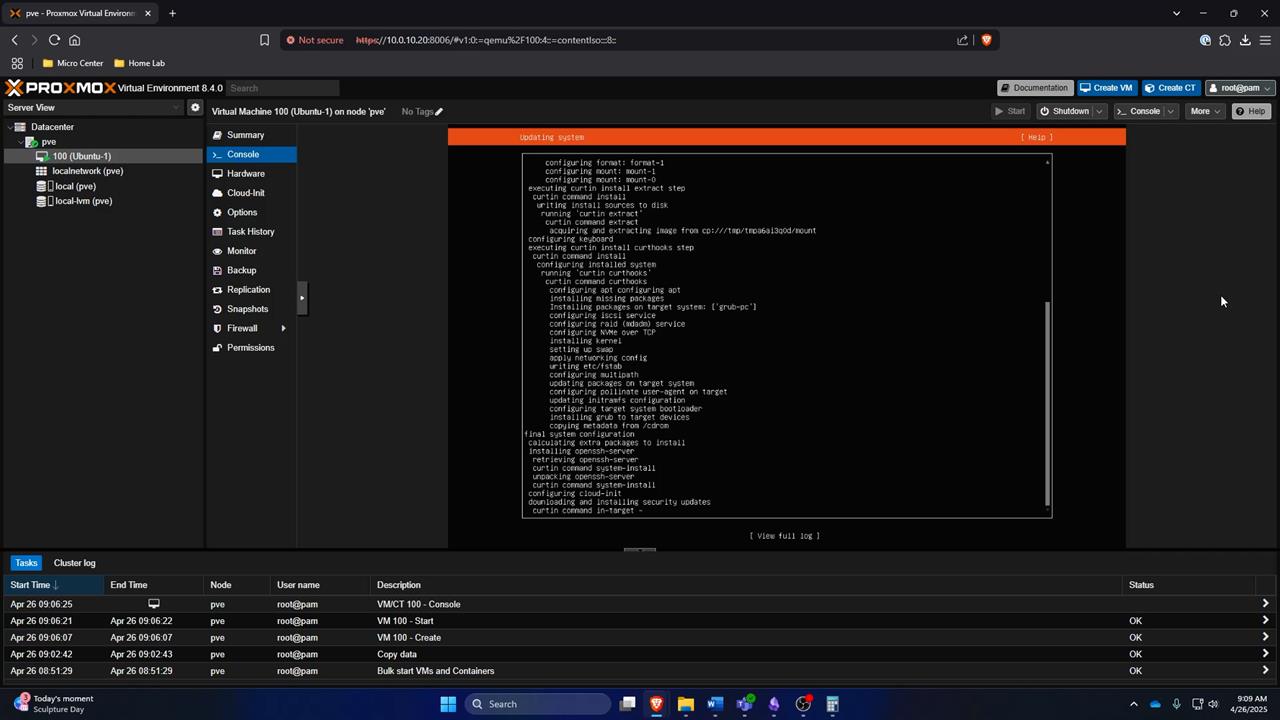
Photo: ProxMox
From here, it’s functionally identical to installing an OS on a new machine… just one that's already inside a machine.You will want to make note of the IP address that DHCP assigns your new VM and make a DHCP reservation like we did earlier on your router.
To finish up, let's go ahead and update the VM. Head back to the Console section in ProxMox, and type the following command:
sudo apt update && sudo apt upgrade -y
This will make sure your VM is fully updated and ready for some services! And, with that, you’ve officially created a server.
This is just the beginning of both your server adventures and this series, so keep your eye on Micro Center News for my next piece on setting up first services.
If we’ve convinced you to start your own server, stop by your local Micro Center. Our knowledgeable associates are more than happy to help you pick out parts to build your own, or recommend a prebuilt that will work for your needs.