Micro Center AMD Threadripper 3990X Build Guide
This guide will demonstrate the assembly process of the AMD Ryzen Threadripper 3990X display system.PC Build Guides
This guide will demonstrate the assembly process of the AMD Ryzen Threadripper 3990X display system. Please note: The steps below may depend on component availability and preference/experience of the person performing the assembly. The instructions below are to build a system using the following computer parts:
Load the list of components in our online PC Builder
Additional water cooling components are show below. While our build used silver fittings, we have many other colors (black, white, black sparkle, and matte black) in stock so you can tailor the build to your own taste.
Step 1: Motherboard Component Installation
If you want to use different fittings, tubing and add components such as a GPU water block, the following instructions may not reflect your modifications. All assembly and modification is done at your own risk.
Preparation and Recommended Tools:
· Large Anti-static work environment
· EK Leak Tester
· Screwdriver Set
· Water Coolant Fill Bottle
· Tape Measure/Ruler
· ASUS Motherboard Manual (pdf)
· Lian Li Chassis PDF Manual can be found at the bottom of their product page.
· Saw/dremel for cutting PETG tubing
· PrimoChill PETG / Acrylic Reamer/Deburring Tool
· Eclipse Enterprise ESD Strap W/Velcro Adjustable Strap
· Safety glasses
· Grip Microfiber Cleaning Cloths 12" x 12" - 12 pack
· Tweezers ;-)
· Bawls Guarana - Cherry
Prepare the motherboard outside of the chassis by installing the DDR4 memory, the CPU, and both M.2 SSD’s in the motherboard. Install the CPU water block, using an X pattern and 4 dots for thermal paste. Refer to section 2-1 of the motherboard manual for detailed step by step instructions on this process.
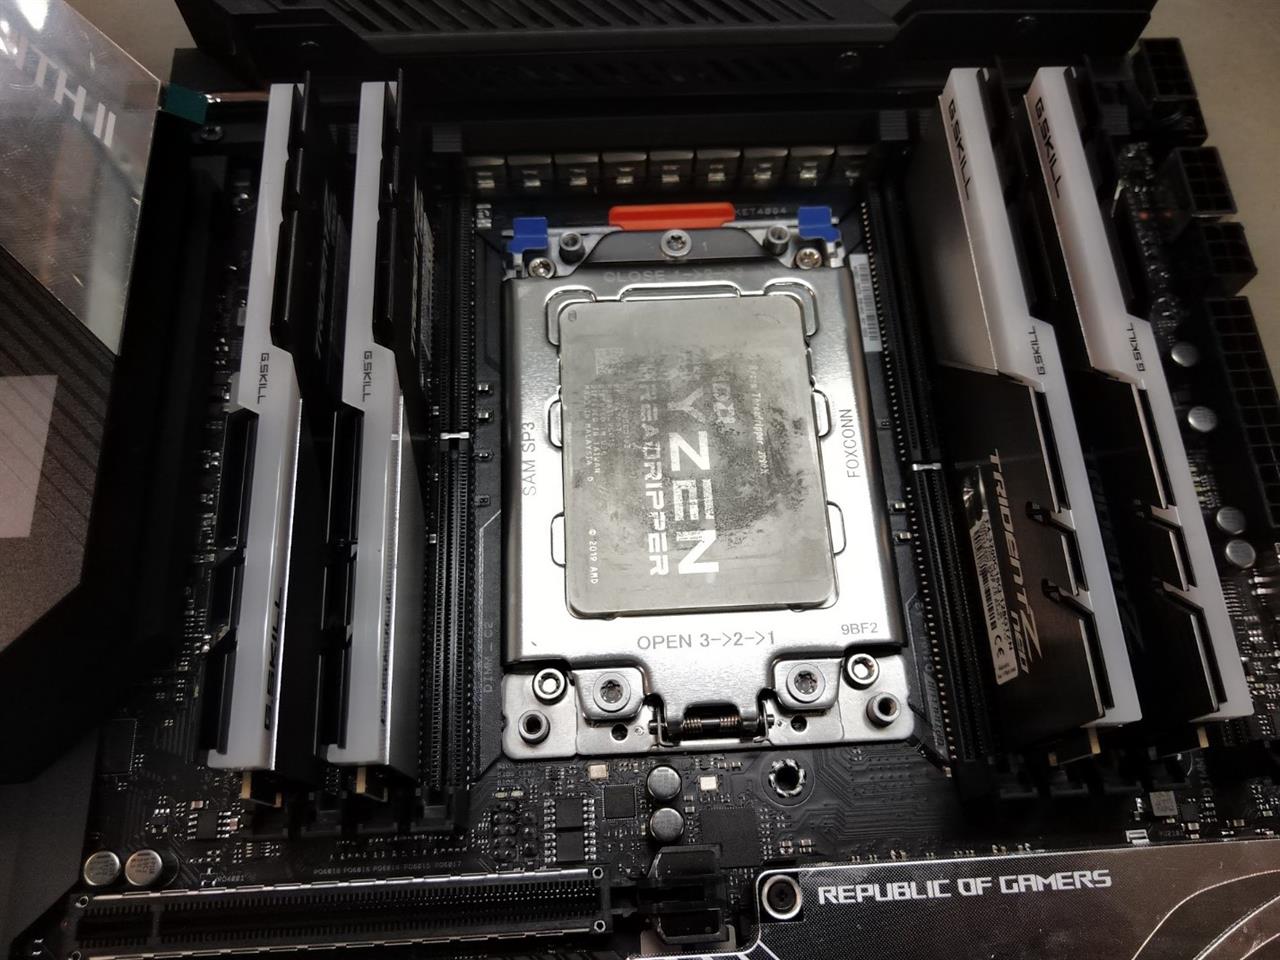
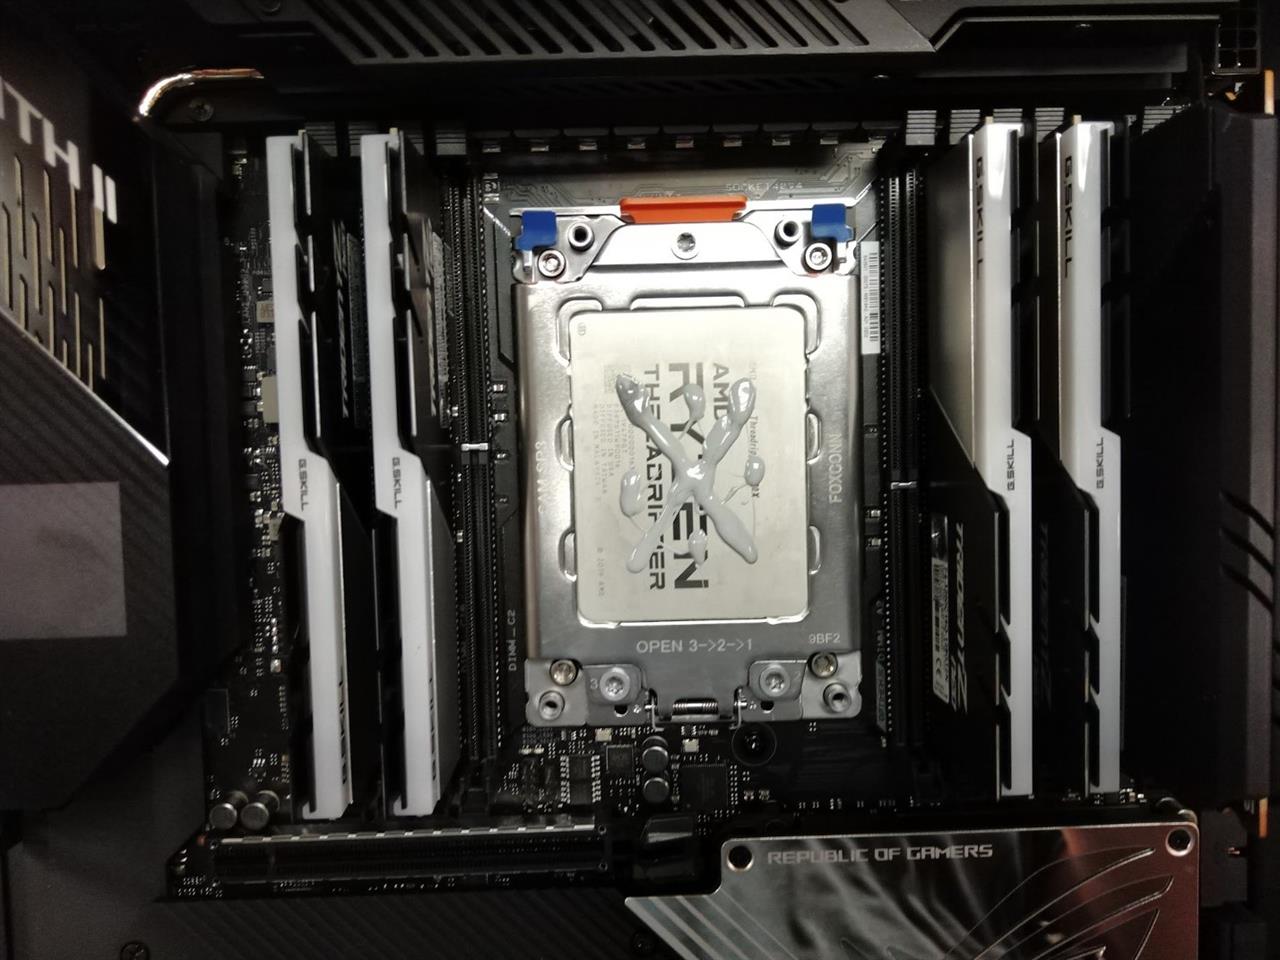
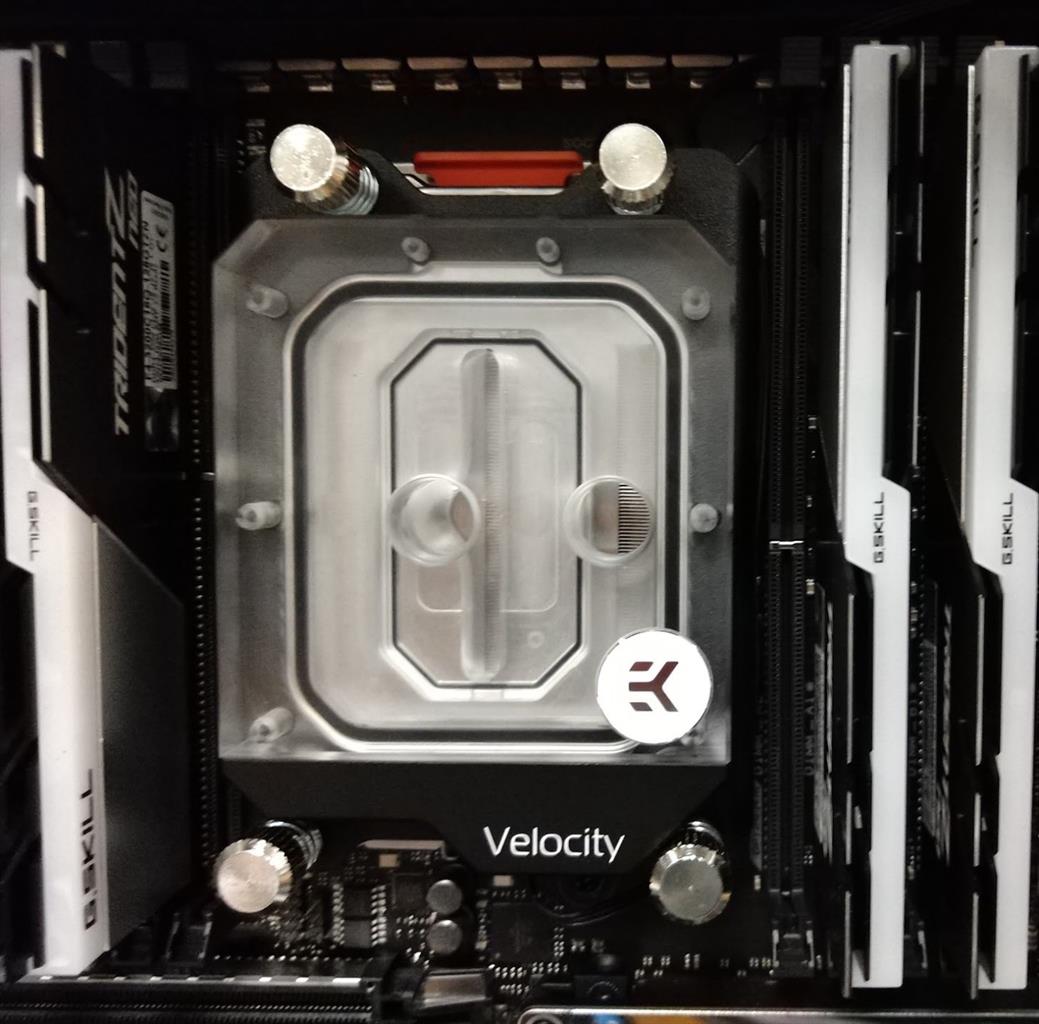
This requires loosening 4 captive screws and removing the armor to reveal the M.2 slots.
Refer to section 2-11 of the manual for more detailed instructions.
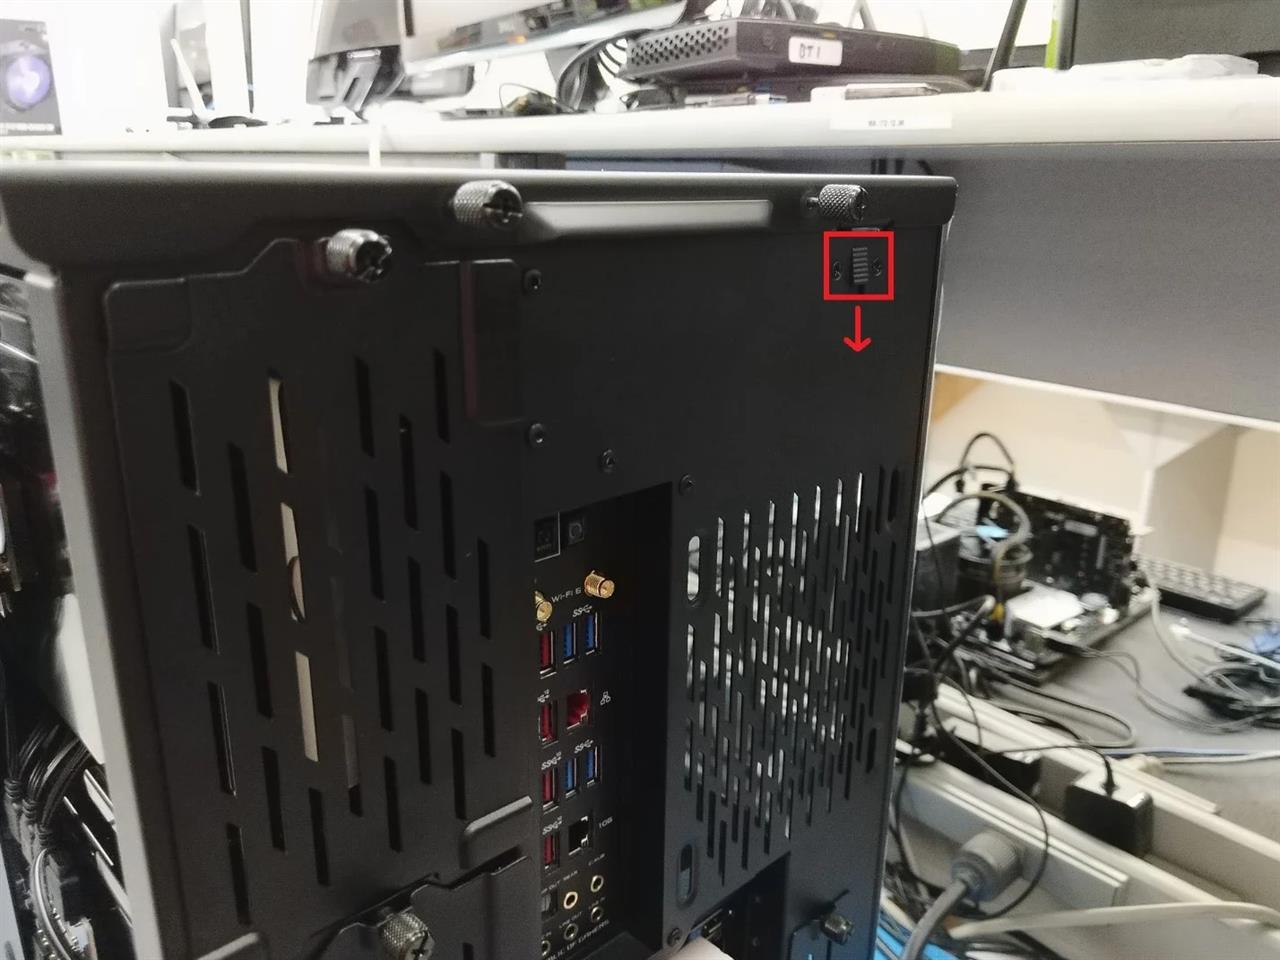
Step 2: Remove the top panel by loosening the captive thumb screws and pressing down on the rear latch on the back of the chassis. Afterwards, slide each side panel upwards to remove them from the chassis. Store in a safe location until the assembly is finished. Please refer to the attached manual for more detailed instructions.
Step 3: Loosen the captive screw on the plate covering the top internal hard drive bay. Next, loosen the screw on the bracket below the top bay and slide it towards the left. Finally, remove the hard drive rail to access the chassis accessory package.


Step 5: Remove the rear chassis cable shroud by removing two screws and lifting the bracket outwards. Refer to page 8 of the Lian Li manual for more detailed instructions.


Step 7: Remove the top 3 SSD mounting panels on the left side of the chassis behind the motherboard tray. Leave the bottom panel connected as it will help hide cables from the front IO and distro-plate. Refer to page 7 of the Lian Li manual for additional details.


Step 16: Cut PETG tubing in the following lengths for the respective bends. Keep in mind that you may need slightly more length on the tubing to make up for material lost when deburring:
· Bend 1: 3 ⅞” – 2 ⅛” – 2”
· Bend 2: 5 ⅞” – 4 ½” – 2”
· Bend 3: 6” – 3 ⅛”
· Bend 4: 5” – 2 ¾”
· Bend 5: 2 ⅛”
· Bend 6: 4 ⅜”
Those bends will correspond with the image below:

Attach the tubes and fittings to their exact locations referenced in the image above.
Step 16A (OPTIONAL): Add a drain at the bottom of the distro-plate behind the SSD mounting plate.


Step 17: Leak test the system using the EKWB Leak Test tool. Hand pump to 0.5-0.75 BAR and listen closely for any air leaks. It’s recommended to let the system sit for an hour to make sure it does not leak air over time.
Step 18: Fill the system with coolant using the fill port on the back of the distro-plate. A fill bottle will make this step easier. NOTE: Due to the lower speed of the pump, it is only recommended to use clear coolants such as EK CryoFuel Clear. Opaque fluids may gunk up and impede the flowrate of the pump.

If you've reached this point, congrats! The system should be complete and ready for use.

Comment on This Post
See More Blog Categories
Recent Posts
This Week in AI: Microsoft's Says AI Can Diagnose Patients Better Than Doctors
For July 4, 2025: Cloudflare blocking chatbots, ChatGPT referrals to news sites tick up, AI laws remain for states to decide.
Continue Reading About This Week in AI: Microsoft's Says AI Can Diagnose Patients Better Than DoctorsWatch: Intro to Electronics at Micro Center - Episode 3: Arduino and Servo Motors
In our new Intro to Electronics episode, we continue our DIY journey with some servo motors and an Arduino Kit, including code demonstration.
Continue Reading About Watch: Intro to Electronics at Micro Center - Episode 3: Arduino and Servo Motors

