

How to manually create a Restore Point in Windows 10
Description: This article will show how to manually create and configure system restore points in Windows 10. System Restore is a feature that allows you to revert the computer's state (including system files, installed applications, Windows Registry, and system settings) to that of a previous point in time. This can be used to recover from system malfunctions or other problems.
- Right click on the Start button at the lower left corner of the screen, then on the menu that appears choose on System.

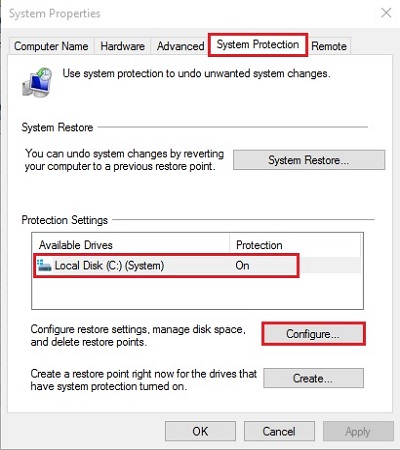
- Select System protection from the left panel.

- Select the System protection tab along the top. If needed, system protection can be enabled or disabled for each drive. To change a drive’s settings, click on the drive’s name and then click on Configure.
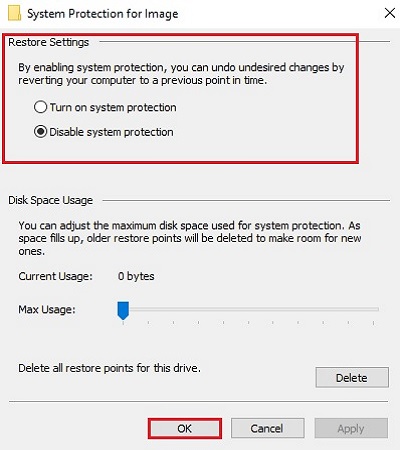
- From here System Protection can be disabled or enabled for the drive by selecting Disable or Turn On, then click on OK to save changes.
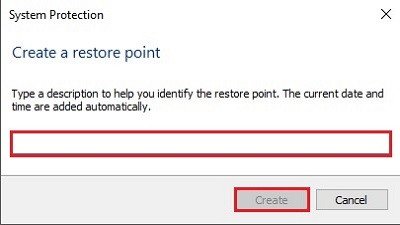
- To begin the process of creating a restore point, click on Create at the bottom of the window.

- Enter a name for the restore point in the box, and then click on Create.
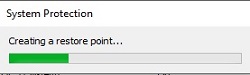
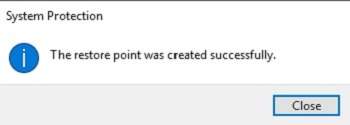
- A progress bar will appear and display Creating a restore point. This process will typically take a minimum of 5 minutes. Once finished, it will then say The restore point was created successfully.
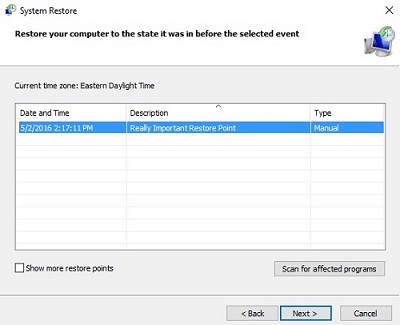
- To verify its creation, open System Restore and select Next in the first Window. This will display recent restore points, the list will show a manually created restore point at the top.

Technical Support Community
Free technical support is available for your desktops, laptops, printers, software usage and more, via our new community forum, where our tech support staff, or the Micro Center Community will be happy to answer your questions online.
Forums
Ask questions and get answers from our technical support team or our community.
PC Builds
Help in Choosing Parts
Troubleshooting