

Troubleshooting: Cannot see your Hard Drive or SSD in Windows 7 Setup
Description: When hard drives or SSDs come from a manufacturer sometimes you can receive one that has not been initialized, you can follow these steps to initialize your hard drive or SSD.
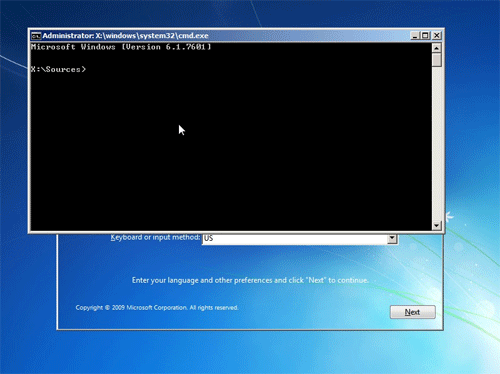
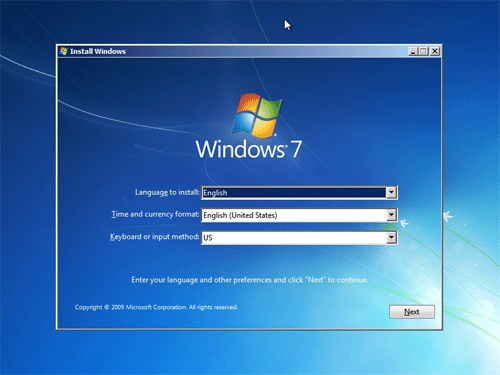
- Put in your Windows 7 CD into your computer and start the setup.
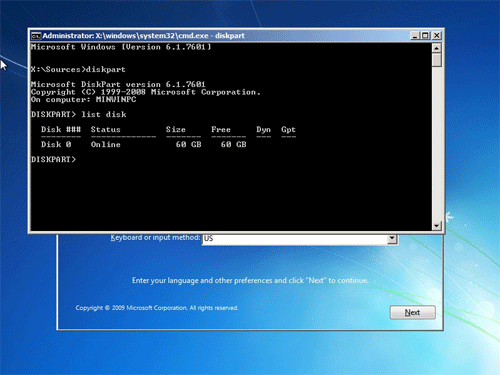
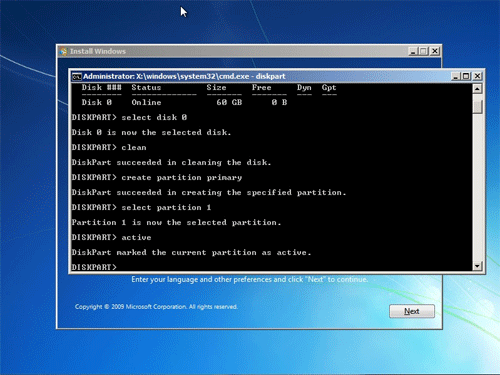
- Once in the Windows 7 setup screen press Shift + F10, this will bring up the Command Prompt.
- Now type in diskpart then press the Enter key.
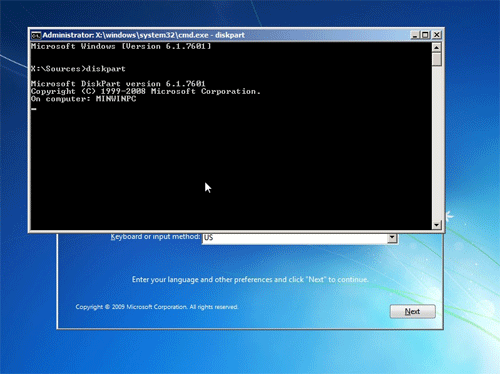
- Then type in list disk then press the Enter key.
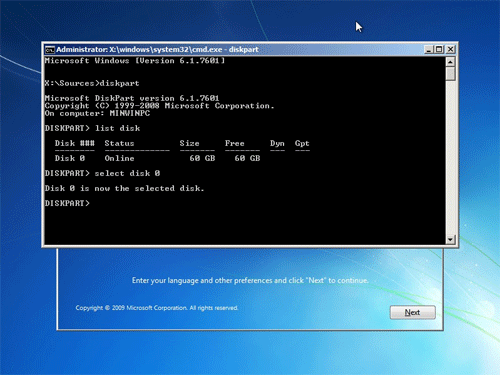
- If you see more than one disk show on the list, select the disk that you want to initialize. In this case we will use disk 0, type select disk 0 then press the Enter key.
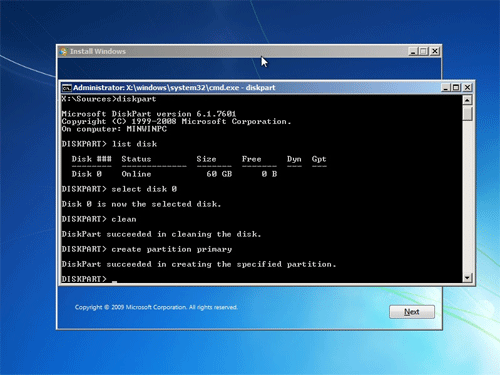
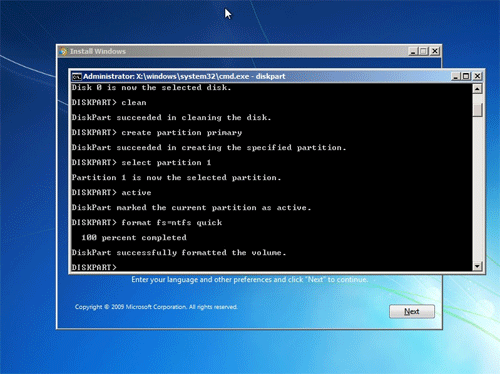
- To remove any partitions and volume formatting type Clean then press the Enter key.

- Now we need to create a partition on the disk. Type create partition primary then press the Enter key.
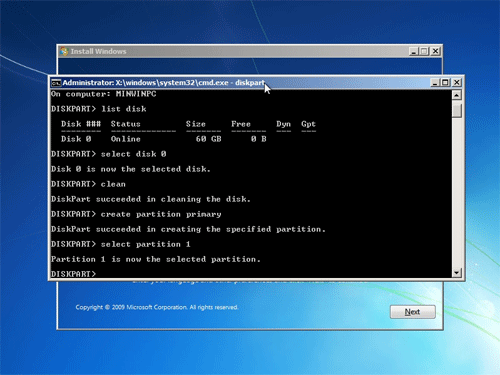
- Now we need to select the new partition for the next steps, type select partition 1 then press the Enter key.
- Now we need to make the new partition active, type Active then press the Enter key.
- Now to format the partition, type format fs=ntfs quick then press the Enter key.
- Now we can exit disk part, type Exit then press the Enter key.
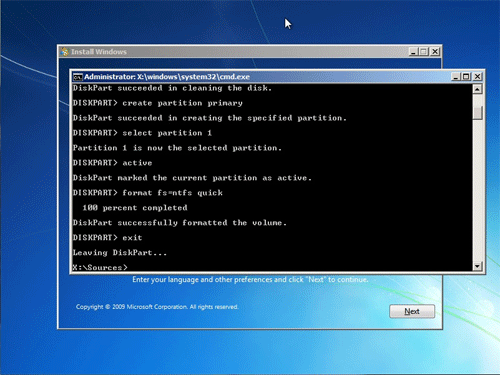
- Then we can now exit out of command prompt by typing Exit then press the Enter key. Your hard drive or SSD should now show under the Windows 7 setup!
Technical Support Community
Free technical support is available for your desktops, laptops, printers, software usage and more, via our new community forum, where our tech support staff, or the Micro Center Community will be happy to answer your questions online.
Forums
Ask questions and get answers from our technical support team or our community.
PC Builds
Help in Choosing Parts
Troubleshooting