

How to customize how Outlook 2013 Groups Emails Together
Description: A guide to customizing how Outlook 2013 groups emails together.
- Open Outlook 2013.
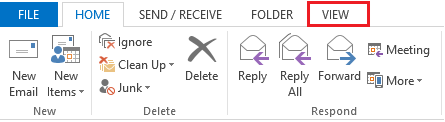
- Click the View tab at the top of Outlook beside the Folder tab.
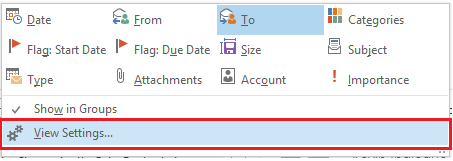
- Click the symbol highlighted in red in the picture below. This will expand the arrangement box. Click View Settings.
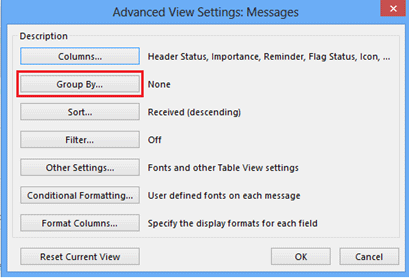
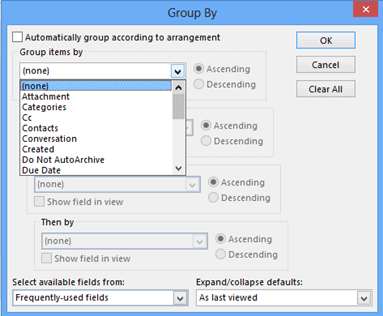
- Click Group By.
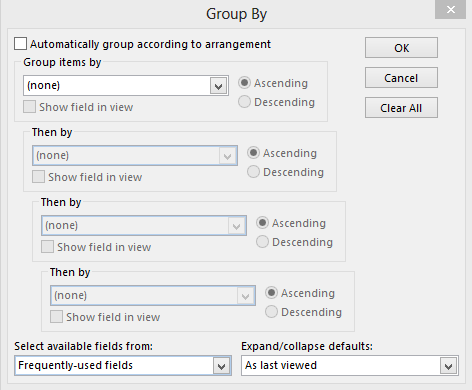
- Uncheck the Automatically group according to arrangement box and this will allow changes to be made in the Group items by box.
- Click the dropdown menu and select how you want your emails to be grouped.
- When finished selecting how to group, the emails subgroups can be added by next clicking on the Then By drop down box and selecting a subgroup option. This can be done 3 times.
- If the preferred choice of Group Items By is not present, click on the drop down box under Select Available Fields from at the bottom and select the category that contains the preferred method.
- The Expand / Collapse defaults drop down box will set how the emails will be displayed. When all the preferences have been chosen click on OK. The emails are now grouped by the exact customizations made.


Technical Support Community
Free technical support is available for your desktops, laptops, printers, software usage and more, via our new community forum, where our tech support staff, or the Micro Center Community will be happy to answer your questions online.
Forums
Ask questions and get answers from our technical support team or our community.
PC Builds
Help in Choosing Parts
Troubleshooting