

How to manually import Pictures from an Android Device to Windows 7
Description: A how to on manually copying pictures from an android device to a computer using Windows 7.
- Plug the device into the computer using a USB cable.
- The device will automatically install if this is the first time being plugged in. Wait for the installed successfully prompt to come up on the bottom right hand corner of the screen. If this is not the first time plugging in, move on to step 3.


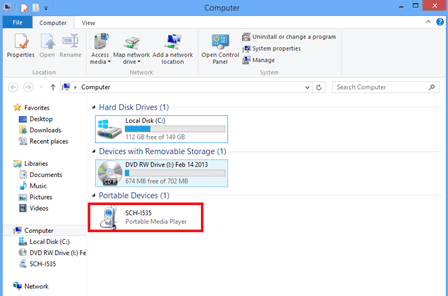
- Click on the Start Button then click Computer.
- Under Portable Devices you will see your Android device. Double Click the Device.
- Double Click DCIM.
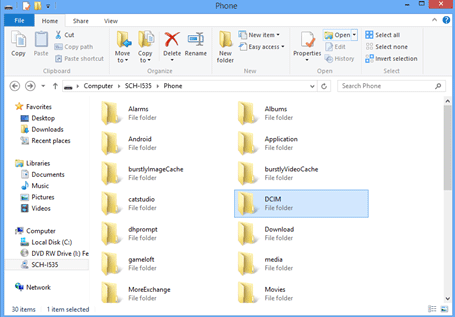
- Double Click the Camera folder.

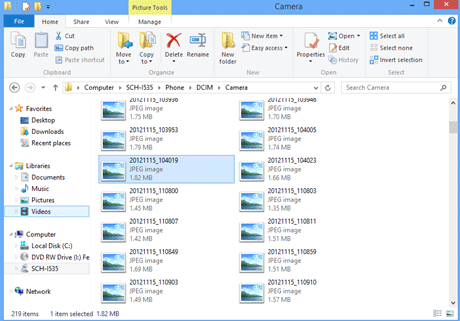
- Find the picture you want to import to your computer.
- There are multiple ways to import the picture into the computer but we will only focus on Copy/Paste and Cut/Paste.
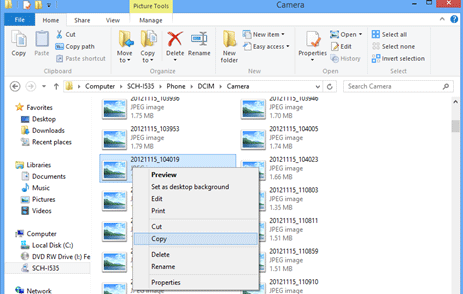
- If you want to leave the picture on your phone but also put the picture on your computer, Right Click on the picture and click on Copy.
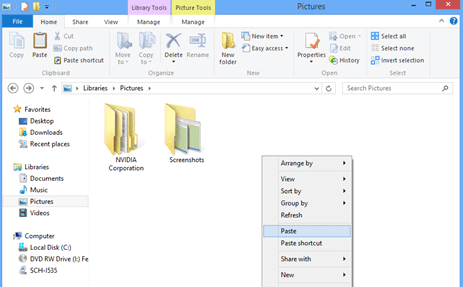
- Double Click the folder on your computer where you want the picture to be saved such as My Pictures.
- Right Click on an empty space in the folder and click on paste. Your picture is now saved on your phone and computer.
- If you want the picture to be deleted off your phone and be copied to your computer, right click on the photograph and click on Cut.

- Open the folder where you want the photograph to be located. Right click on an empty space in the folder and click paste.

- Your picture is now saved on the computer and also has been deleted off the phone.
Technical Support Community
Free technical support is available for your desktops, laptops, printers, software usage and more, via our new community forum, where our tech support staff, or the Micro Center Community will be happy to answer your questions online.
Forums
Ask questions and get answers from our technical support team or our community.
PC Builds
Help in Choosing Parts
Troubleshooting