How to save space on Solid State Drives (SSDs) in Windows 8 - Part 5
Description: This is a technical article on the topic of saving space on Solid State Drives. Part Five covers moving the User Directories.
The purpose of this article series is to show how to save space on Solid State drives, which are typically smaller than standard hard drives. In this article we will use a secondary hard drive, presumed to be larger than the solid state drive, as sort of a repository, so we may move files from the faster SSD drive to the bigger standard hard drive.
Backup
Although we haven't had issues in our testing, we do recommend you do a backup of your important files before proceeding.
User Directories
The User Directories are the folders such as Documents, Pictures, Videos, etcetera, which are stored in your user directory. In this document we will move these to save space. We will be moving these directories from the C:\ drive (SSD) to the D:\ drive (HDD). This configuration may differ per system, so make sure the drive letters are right with your system.
*Note: this process would need to be completed once for EACH USER ACCOUNT on the system by logging in as that user.
- From the Windows 8 Desktop mode move your cursor down to the folder icon on the taskbar.
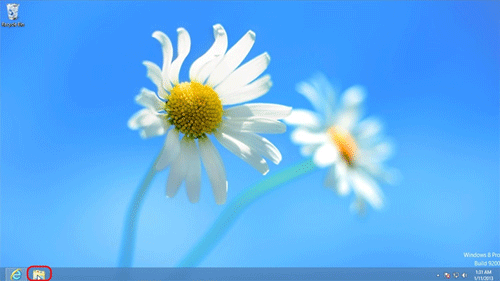
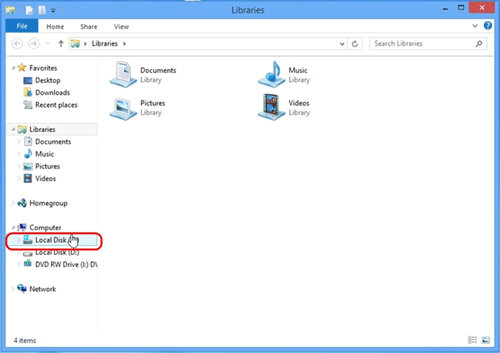
- Click on the C Drive.
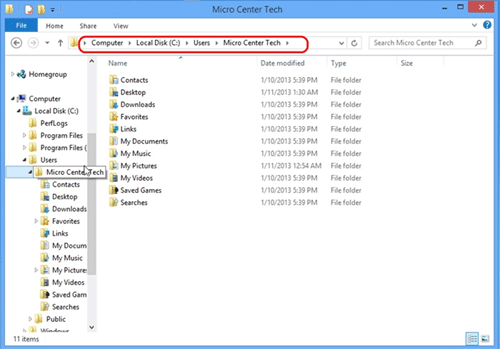
- Navigate to the C:\users\ folder. Here you will see a folder with your login name. Here we will see folders named contacts, desktop, downloads, favorites, my documents, my pictures, my videos etc. These are the personal files associated with your login. In this example we are using Micro Center Tech.
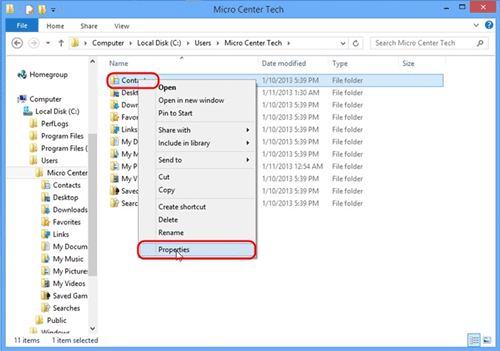
- Right click each folder one at a time. Select Properties.
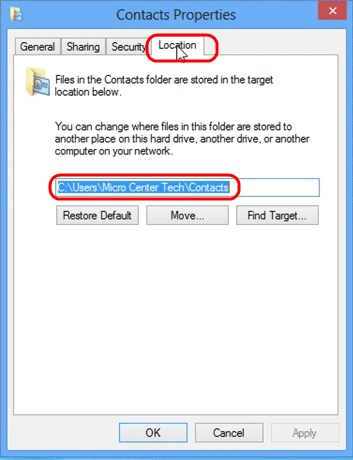
- Click on the Location tab. You will see the current location is on the C drive. Replace the C with a D, leave the rest unchanged (this requires making sure only the drive letter is highlighted, and alternate method would be to put the cursor in front of the C hitting the delete key and adding a D).
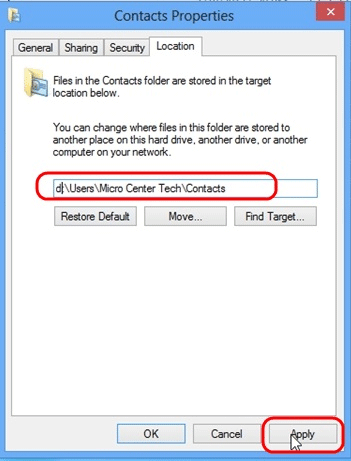
- Now that we have a D in place of a C, click Apply.
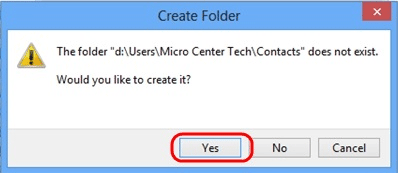
- Click on Yes to allow the folder to be created.
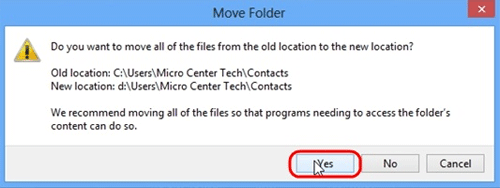
- Click Yes to allow the files to be moved to the new location.
- Click on OK when finished.
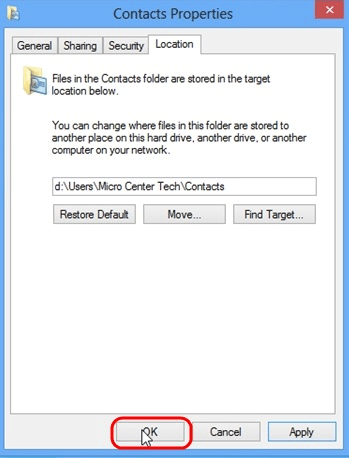
- Repeat this process for any folders in the user directory that need to be moved - anything that takes up substantial amounts of space would be recommended. Typically the documents, pictures and video folders.
- Once all the selected folders have been moved, restart the computer to complete the process.
This article is part 5 of a 6 part series.
Part 1 of this set, Paging File, can be found here.
Part 2 of this set, Disabling Hibernation, can be found here.
Part 3 of this set, System Restore, can be found here.
Part 4 of this set, Indexing Files, can be found here.
Part 6 of this set, Program Directory Location, can be found here.
Technical Support Community
Free technical support is available for your desktops, laptops, printers, software usage and more, via our new community forum, where our tech support staff, or the Micro Center Community will be happy to answer your questions online.
Ask questions and get answers from our technical support team or our community.
PC Builds
Help in Choosing Parts
Troubleshooting

