How to make Word 2013 save to your Computer by Default
Description: This article will describe how to make Word 2013 save documents to your computer by default instead of automatically saving to OneDrive.
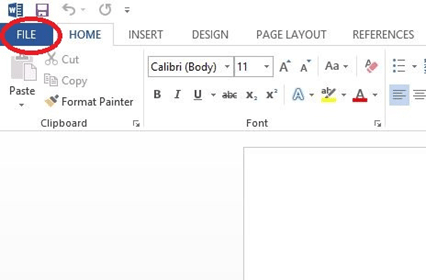
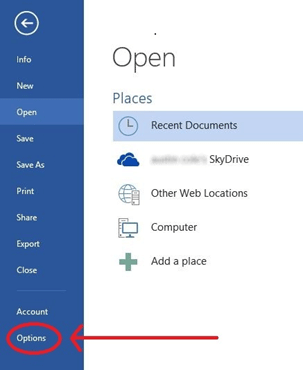
- Open Word (Choose Blank document) and click on the File tab, the click on Options.


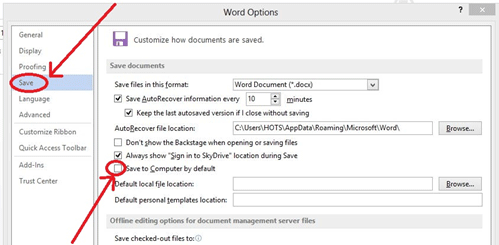
- From that popup, choose Save. Then click the box next to Save to Computer by default. This should have a check mark in the box.

- You might want to type in a default local file location: (there should be a default location already there).
- Now every time you save a new document, it is set to save to your computer and all you need to do is to pick a directory to save it to. You still will have the option to save it to OneDrive if you need to.
Technical Support Community
Free technical support is available for your desktops, laptops, printers, software usage and more, via our new community forum, where our tech support staff, or the Micro Center Community will be happy to answer your questions online.
Forums
Ask questions and get answers from our technical support team or our community.
PC Builds
Help in Choosing Parts
Troubleshooting

