

Arduino Workshop - Parallel LCD Project 2: SparkFun Parallel LCD
Hardware Required:
|
Schematic: 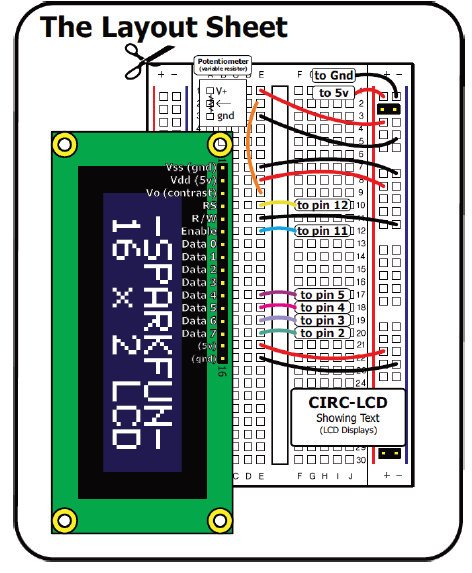 There are several +5v and Ground connections for the parallel LCD. Use the power bus (strip) along the edge to run a single pair to the Arduino, and then break it out to the different pins on the display. Use different color wires to make connections easier to follow.  |
Project Steps: NOTE: You must have the 16-pin header soldered into the LCD module before starting here!
Things to try: (Arduino Sketch examples) Try this: connect pin 15 on the display to an available digital pin on the Arduino. Add code to your sketch to control the LED brightness!
|

Technical Support Community
Free technical support is available for your desktops, laptops, printers, software usage and more, via our new community forum, where our tech support staff, or the Micro Center Community will be happy to answer your questions online.
Forums
Ask questions and get answers from our technical support team or our community.
PC Builds
Help in Choosing Parts
Troubleshooting