

How to resize a Photo in Microsoft Paint
Description: This article describes how to resize a photo in Microsoft Paint. Sometimes an electronic photograph is too small or too large for the purpose it is required. This article explains how to resize a photo using the native Windows application Microsoft Paint.
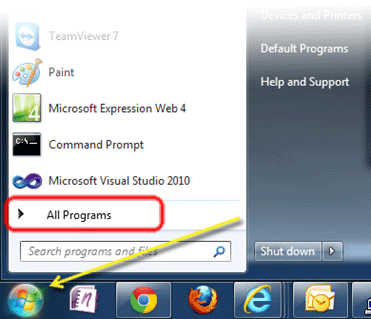
- Click on the Start button and select All Programs.
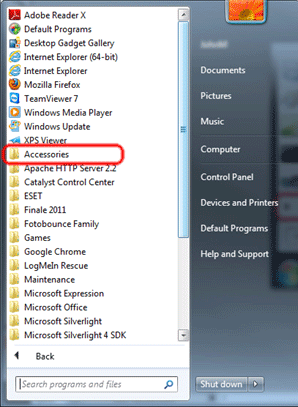
- Locate the Accessories folder and click on it.
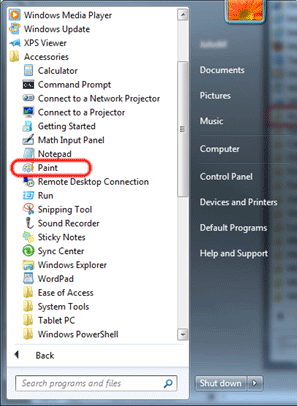
- Find the Paint icon and click it to open the application.
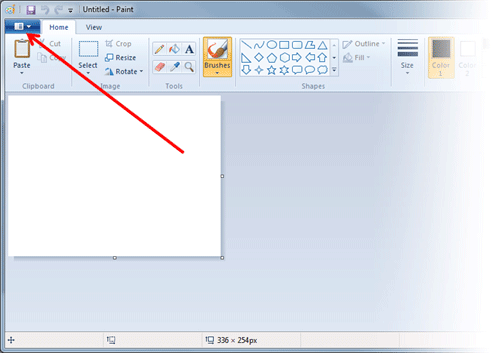
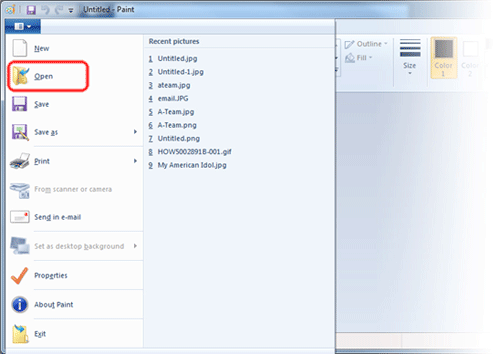
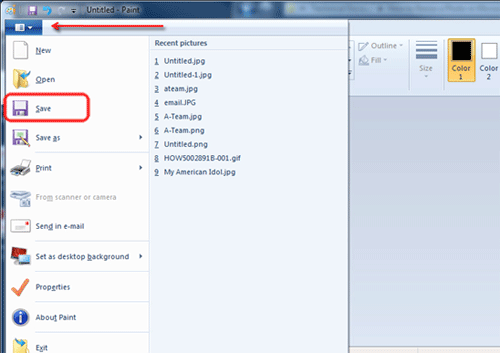
- Click the blue tab in the upper left hand corner.
- Click Open.
- Navigate to and click on the file to be edited and click the Open button.

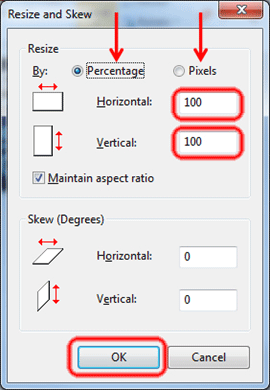
- The file is now open. Click the Resize icon.

- A dialog box will appear with many options. For example, resizing can be done by percentage or by actual number of pixels. If the Maintain aspect ratio box is unchecked, then horizontal and vertical sizing may be done as separate values. After selecting the appropriate dimensions, press the OK button.
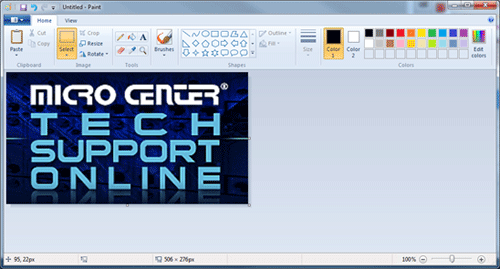
- In this following example, the image was sized to 200%.
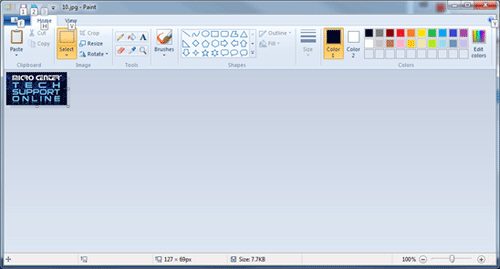
- In this next example, the image was sized to 50%.
- Click the blue tab again and select Save to save the changes to the open image.
Technical Support Community
Free technical support is available for your desktops, laptops, printers, software usage and more, via our new community forum, where our tech support staff, or the Micro Center Community will be happy to answer your questions online.
Forums
Ask questions and get answers from our technical support team or our community.
PC Builds
Help in Choosing Parts
Troubleshooting