

How to insert a row or column in a Microsoft Excel 2010 spreadsheet
Description: Entering data into a perpetually changing spreadsheet can present an organizational challenge. Rather than having to resort an entire document with each additional entry, it can sometimes be simpler to add a new row or column in its appropriate position in a spreadsheet. This guide will walk through how to insert a row or column in a Microsoft Excel 2010 spreadsheet.
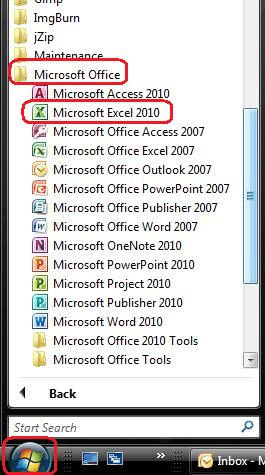
- Open Microsoft Excel by clicking Start, All programs, Microsoft Office, Microsoft Excel 2010.
- Open the desired document for editing.
- Click the cell below the area which you would like to add a row. For example if you would like to add a row between rows 4 and 5, click a cell in row 5.
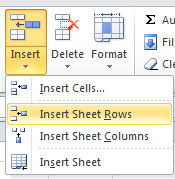
- Click the Home tab across the top of the page.
- Click arrow below the Insert button.
- Click the Insert Sheet Rows option.
- A new row will be added. To add a column follow the same process outlined in steps one through five, but select Insert Sheet Columns rather than Insert Sheet Rows. Columns will be inserted to the left of the currently active column. For example if you wish to add a column between columns D and E, select a cell in column E.


Technical Support Community
Free technical support is available for your desktops, laptops, printers, software usage and more, via our new community forum, where our tech support staff, or the Micro Center Community will be happy to answer your questions online.
Forums
Ask questions and get answers from our technical support team or our community.
PC Builds
Help in Choosing Parts
Troubleshooting