

How to enable an HDMI Device in Windows 7
This article is a guide on how to enable HDMI audio in Windows 7 to take advantage of the high quality HDMI audio built in to the HDMI connection.
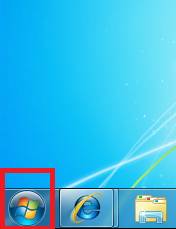
- Click on start in the lower right side of the screen.
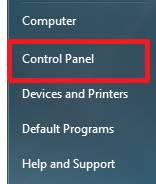
- Navigate to and select control panel from the menu on the right.
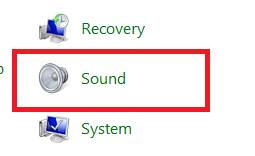
- Scroll down to the sound icon and double click on it to display its settings.
- Under the playback tab locate the HDMI audio device, once located right click on it and Enable the device. if an HDMI device is not displayed it may be necessary to first right click and show disabled devices
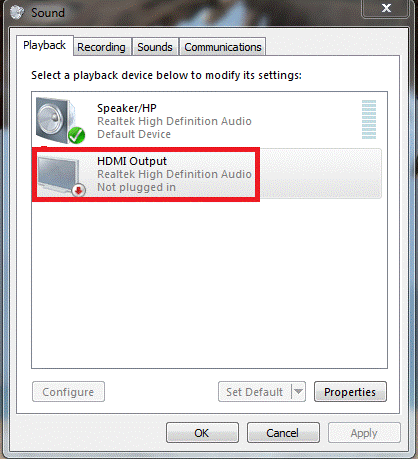
- Right click on the HDMI Output device and choose Set as Default. The audio will now be output through HDMI by default. Note that in some cases it may be necessary to reboot the computer for this change to take effect.
Technical Support Community
Free technical support is available for your desktops, laptops, printers, software usage and more, via our new community forum, where our tech support staff, or the Micro Center Community will be happy to answer your questions online.
Forums
Ask questions and get answers from our technical support team or our community.
PC Builds
Help in Choosing Parts
Troubleshooting