

How to manually set your DNS Server
Description: This article will show you how to manually set a DNS server on your Windows 10 PC.
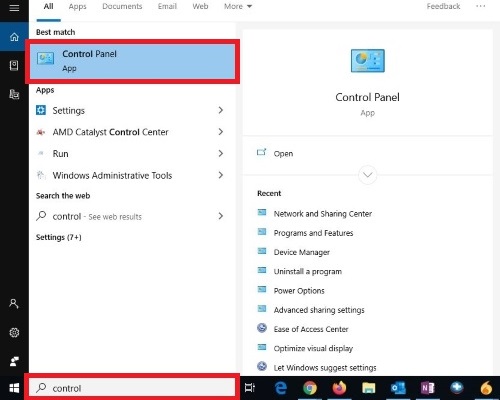
- Open Control Panel.
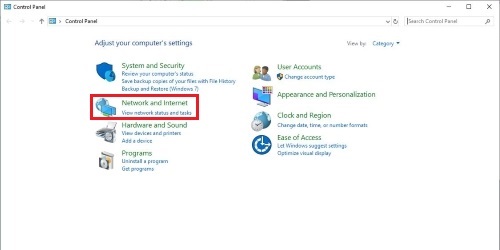
- Select Network and Internet.
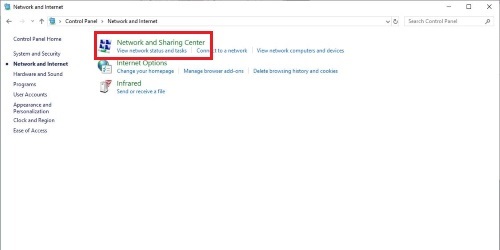
- Choose Network and Sharing Center.
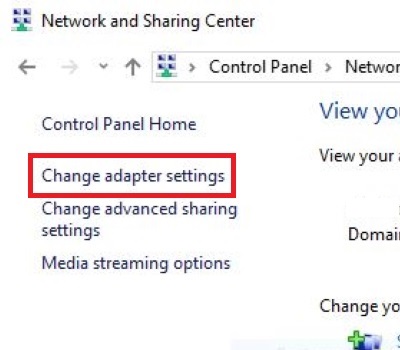
- Next Change adapter settings.
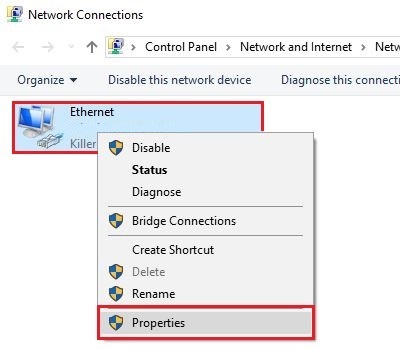
- Right click on your network connection - either wireless or Ethernet - and then choose Properties.
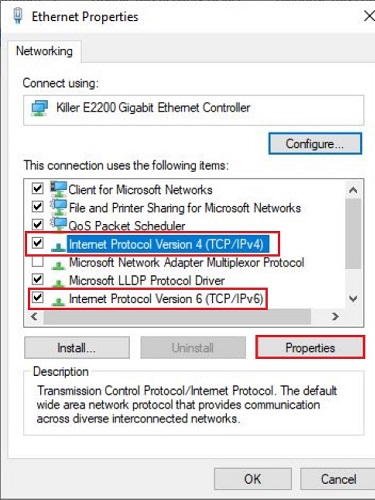
- Under the Networking tab, select the protocol that you are using - either Internet Protocol Version 4 (TCP/IPv4) or Internet Protocol Version 6 (TCP/IPv6).
- After selecting the IPv4 or IPv6, choose Properties.
- Select Use the following DNS server addresses.
- Type in the IP addresses of the new DNS server. You must obtain this information from the alternate source - for example, below is the information for Google's Public DNS servers:
- IPv4: 8.8.8.8 and 8.8.4.4
- IPv6: 4860:4860::8888 and 2001:4860:4860::8844
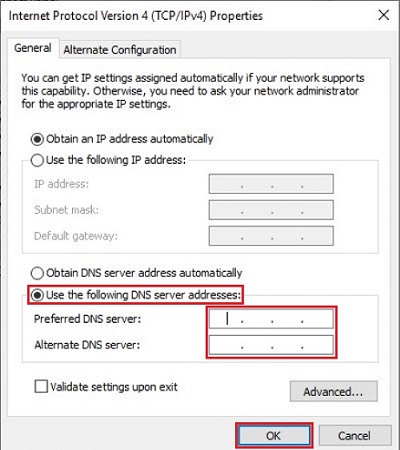
- After entering the new DNS server, select OK.
- Restart your PC to begin using the new settings.
Technical Support Community
Free technical support is available for your desktops, laptops, printers, software usage and more, via our new community forum, where our tech support staff, or the Micro Center Community will be happy to answer your questions online.
Forums
Ask questions and get answers from our technical support team or our community.
PC Builds
Help in Choosing Parts
Troubleshooting