3 Ways to Take Screenshots in Windows 11

Screenshot: Eric Franklin
Windows 11 offers several different ways to take a screenshot. Back in my day I simply used Print Screen (number 2). And while that's still an option, I now prefer a more precise way to screen grab (number 1). Here are three ways to do it on desktops and laptops and one for tablets.
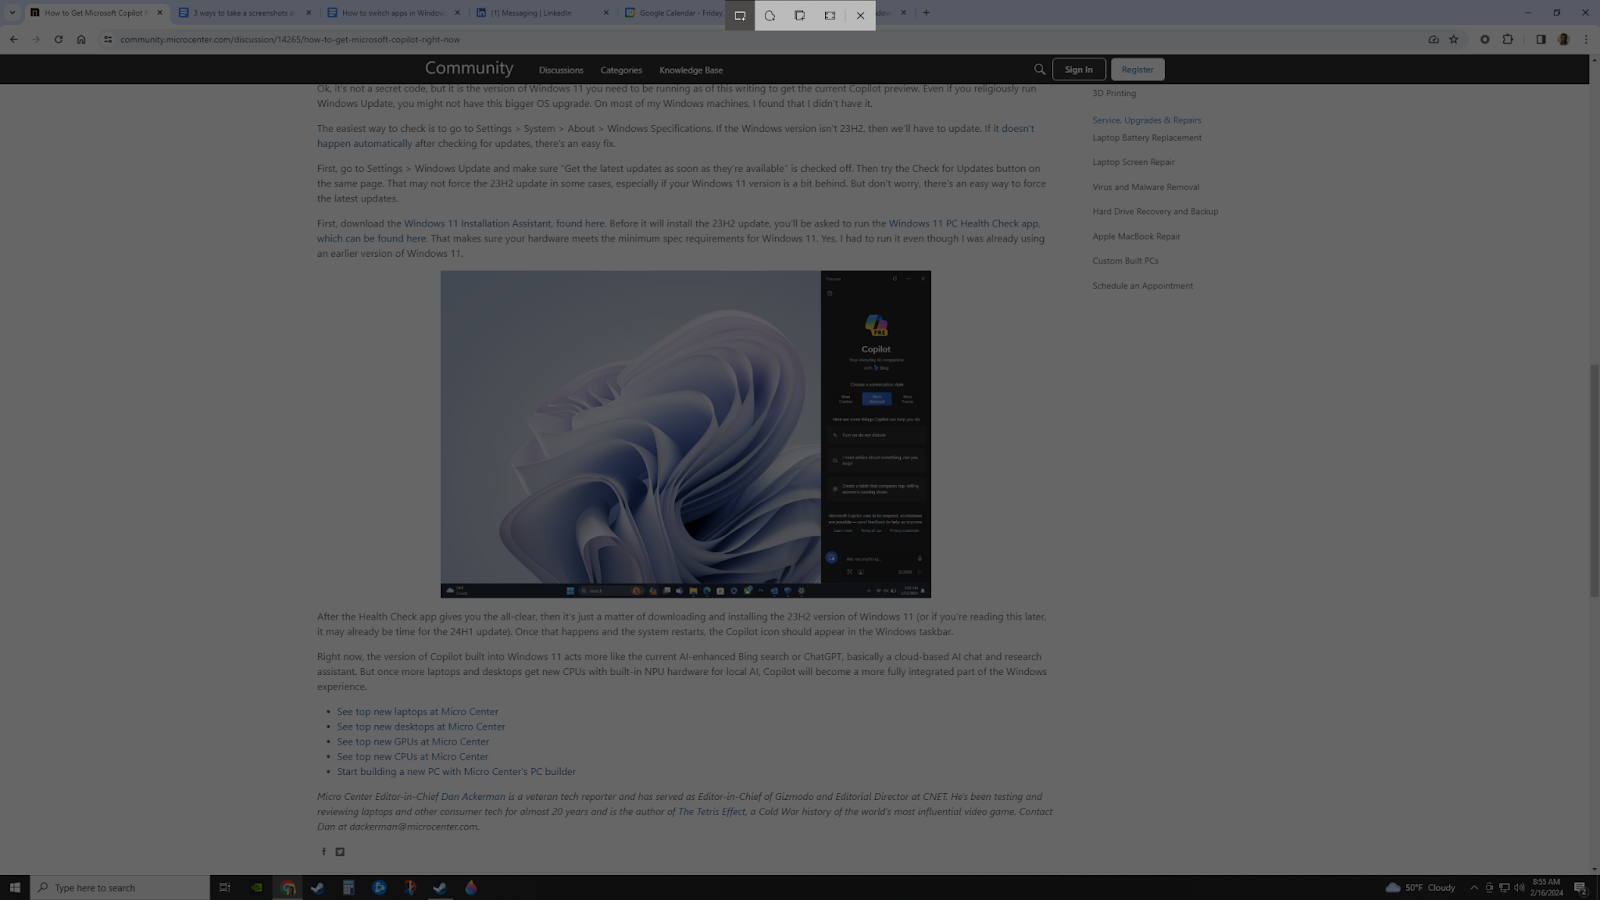
1. Snipping Tool
You can access the snipping tool from the Start menu or with the shortcut, Windows Key + Shift + S. From here, you can choose from rectangular (default), freeform, window, or full-screen snips, via the drop down at the top of the screen.
For the first three options, hold down left click on your mouse and drag your cursor over the area you want to take a screenshot of - or “snip.” Release the button and the snip is completed. The screenshot is saved to your clipboard and, if you have app notifications turned on in Windows, a notification will appear in the lower right-hand corner of the screen. Click on it and you'll be able to edit and save the screenshot.
This has largely replaced the two previous versions -- the old Windows Snipping tool and the more recent Snip and Sketch tool -- into a single unified screen capture app.
2. Print Screen (PrtScn or Windows Key + PrtScn)
Yes, this is the old way to do it, but it still works. Pressing the Print Screen button on your keyboard will take a screenshot of the entire screen, regardless of how many windows you have open. The screenshot gets copied to your clipboard, so you'll need to open another app in order to paste it in and save it.
On some systems, depending on how your Function key row is set up and version of Windows you're using, you'll need to use Fn+PrtScn or Windows Key + PrtScn.
Screenshot: Eric Franklin
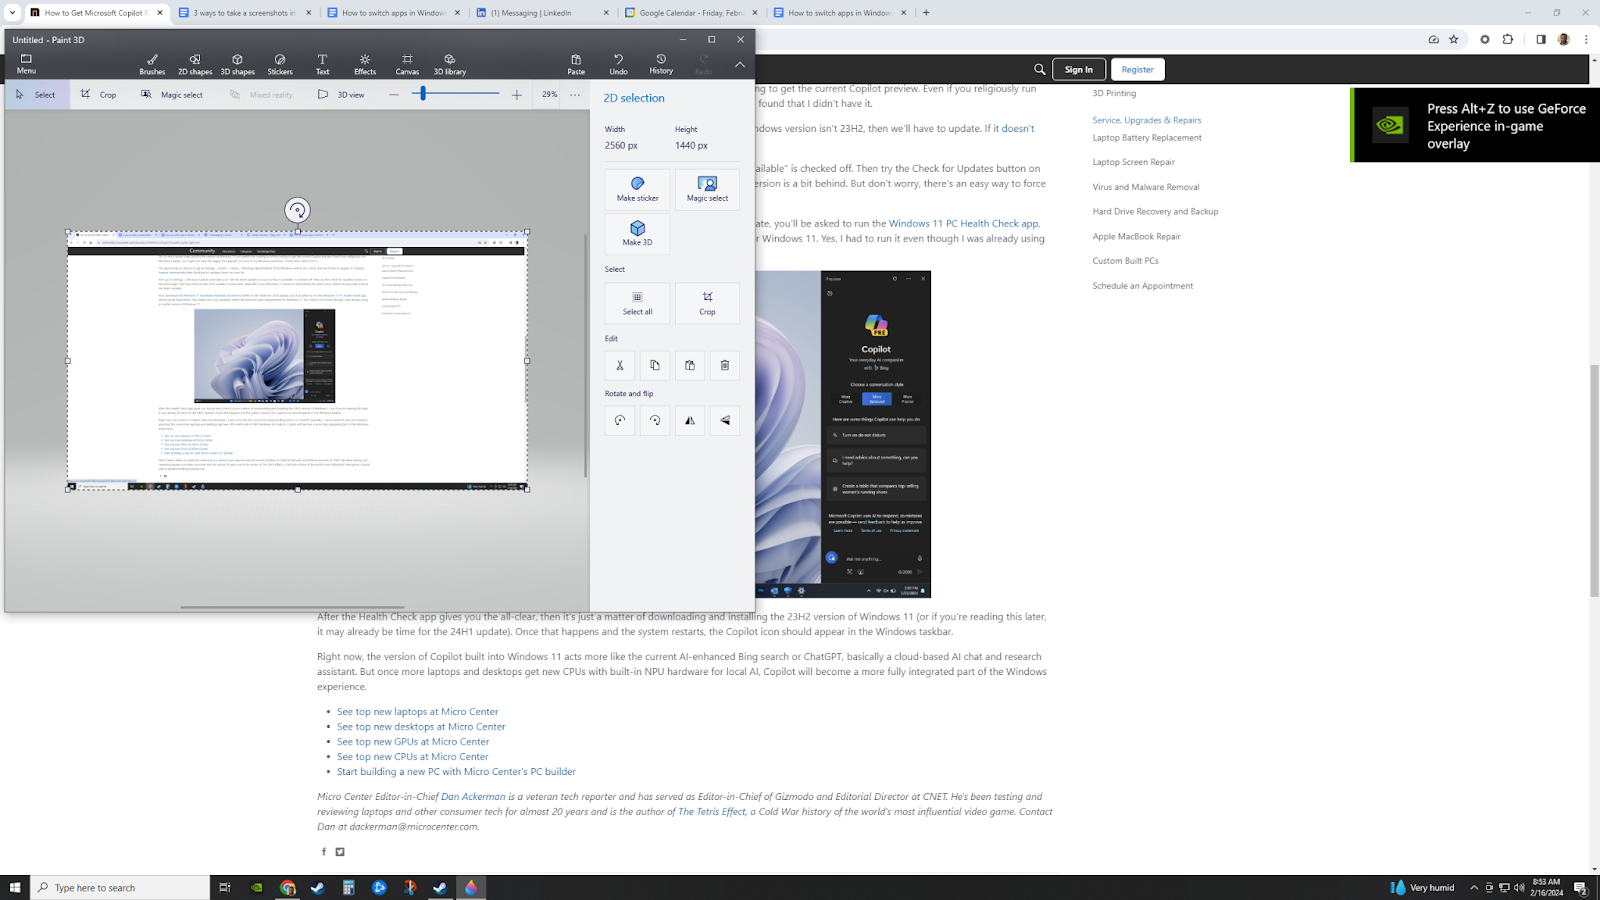
Microsoft makes this easier than it had been in the past using Paint 3D (or the regular old Paint app). After making the snip, open Paint 3D and you'll immediately get three options: New, Open, and Paste. Click Paste and you'll see a screenshot in Paint 3D that you can save or edit as you please.
Once pasted, click the menu button, then click Save As, then click Image, and finally save the screenshot with the name and location you want.
3. Alt + Print Screen (Or Windows Key + Alt + PrtScn)
4. For Tablet Users: Power + Volume Up
On devices like the Surface Pro, all the above methods will work; however, tablets get a bonus technique. Press the physical power button and volume up button simultaneously to capture the entire screen.
Next time you need to send someone a screen image, don’t break out your phone to take a picture of the screen (yes, we've seen people do that). Just use one of the above options to quickly and easily highlight a section of your desktop. Your friends, family, and coworkers will thank you for it.
Read more: PC laptop and desktop resources
- See top new laptops at Micro Center
- See top new desktops at Micro Center
- See top new GPUs at Micro Center
- See top new CPUs at Micro Center
- Start building a new PC with Micro Center's PC builder