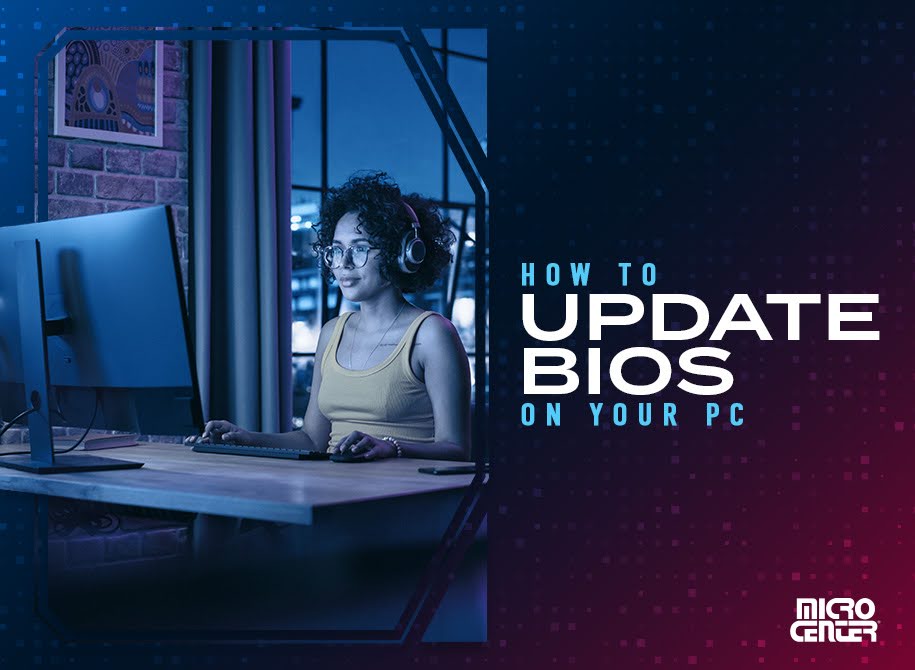
How to Update BIOS on Your PC
If updating your BIOS is a little out of your comfort zone, Micro Center’s PC professionals are here to help. Our BIOS update service can handle the whole process for you from start to finish.How-To

Sometimes, you need to go back to the basics - the very basics. BIOS, or Basic In-Out System, is the hidden software inside your computer's motherboard that starts it up and controls some of its most basic functions.
Updating BIOS is far from an everyday task, but some users might find that they need to do it occasionally. Ahead, we'll discuss who should consider performing a BIOS update and how to update your BIOS if you need to.
What Is BIOS?
The Basic In-Out System is technically software, but it's more commonly called firmware because its role exists between software and hardware. (Firmware - get it?) Firmware is the go-between that communicates instructions between the computer's operating system and its physical hardware, so it's a critical piece of your PC's basic infrastructure.
The most important role of BIOS firmware is to complete your PC's POST (Power On Self Test). During this process, your PC tests each of its components and powers them on. After the POST, the BIOS transfers control to the operating system, handling hardware initialization during the booting process and providing runtime services for operating systems and programs that handle most of your computer's normal operations. BIOS, however, also performs several other important functions, like controlling fan speeds, processor clock speeds, and power management. (This is why you'll need to access the BIOS to set fan curves, overclock your processor, and make other hardware changes.)
Why Update Your BIOS?
For many people, the answer is that you probably don't need to. While many types of software on your computer need regular updates, the average user will never need to update their system's BIOS. Since the process can be somewhat complex and carries some risk if done wrong, it's a good idea to avoid it unless you have a good reason to update.
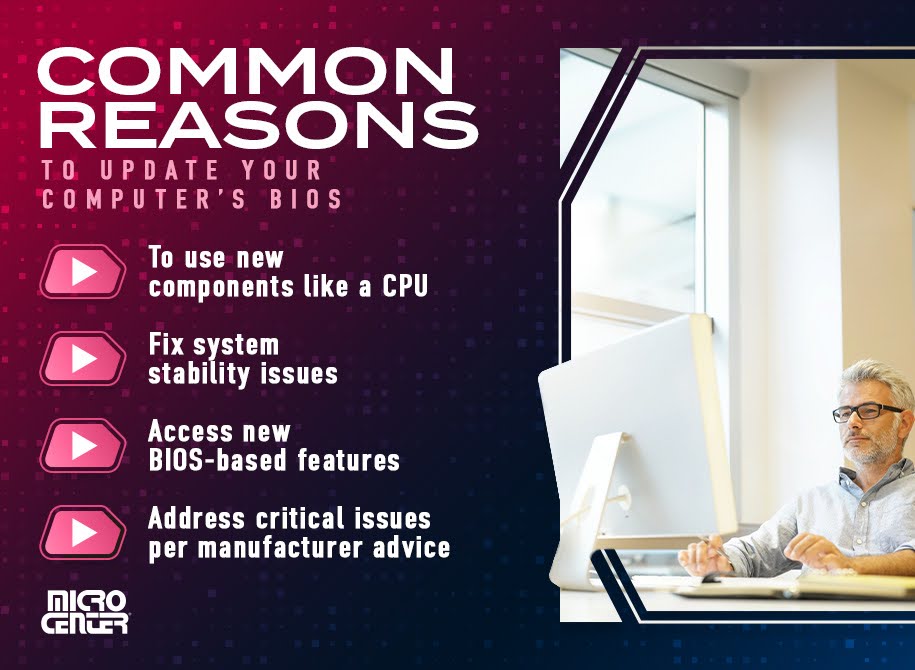
So, why would you update it? These are the most common reasons to update your computer's BIOS:
- You want to use newly-released components that require a BIOS update, such as a new CPU with cutting-edge architecture.
- You're experiencing system stability issues originating from your motherboard.
- You want to use BIOS-based features like memory profiles that aren't available on your current version.
- Your motherboard manufacturer has advised you to install a BIOS update to address critical issues like security flaws.
Note that Macs don't use BIOS, although they have firmware that serves a similar function. Macs do occasionally receive firmware updates, but these are always managed through the Mac Software Update function and don't require access to the motherboard interface.
BIOS vs. UEFI
You'll probably see the term “UEFI” used when discussing BIOS updates. UEFI, or Unified Extensible Firmware Interface, is a type of firmware that's designed to replace BIOS on newer PC systems.
UEFI fulfills most of the same functions as BIOS, but it offers a more user-friendly interface, including the option to use a mouse to navigate. It also delivers a lot of back-end benefits, including massively expanded options for organizing your PC storage, as well as performance and security improvements. It should be noted that UEFI is designed to be more secure and faster, and it can support larger hard drives with GPT partitioning.
These days, when you hear someone refer to a PC's BIOS, they're usually talking about the UEFI. The two terms are used somewhat interchangeably, but few, if any, modern PCs ship with actual BIOS firmware. BIOS still has some edge-case uses, such as dual-booting a PC with two operating systems installed, but in the vast majority of cases, a modern PC will use UEFI.
How to Update BIOS on a PC
The UEFI/BIOS interface looks different for every motherboard manufacturer, so the update process can vary from one PC to another. These steps will give you a basic guide to what you can expect during a BIOS update, but you should always follow your manufacturer's specific instructions.
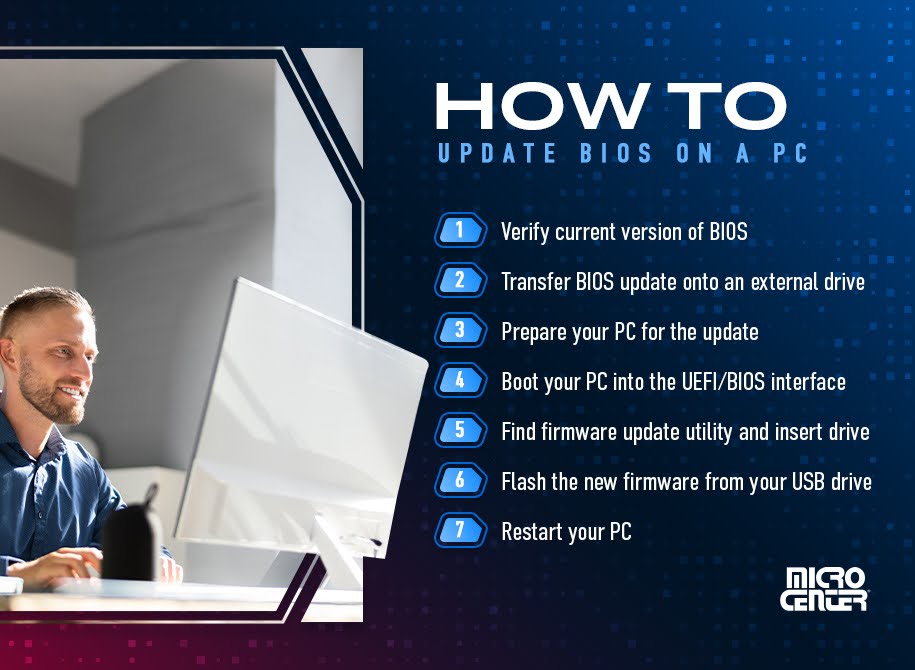
1. Verify which version of BIOS you're currently using.
First, confirm which BIOS version your PC is using right now. To do this, open System Information in Windows, click on System Summary, and look at the panel on the right. You'll see your current UEFI/BIOS version listed next to “BIOS Version/Date.” Take a screenshot of the version number and compare it with the version numbers from the next step.
2. Download the BIOS update and transfer it onto an external drive.
Download the BIOS update from the motherboard manufacturer's website. Make sure to look for your specific motherboard model. Some firmware may be available in a beta version, but your best bet is to look for the latest stable release. Again, you'll want to check the version information against the number from Step 1 to ensure that you don’t accidentally install the same version again.
Once you've downloaded the file, unzip it and move it onto an external drive that's formatted using the FAT32 file system. Flash drives work well for this since they're small and convenient. You'll use this drive to transfer the update file onto your PC while it's in the UEFI interface.
3. Prepare your PC for the update.
There are a few key tasks you should do before updating your BIOS:
- Drive Backup: A BIOS update is usually safe if done correctly, but accidents can happen, so it's always critical to have a backup. Make copies of any crucial data and then store one copy in a cloud storage solution and another copy on physical storage media, such as an external solid state drive.
- Turn Off BitLocker: While you're at it, turn off BitLocker encryption on your PC if you have it enabled. BitLocker is a drive encryption feature that's only available on Windows 10 and 11 Pro, and your UEFI utility may ask you to turn it off before updating the BIOS. You'll probably know if you have BitLocker turned on, but you can double-check and turn it on or off via the Manage BitLocker option in System Settings.
- Screenshot Settings: If you've made any changes to your BIOS settings, such as clock speed or memory profiles, take a screenshot of your current settings. A BIOS update will restore the motherboard's default settings, and you'll want to be able to go back in and adjust them to your preferences.
4. Boot your PC into the UEFI/BIOS interface.
In the past, you could only boot into BIOS by pressing a certain key (determined by the on-screen instructions) during your PC's startup sequence. This still works with most PCs, although many modern computers boot so quickly that it can be challenging to pull off (and some don't recognize keyboard inputs during startup). Look for text instructions while your PC is booting up and press the indicated key (often DEL, but sometimes a function key) before the startup sequence finishes.

Windows 10 and Windows 11 offer a simpler way to access UEFI/BIOS using the Advanced Startup menu. Navigate to Settings > System > Recovery and then find the Advanced Startup option and click “Restart now.” Your system will restart, and you'll see an advanced restart menu appear. Click Troubleshoot > Advanced Options > UEFI Firmware Settings, and then choose Restart. From there, you'll boot into the UEFI instead of the standard startup sequence.
5. Find your UEFI's firmware update utility and insert the flash drive.
Almost all UEFIs include a firmware update utility that simplifies the update process. Since the process of updating firmware is sometimes called “flashing,” most of these utilities have “flash” somewhere in the name. (Gigabyte's Q-Flash and ASUS's EZ Flash are just two examples.)
Once you've found what you're looking for, insert the flash drive into your compute''s USB ports. You should see it appear in the firmware utility. Now it's time to finish the job.
6. Flash the new firmware from your USB drive.
The last step is generally the easiest. In your firmware update utility, choose the new firmware version from your flash drive and then click Yes or Confirm to start the firmware update process.
The actual update itself is typically quick, but there's one key thing to remember: Do not, under any circumstances, turn off or unplug your PC during a firmware update. Losing power can permanently corrupt your firmware, and it's not an easy fix to restore. If you're the least bit unsure about your power supply or your laptop is on low battery, wait to update your firmware until you're confident that your power won't be interrupted.
7. Restart your PC.
Once your PC tells you the update is finished, restart your computer. Now, you're ready to enjoy the benefits of your updated firmware and motherboard.

Learn More About Our BIOS Update Service
Image Credits
Krakenimages/Shutterstock.com
Beautrium/Shutterstock.com
Gorodenkoff/Shutterstock.com
Thannaree Deepul/Shutterstock.com
Andrii_Kovalskyi/Shutterstock.com
Askhat Gilyakhov/Shutterstock.com
Andrey_Popov/Shutterstock.com