3D Print with Texture: The Fuzzy Skin Modifier
Looking to give your prints a bit more of a cuddly personality? The Fuzzy Skin Modifier is here to help.Maker Projects

3D printing is constantly evolving, with new features to enhance the printing process introduced all the time. One such innovation is the "fuzzy skin" modifier, now available in most mainstream slicers. Today, we'll explore the fuzzy skin modifier in Bambu Studio and Creality Print, detailing its benefits and how to use it to add a creative touch to 3D printing projects. We'll be printing on a Bambu Lab X1C with Inland White PLA using this Ornamental Bear STL designed by pmeows.
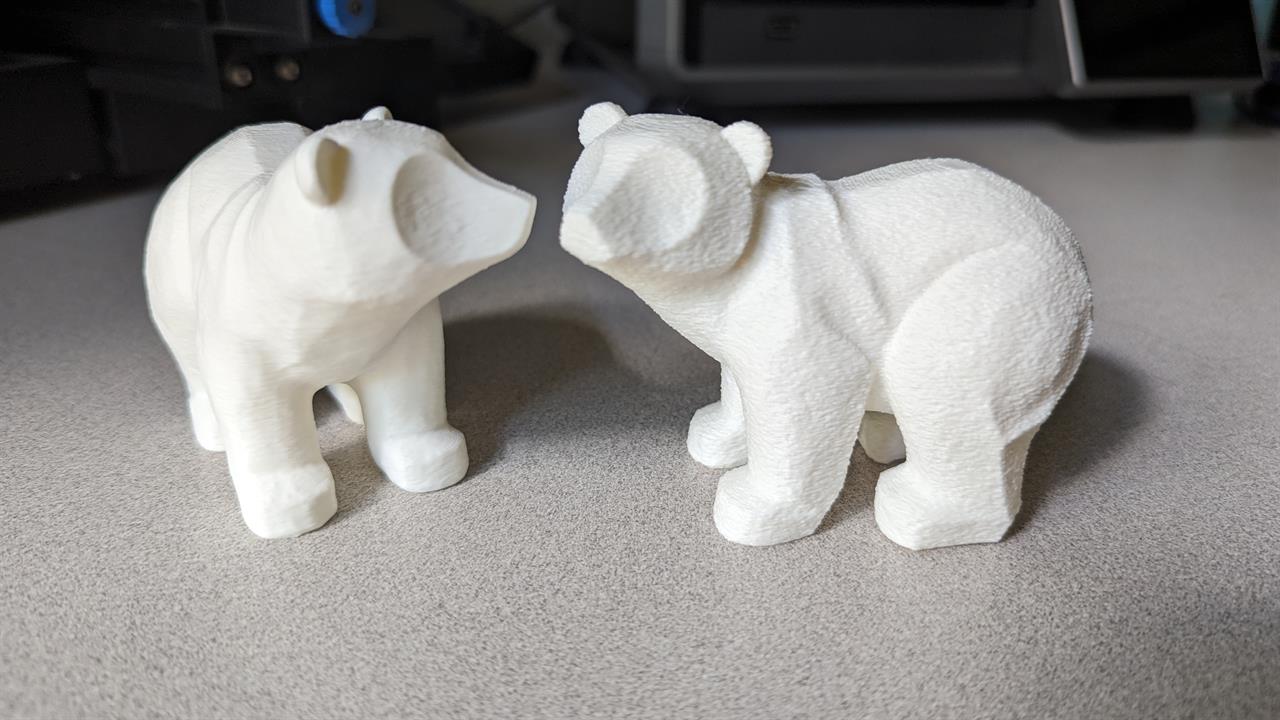 Photo: Micro Center
 What is the Fuzzy Skin Modifier?
The fuzzy skin modifier is a feature in 3D printing slicers that adds a rough, textured surface to printed objects. This texture can improve grip, add aesthetic appeal, and mask minor imperfections, including visible layer lines. The printer creates this effect by adjusting the outer wall of the print to make it choppy or wavy, introducing controlled irregularities to the surface. This process adds a unique finish but can also increase the print time due to the more inefficient wall path. The result can be a more visually appealing surface despite the longer print times.
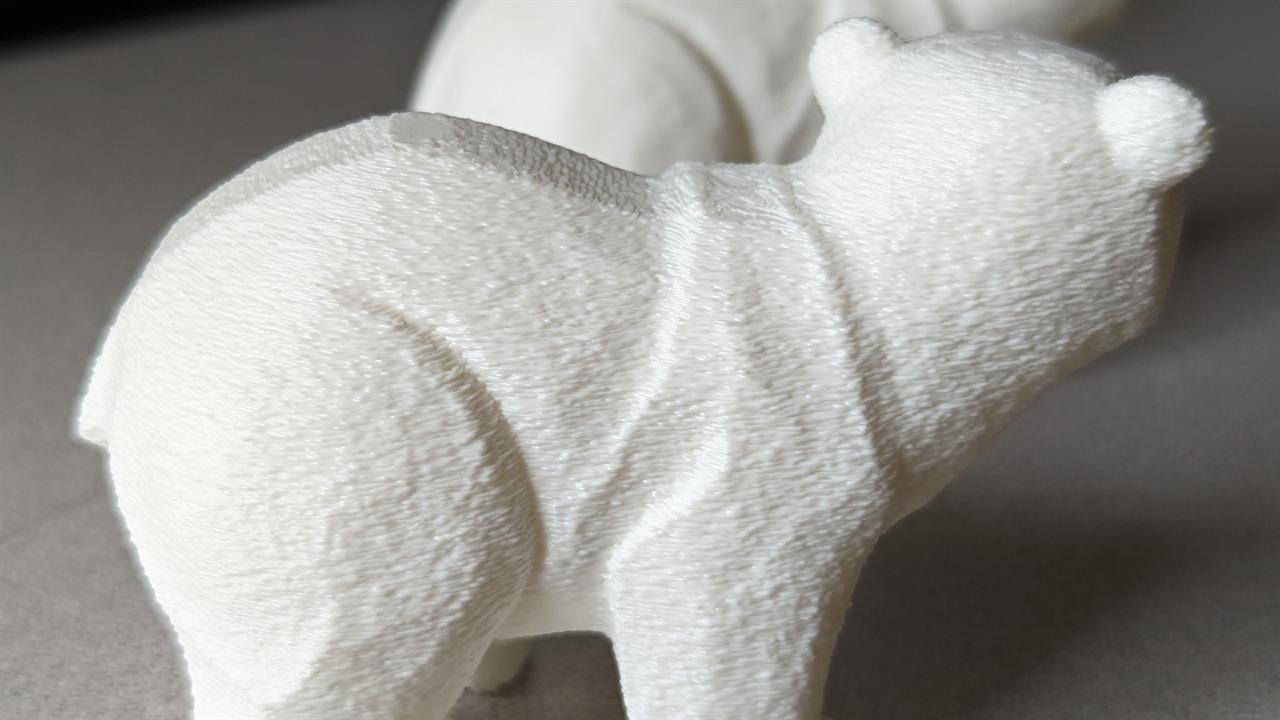 Photo: Micro Center
 Using the Fuzzy Skin Modifier in Bambu Studio
Step-by-Step Guide
- Open Bambu Studio and Load Your 3D Model
- Start by launching Bambu Studio and importing the 3D model you wish to print.
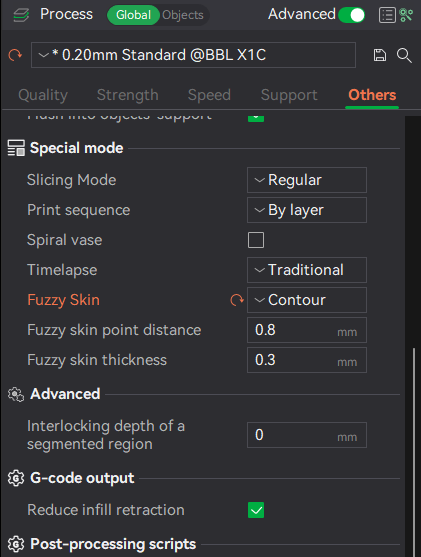
- Navigate to the Print Settings
- Find the "Special mode" section in the "Others" menu tab, where various surface-related options are available.
- Enable the "Fuzzy Skin" Option
- Select the "Fuzzy Skin" drop-down to activate this feature.
- Adjust Parameters
- Modify parameters such as "point distance" and "skin thickness" to achieve the desired texture.
- Preview Changes and Slice Your Model
- Use the preview function to see how the changes affect your model, then proceed to slice and prepare it for printing.
Tips for Best Results
- Begin with moderate settings and use the preview feature for fine-tuning. Gradually increase the density to see the effect.
Using the Fuzzy Skin Modifier in Creality Print
Step-by-Step Guide
- Open Creality Print and Import Your 3D Model
- Start by launching Creality Print and importing the 3D model you want to print.
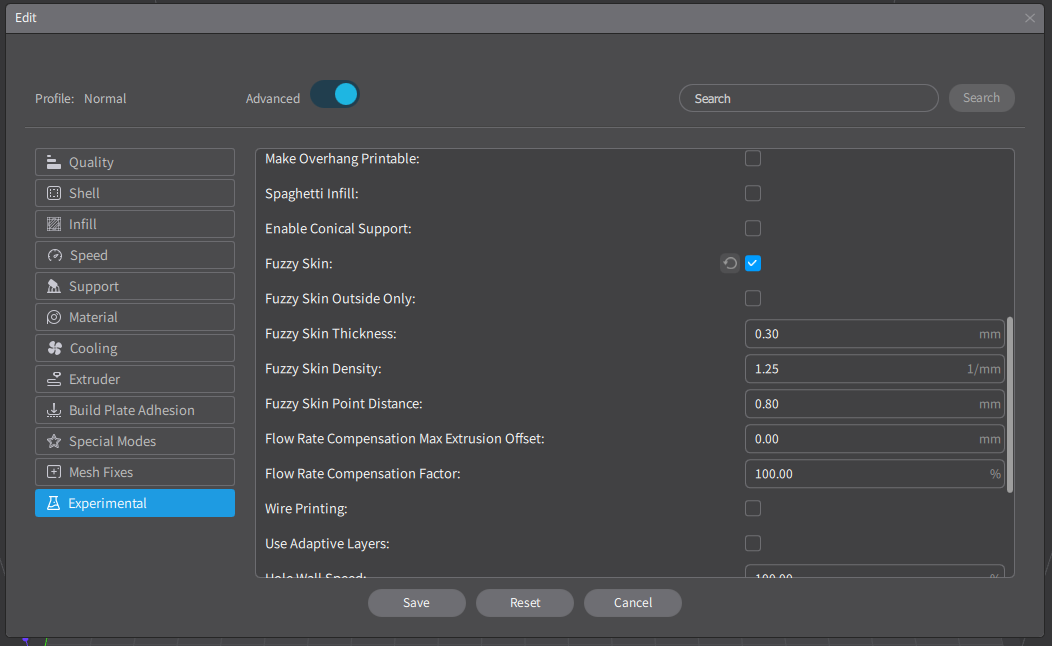
- Go to the Print Settings
- In the print settings menu, locate the "Experimental" section where the fuzzy skin feature is available.
- Activate the "Fuzzy Skin" Feature
- Toggle the "Fuzzy Skin" option to enable this feature.
- Adjust Settings
- Modify settings such as thickness and density to achieve the desired texture. Thicker settings will create a more pronounced texture.
- Preview the Effect and Slice Your Model
- Use the preview function to see how the changes affect your model, then proceed to slice and prepare it for printing.
Tips for Best Results
- Experiment with different thickness and density settings to find the best texture for your project. The preview feature ensures the texture looks as intended before printing.
Comparing Bambu Studio and Creality Print
Although Bambu Studio and Creality Print offer robust fuzzy skin features, they differ slightly in implementation.
In terms of performance, both slicers effectively mask layer lines, giving printed objects a more random appearance. The choice between the two often comes down to personal preference and the specific requirements of your project. Ultimately, experimenting with both slicers will help you determine which best suits your needs and preferences.
The fuzzy skin modifier is a powerful tool for adding texture and functionality to your 3D prints. Experimenting with this feature can lead to new project possibilities.
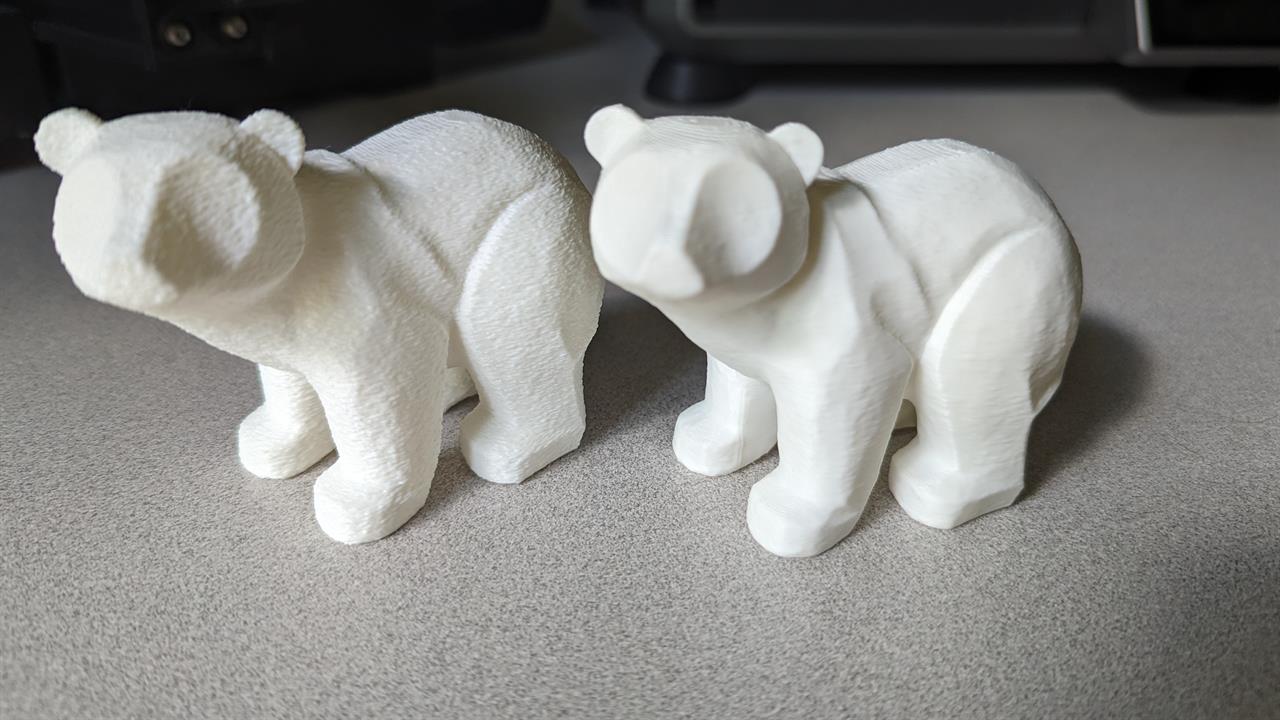 Photo: Micro Center
 Whether you're creating custom grips for tools, textured phone cases, or unique decorative items, the fuzzy skin modifier can enhance the quality and appearance of your prints. Try it and see how it can transform your 3D printing projects. We encourage you to share your experiences and feedback with the community. Happy Fuzzy Printing!