How to Create a Windows 10 Installation Flash Drive

1. Open a web browser and go to https://www.microsoft.com/en-us/software-download/windows10
2. Click the button to Download tool now

3. Choose what to do with the file. In case you need to run the tool more than once, or restart at any point, it is best to select Save File


4. Open your Downloads folder and run MediaCreationTool

5. When prompted, click Yes or Okay to allow the program to make changes

6. Agree to the terms of use

7. The tool will spend several minutes “Getting a few things ready”

8. The tool has 2 options. Select the option to Create installation media. The other option is to immediately install Windows 10 on the computer you are using. Select Create Installation Media and then click Next.

9. Uncheck the box to “Use the recommended options for this PC” and select the settings you want above.Then click Next.

10. Choose the option to create a USB flash drive

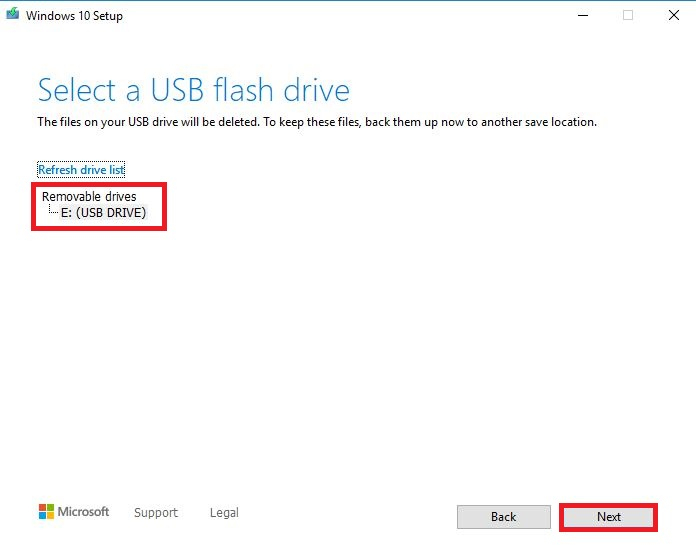
11. Find the flash drive you want to use in the list and select it.
*This will delete all data that is stored to the drive. Be sure to back up the data before completing this step*
12. The tool will now download the installer files to your flash drive. Be sure to stay connected to the internet until this completes. Depending on your internet speed, this may take some time to complete.

13. Once completed you will get a "your USB flash drive is now ready" message. Click Finish and remove the drive. Connect it to the computer you want to install Windows on and power on the device.