

How to configure Email on an Android Device
Description: Just like all other operating systems, Android has an email application built in for easy and instant access to email, whether it be personal, business or both. All that is needed is account and server settings (if these are not accessible, or unknown, contact your ISP). This guide will show how to configure email on your Android device.
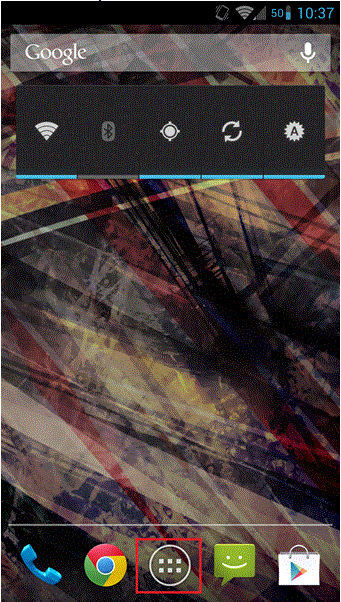
- Open the App Drawer by tapping the icon along the bottom of the screen. (This can vary on some devices, but will be in the same general area).
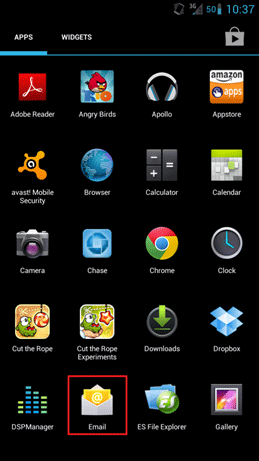
- Once in all applications, tap the Email app icon.
- The application will prompt for an email address and password. Enter this now.
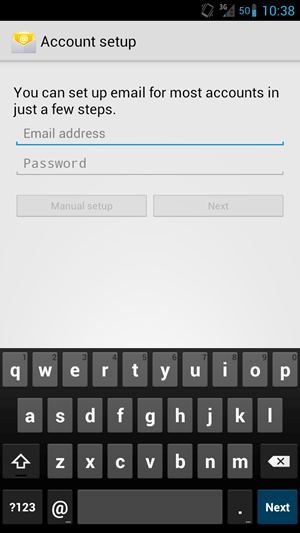
- Tap Next. Android will attempt to locate the correct server settings. If it is able to find them, then setup is complete. If it asks for more information, continue to step 5.
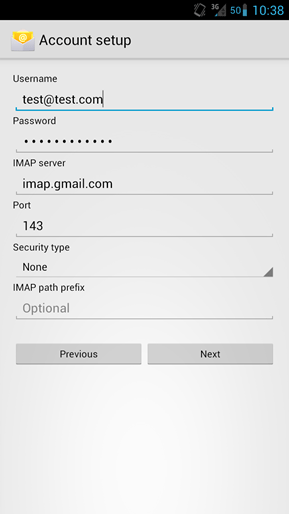
- If the application cannot automatically detect the server settings, it will prompt to enter them manually. Choose between POP, IMAP and Exchange. (If you do not know which one you use, contact your email provider).

- Enter the account settings, or, Incoming Server Settings. This includes the email address, password, server, port, and security type. (If you do not have these, contact your email provider). Once completed, touch Next.
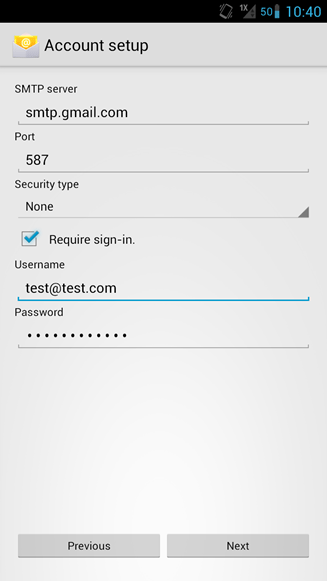
- Now, enter the Outgoing Server Settings. Once completed, touch Next.
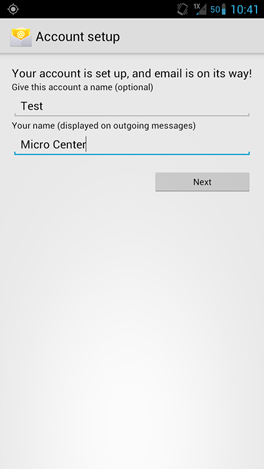
- On the next screen, it gives the option to give the account a name (for personal identification for multiple accounts) and to set the outgoing name that is visible to senders. Once complete with this page, tap Next.
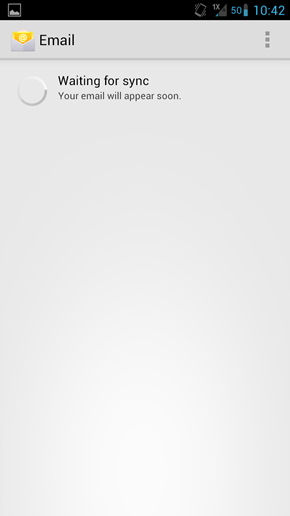
- Email will begin to sync in. Depending on the amount of messages, it could take quite some time.
Technical Support Community
Free technical support is available for your desktops, laptops, printers, software usage and more, via our new community forum, where our tech support staff, or the Micro Center Community will be happy to answer your questions online.
Forums
Ask questions and get answers from our technical support team or our community.
PC Builds
Help in Choosing Parts
Troubleshooting