
Pro USB to Parallel Converter Instructions
Description: Following are the instructions for using the Pro USB to Parallel Converter with a computer that is running Windows 7.
- Attach your printer to the Pro USB to Parallel Converter
- Power on your printer
- Power on your computer
- Follow the steps below
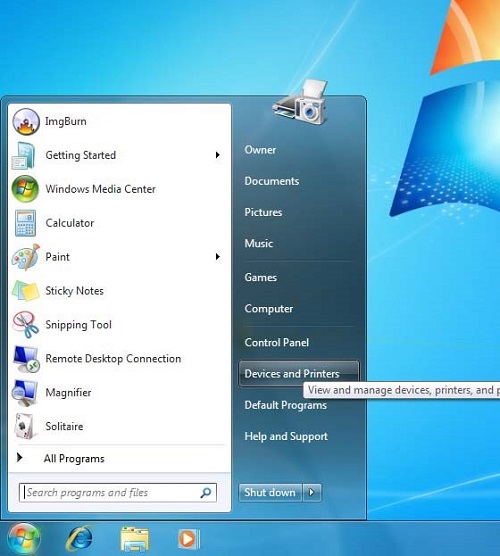
- Click Start then choose Devices and Printers.
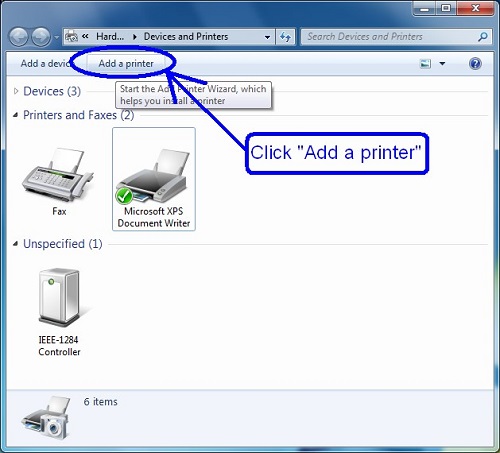
- The Devices and Printers window will open up. Click Add a printer.
- The Add Printer window will open up. Click Add a local printer.

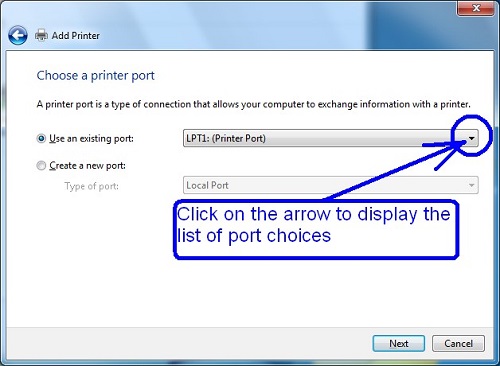
- Place the dot in Use an existing port and then click on the drop down list of port choices.
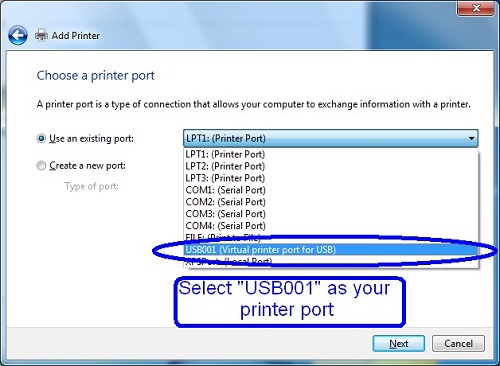
- Select USB001 (Virtual printer port for USB) as your printer port. Click Next.
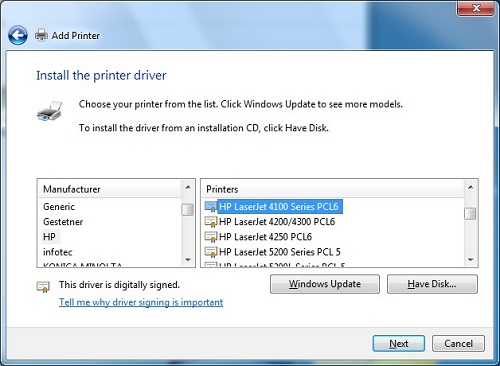
- Select the brand of printer that you have from the left side under Manufacturer, then select the model of your printer on the right side under Printers. Click Next.
- If you do not see your printer on this list then it will be necessary to first obtain printer drivers from your printer manufacturer's website in order to proceed.
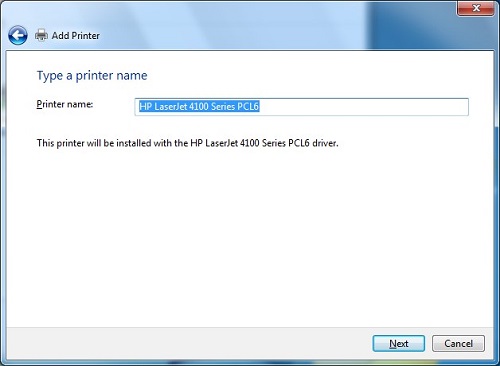
- Accept the name for your printer or you may rename it if you like. Click Next.
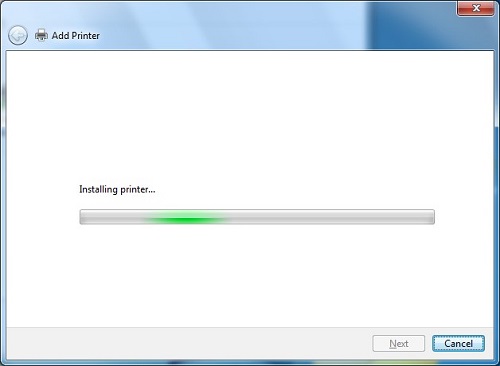
- Windows will now install your printer.
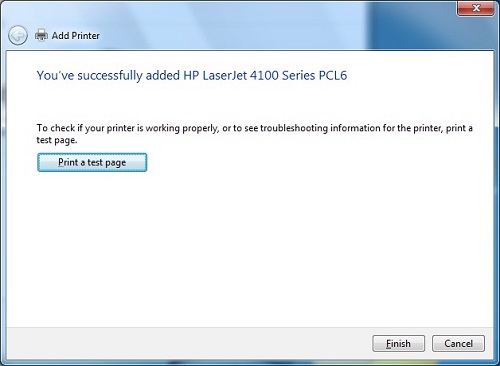
- When you see the message that you have successfully added your printer, click the button to Print a test page.

- A message will come up indicating the success of your test page. Click Finish.
- Your printer will now show in the Devices and Printers window referred to in Step 2 above

Technical Support Community
Free technical support is available for your desktops, laptops, printers, software usage and more, via our new community forum, where our tech support staff, or the Micro Center Community will be happy to answer your questions online.
Forums
Ask questions and get answers from our technical support team or our community.
PC Builds
Help in Choosing Parts
Troubleshooting