

How to set up Port Forwarding on the Tenda N60 Router
Description: This technical article will show how to configure the N60 router to forward specific ports to a particular computer in the network.
- First, we need to access the router's configuration page. This can be done by opening an internet browser. Next, enter 192.168.0.1 into the address bar.
- Log in to the router. This can be done by using admin as both the username and password unless you have change them.
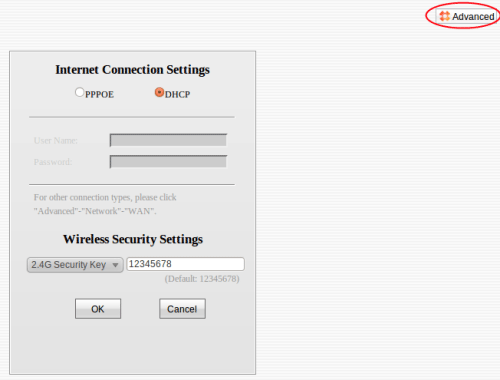
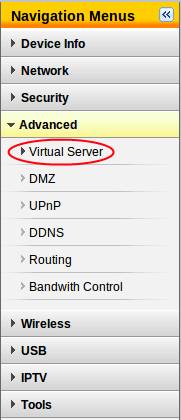
- Once logged in, the main screen shown below will appear. Click on Advanced in the upper-right.
- Next, determine the IP address of the computer having ports forwarded to it. This can be done by clicking on Network in the Navigation Menu, then clicking on DHCP.
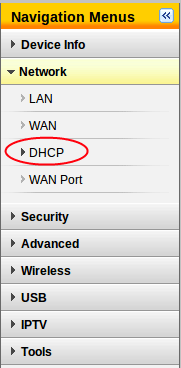
- Once the DHCP screen is up, click on Client List.
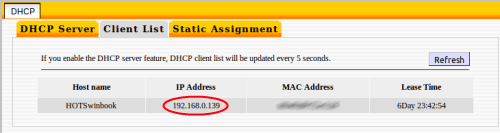
- With the Client List open, there will be a list of computers attached to the network. Typically, the easiest way to determine which computer to forward to is by the name of the machine. In this example, the computer in question is named HOTSwinbook and its IP Address is 192.168.0.139. Make a note of the IP address associated with the computer to forward to.
- With this information in hand, go to the Virtual Server page. This can be done by clicking on Advanced, then clicking on Virtual Server.
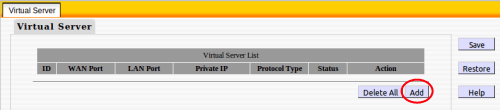
- With the Virtual Server page open, click on the Add button.
- Once the page loads, there are a few different fields to fill in. The dropdown menu that says DNS (53) can be ignored unless the port in question is in the list. This list is designed for quick forwarding of commonly used ports.
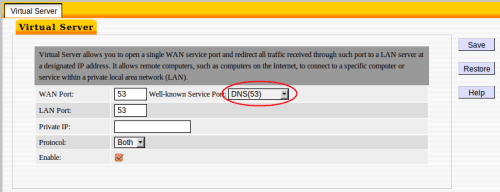
- Enter the port that needs forwarded in both the WAN and LAN boxes, and then enter the IP Address of the computer to forward to into the Private IP field. If the port is TCP or UDP specific, this can be selected in Protocol, or it can be left on both if you are unsure or if the protocol is not specified. In this example, we are using port 11529 over both TCP and UDP. Once the information is entered, click on Save.
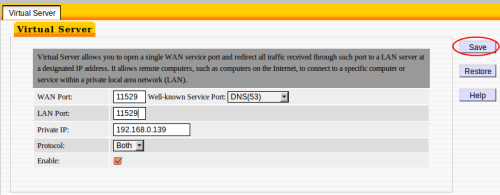
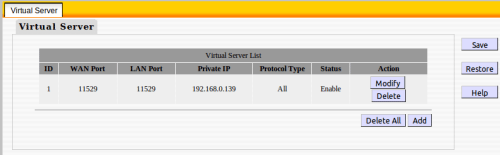
- The next screen that appears will show a list of ports being forwarded, and where they are forwarded to. In this example, we have forwarded the port 11529 to the IP 192.168.0.139.
- Repeat these steps for any other computers and ports that need to be configured for forwarding.
Technical Support Community
Free technical support is available for your desktops, laptops, printers, software usage and more, via our new community forum, where our tech support staff, or the Micro Center Community will be happy to answer your questions online.
Forums
Ask questions and get answers from our technical support team or our community.
PC Builds
Help in Choosing Parts
Troubleshooting